Deploying a Vector Database with Elasticsearch for Retrieval Augmented Generation (RAG)
Working with RAG
We’ve explored using system prompts to guide LLM responses, but prompting alone has limitations. The following two sections detail how to set up Retrieval Augmented Generation (RAG), a cost-effective method for enhancing LLM responses with more relevant data.
RAG significantly improves LLM responses by providing pertinent information related to a user’s query, rather than relying solely on the LLM’s training data.
Why Vector Databases?
RAG requires a data source. Currently, vector databases are the most common solution for this purpose. They enable us to divide data into logical "chunks" and then query the database for chunks related to a specific question. These relevant chunks are then provided to the LLM as context, improving the quality of its response.
This workshop uses Elasticsearch as our vector database. As a Red Hat partner, Elasticsearch will be integrated with OpenShift AI in the future.
Manually Scaling GPU node
For our pipeline we will run at the end of this section, we will need an additional GPU. While this cluster is set to autoscale our GPU nodes, it does take approximately 20 minutes to fully provision a GPU node and setup the GPU drivers on that node. In order to avoid waiting for it to autoscale, we are going to manually scale the GPU now, so it is ready by the time we are ready to execute our pipeline.
-
From the
Administratorperspective of the OpenShift Web Console, navigate toCompute>MachineSets. Select the MachineSet with theg5.2xlargeInstance type.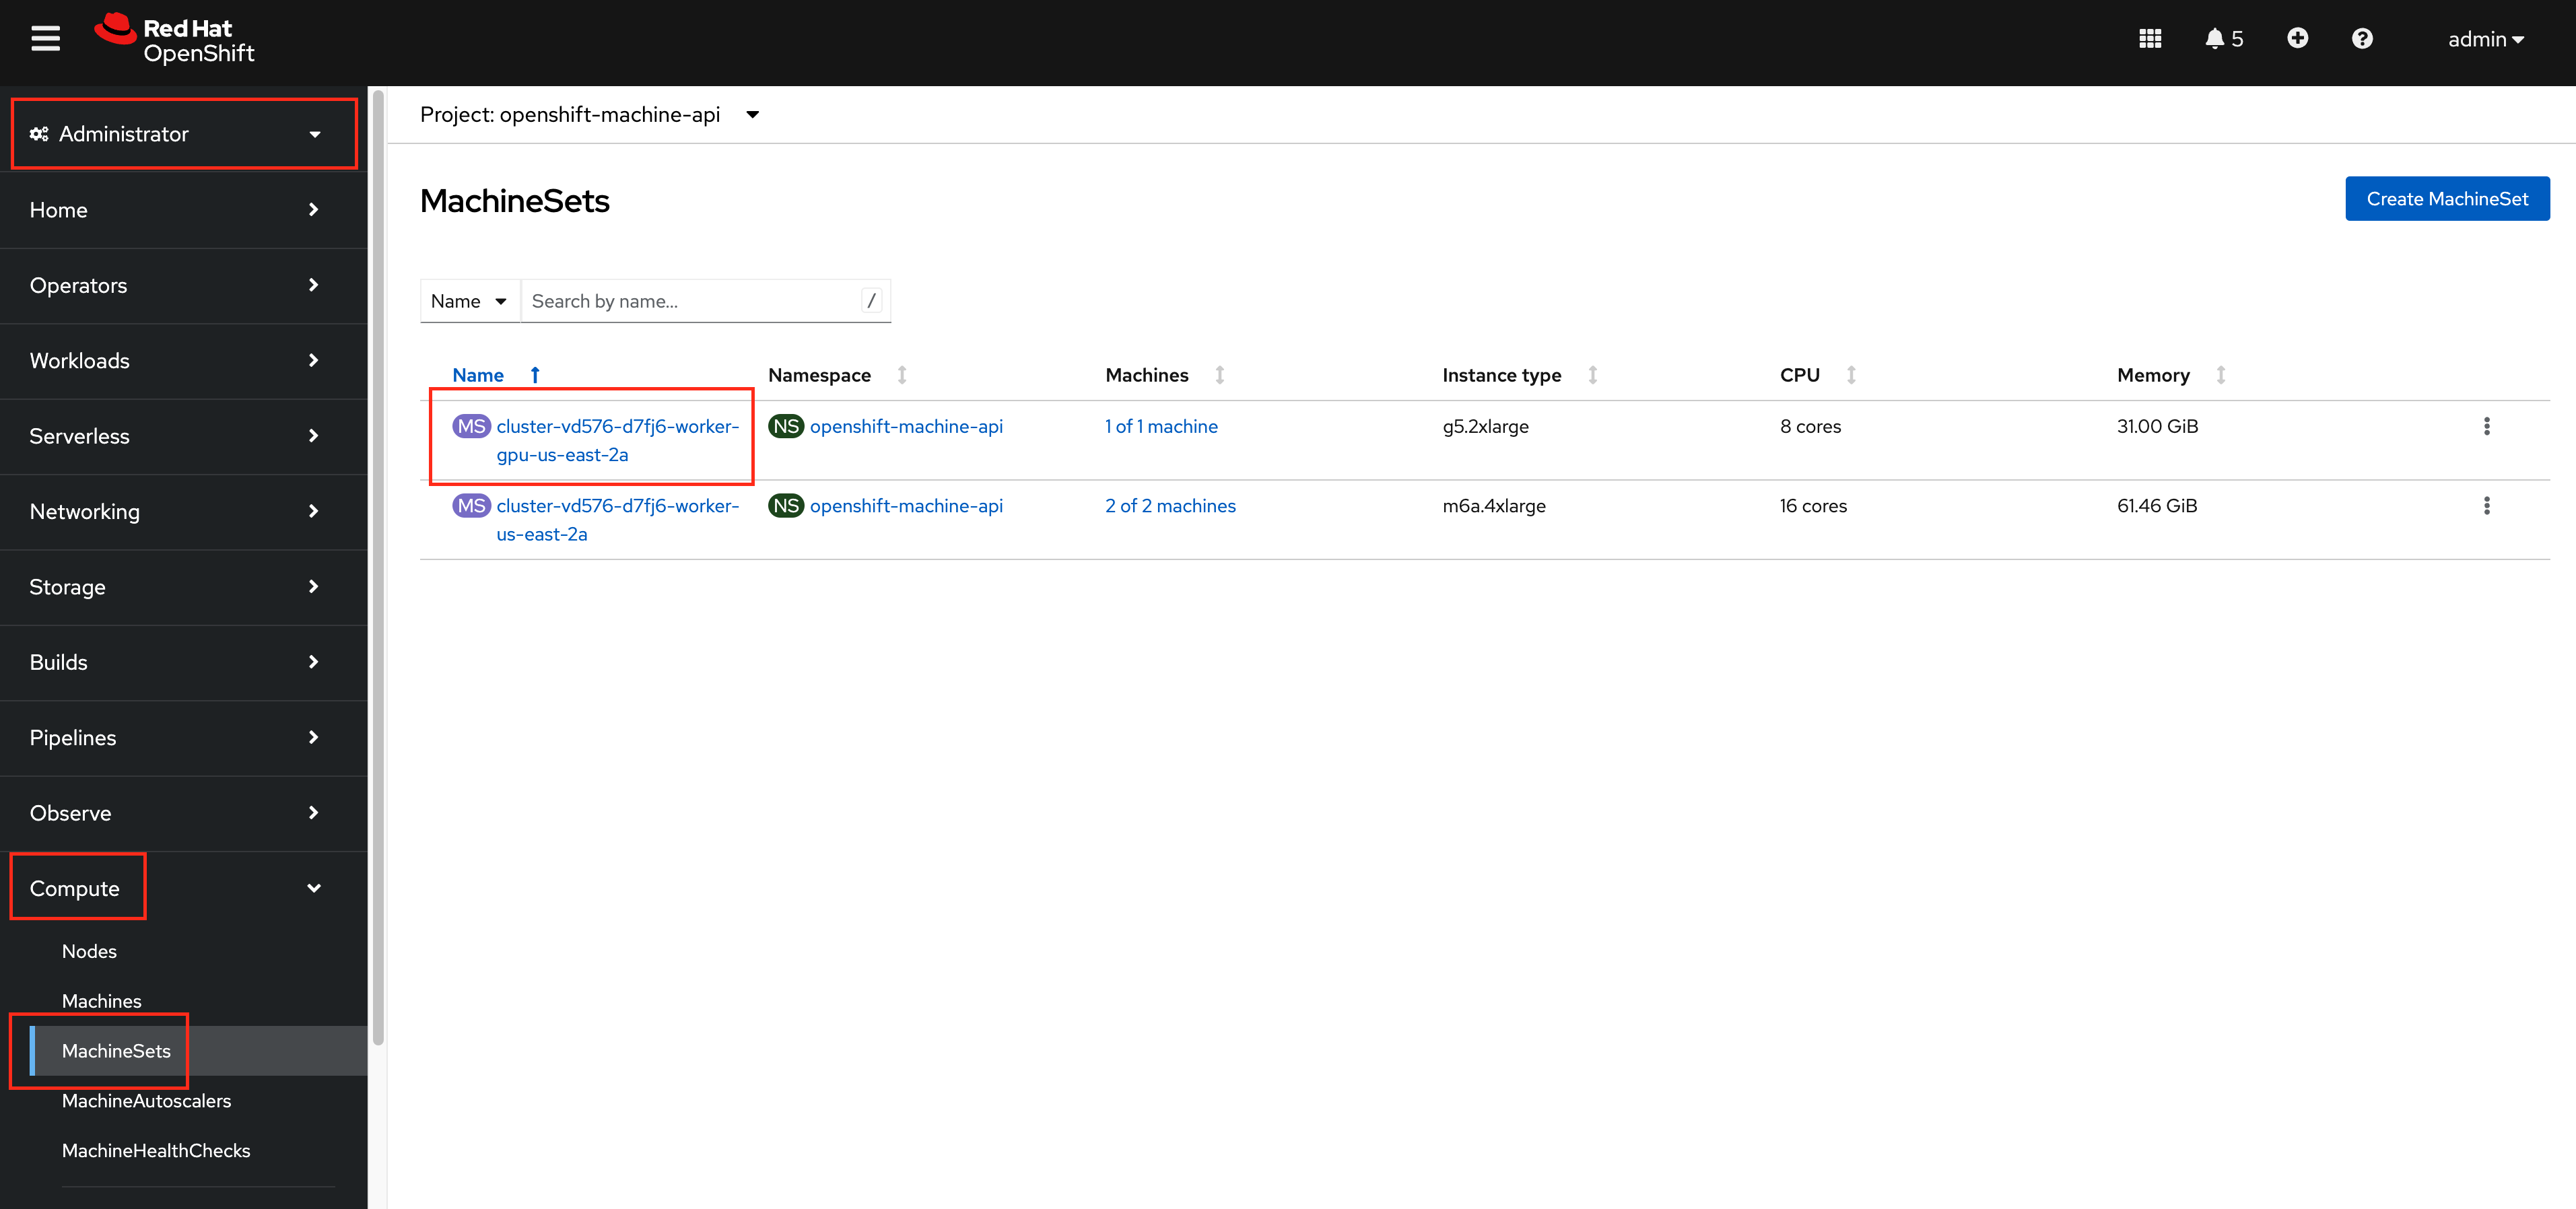
-
Click on the edit icon for
Desired count, update the value to 2 and click save.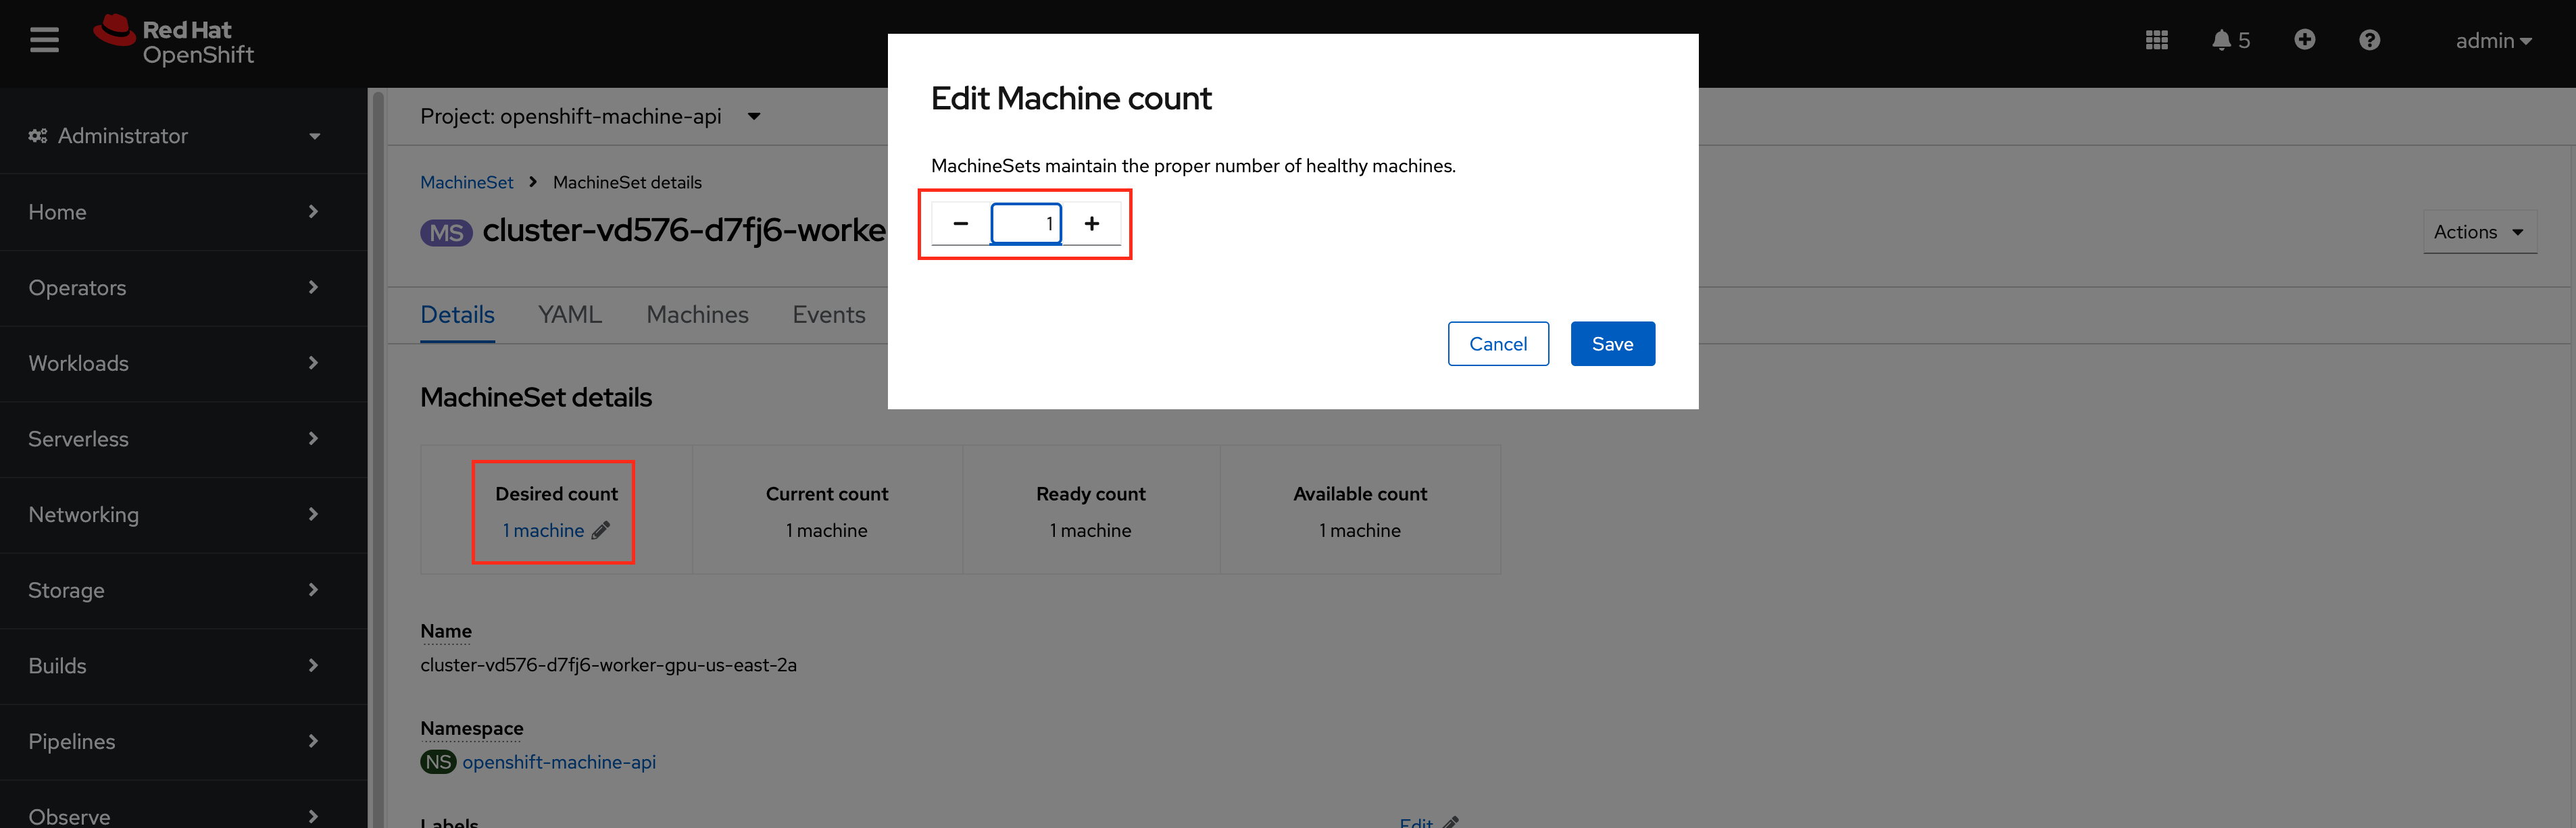
A new GPU node will begin the provisioning process. Continue with the rest of the instructions and the node should hopefully reduce the amount of time it takes for the pipeline to execute in the last part of this section.
Creating the Elasticsearch Instance
The Elasticsearch (ECK) Operator has already been installed on the cluster for you, so we will just need to create an Elasticsearch Cluster instance.
-
With the
composer-ai-appsnamespace selected in the OpenShift Web Console, navigate toOperators>Installed Operatorsand select theElasticsearch (ECK) Operator.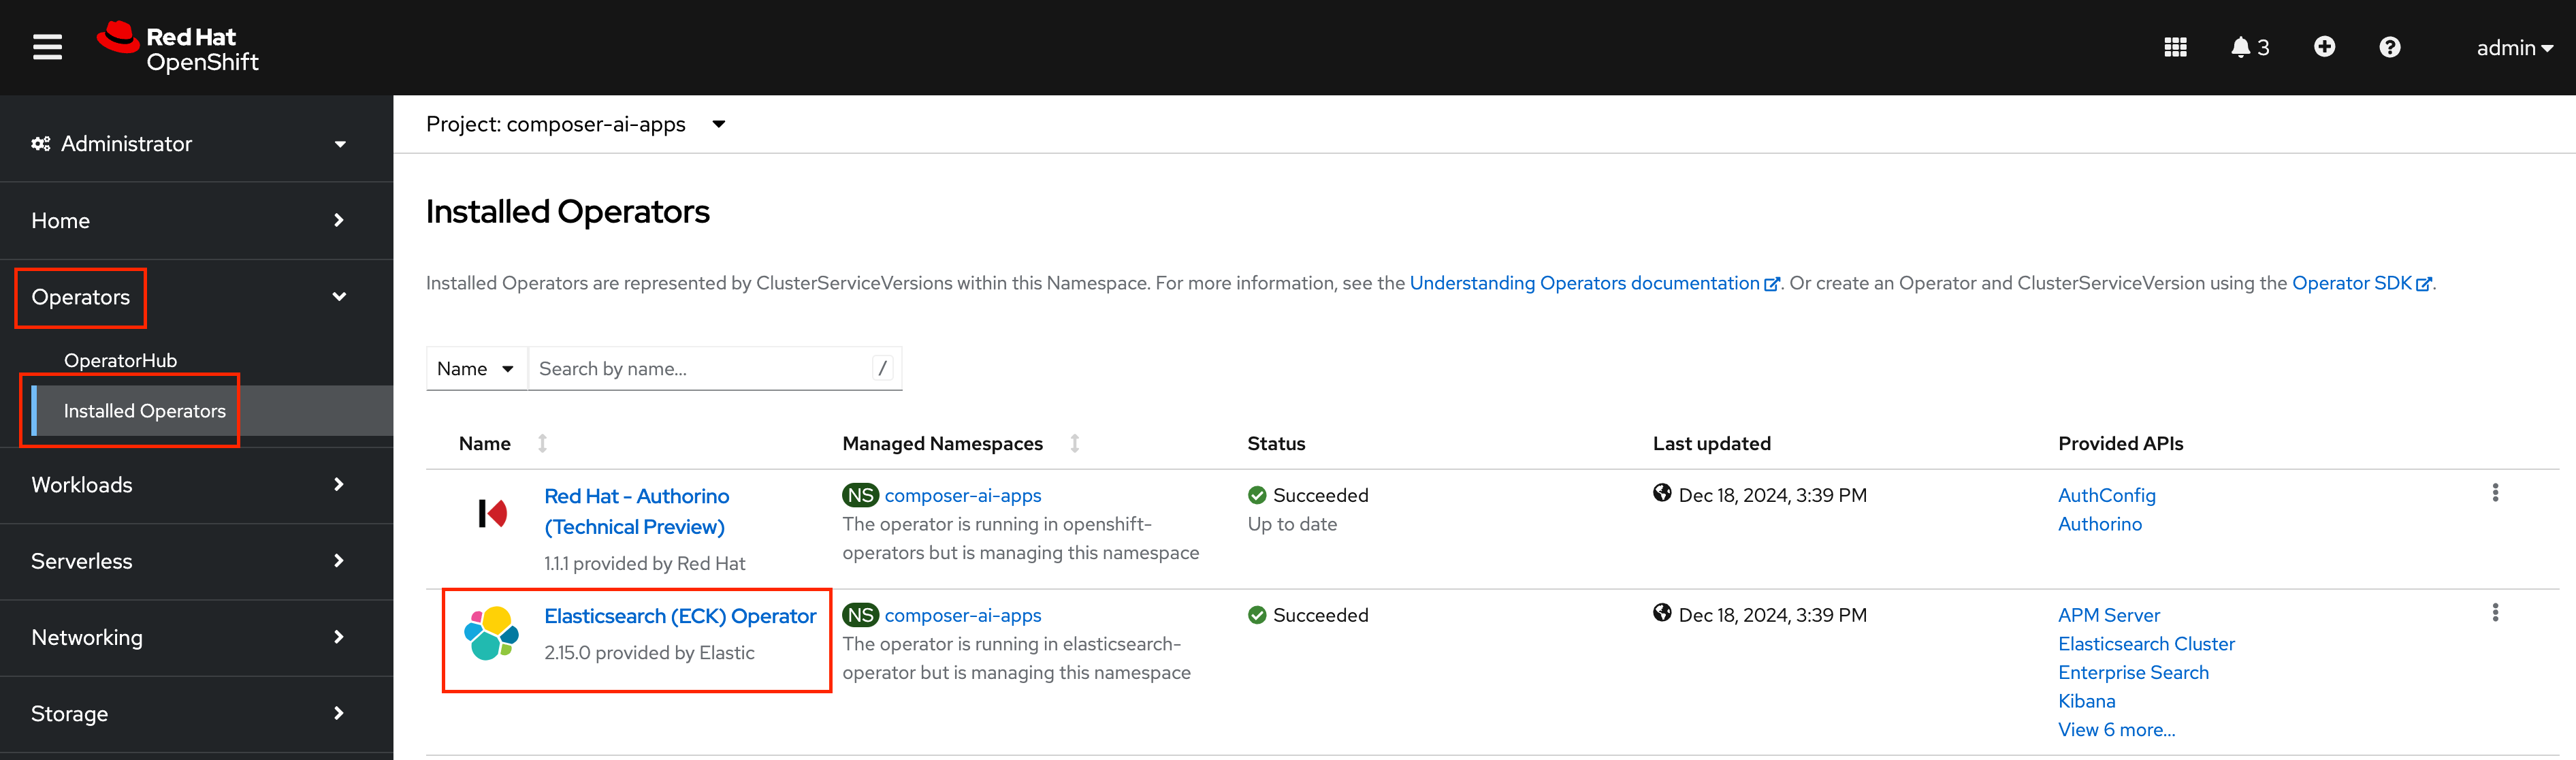
-
Click the
+Create instanceoption for anElasticsearch Cluster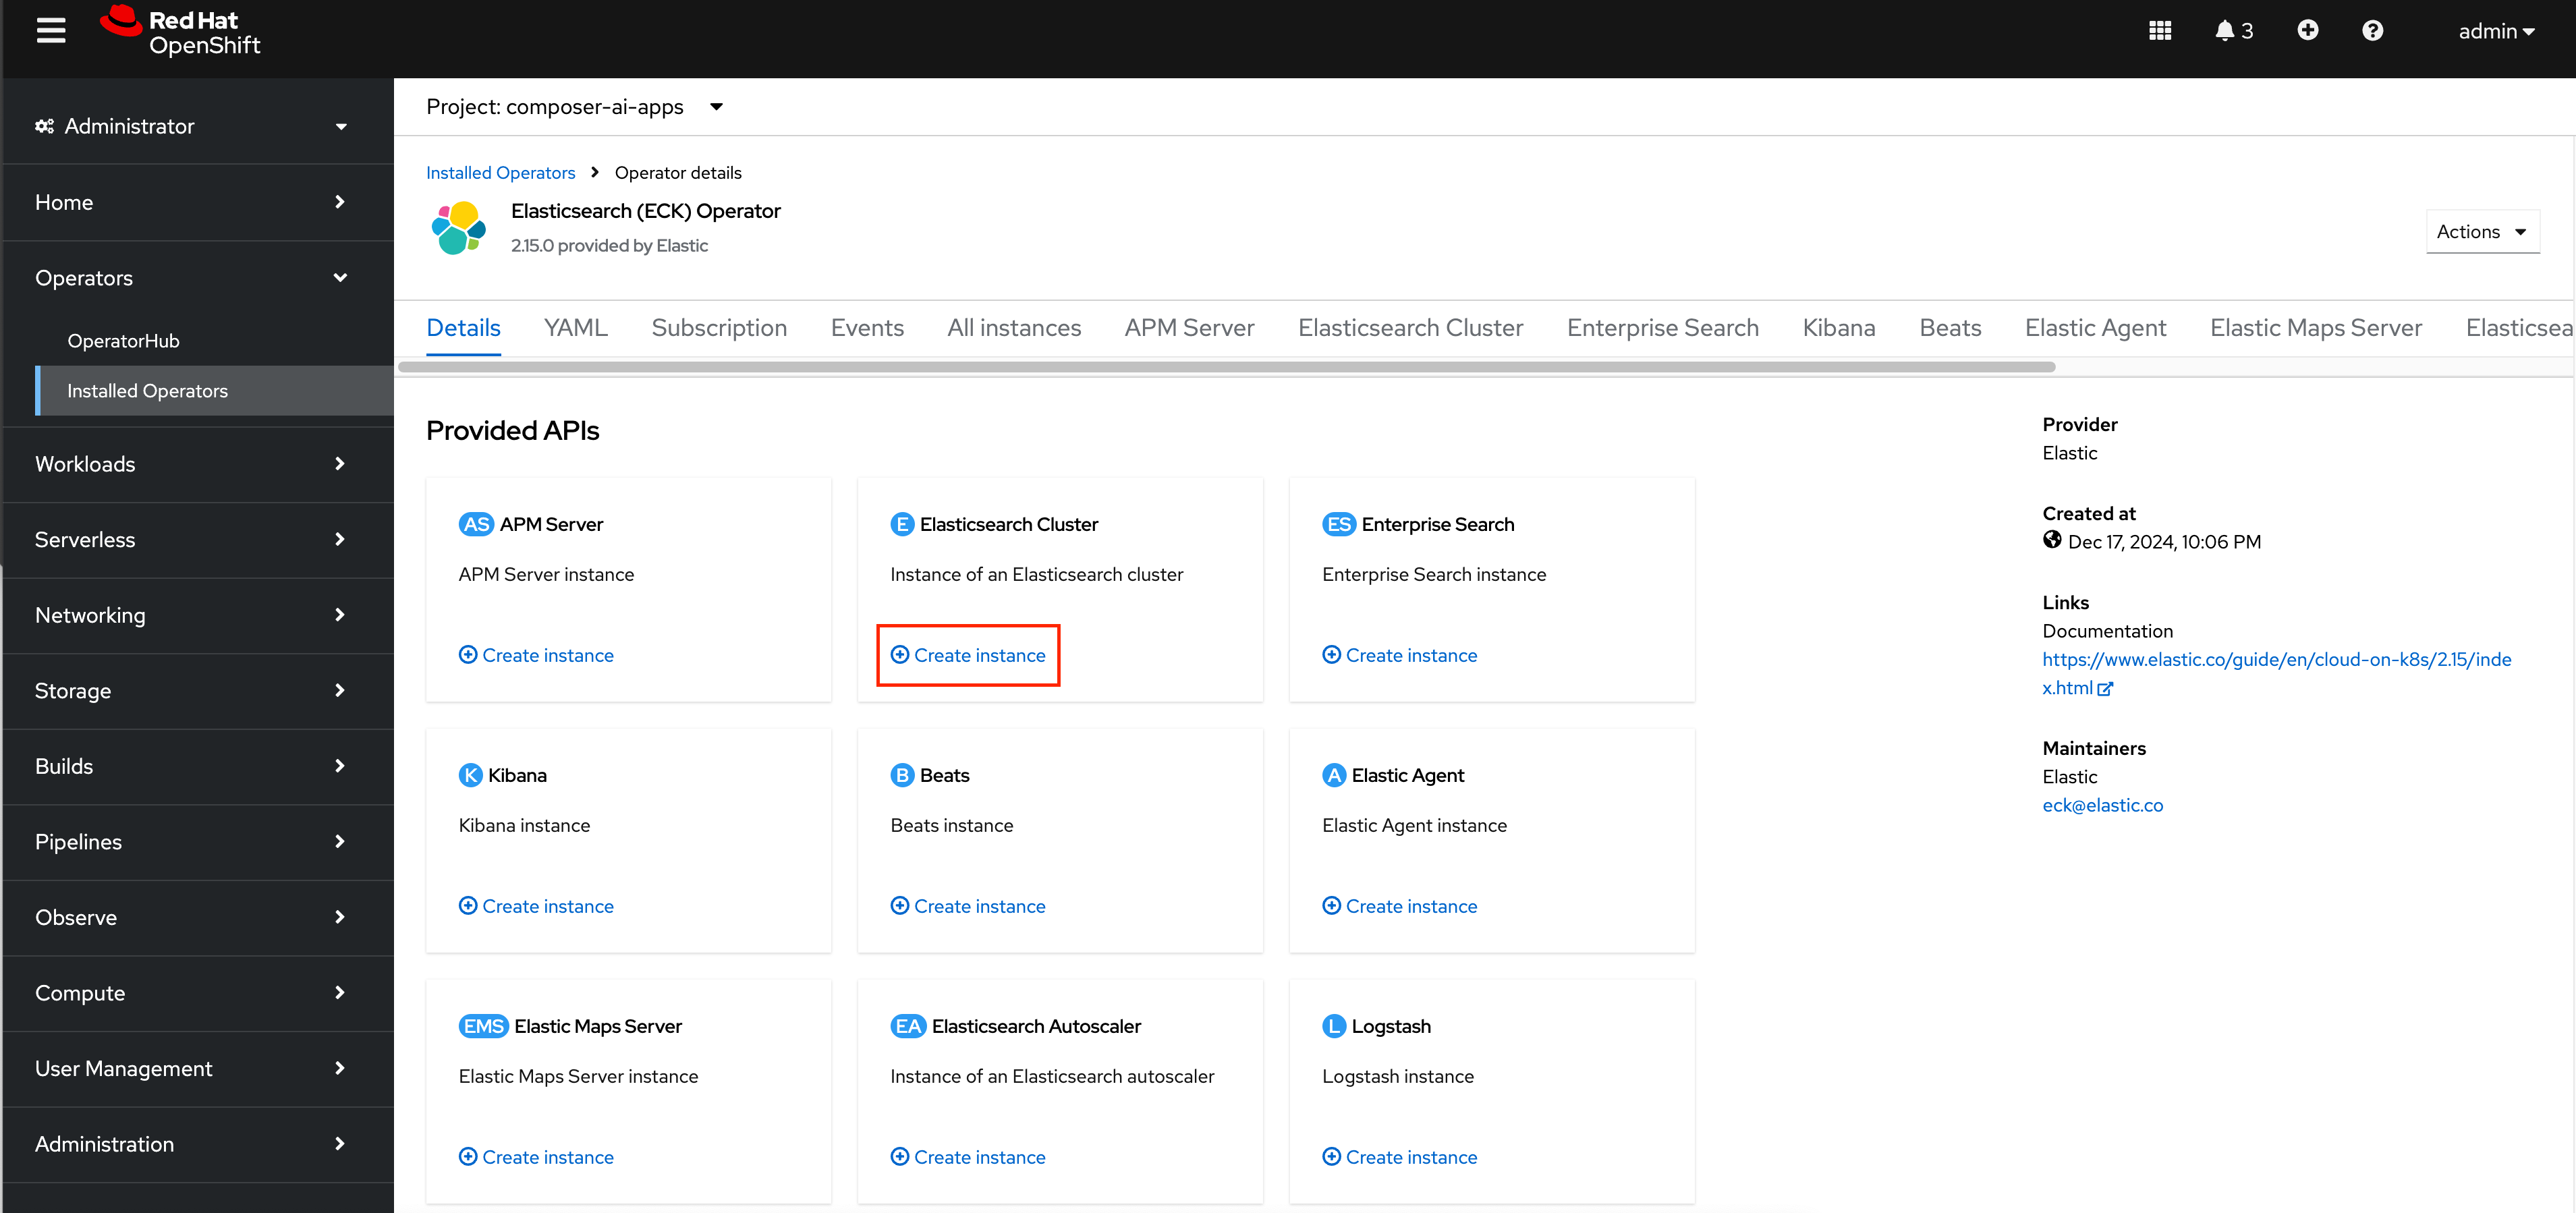
-
Update
metadata.nametoelasticsearch. -
Add the following yaml to the top level
spec:of theElasticsearchcustom resource:spec: http: tls: selfSignedCertificate: disabled: trueand then click
Create.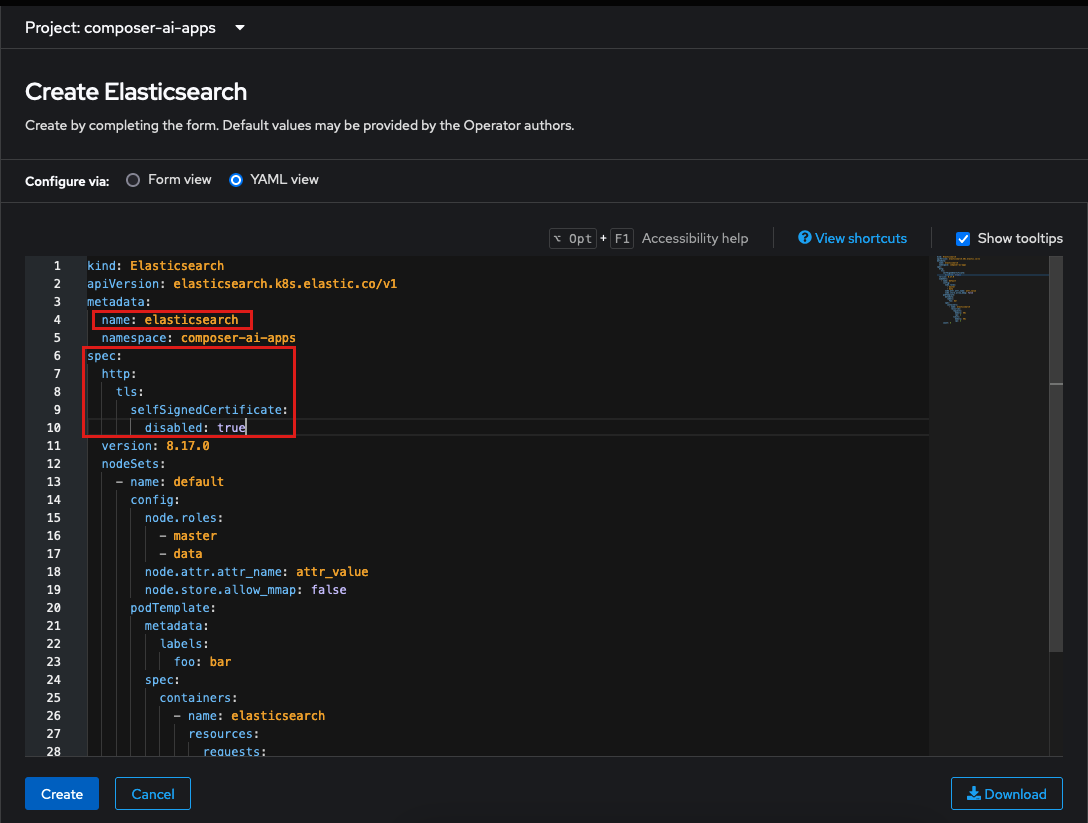
-
Wait until the Elasticsearch Cluster has come up
This can be validated by checking the opeartor status or validating that the Elasticsearch StatefulSet is up and running in the
composer-ai-appsnamespace. -
Finally, navigate to
Workloads → Podsand delete ourquarkus-llm-router-pod.
The elasticsearch-es-elastic-user secret contains the password for the Elasticsearch instance. The ECK operator should update the placeholder password (REPLACE_ME) with a real password. Ensure the operator has completed this update before deleting the quarkus-llm-router pod. If the pod is deleted before the password is updated, the application won’t be able to connect to Elasticsearch. The quarkus-llm-router pod needs to be restarted so that it can use the newly generated password.
|