Deploying a Model with vLLM
In this section will will deploy a Granite 3.0 8B Instruct model using vLLM.
For our Model Server we will be deploying a vLLM instance using a model packaged into an OCI container with ModelCar.
|
ModelCar is Tech Preview as of OpenShift AI 2.14. ModelCar is a great option for smaller models like our 8B model. While it is still a relatively large container (15Gb) it is still reasonable to easily pull into a cluster. Treating the model as an OCI artifact allows us to easily promote the model between different environments using customers existing promotion processes. By contrast, dealing with promoting models between S3 instances in different environments may create new challenges. |
Creating the vLLM Instance
-
Open the OpenShift AI Dashboard and select the
composer-ai-appsproject from the list of Data Science Projects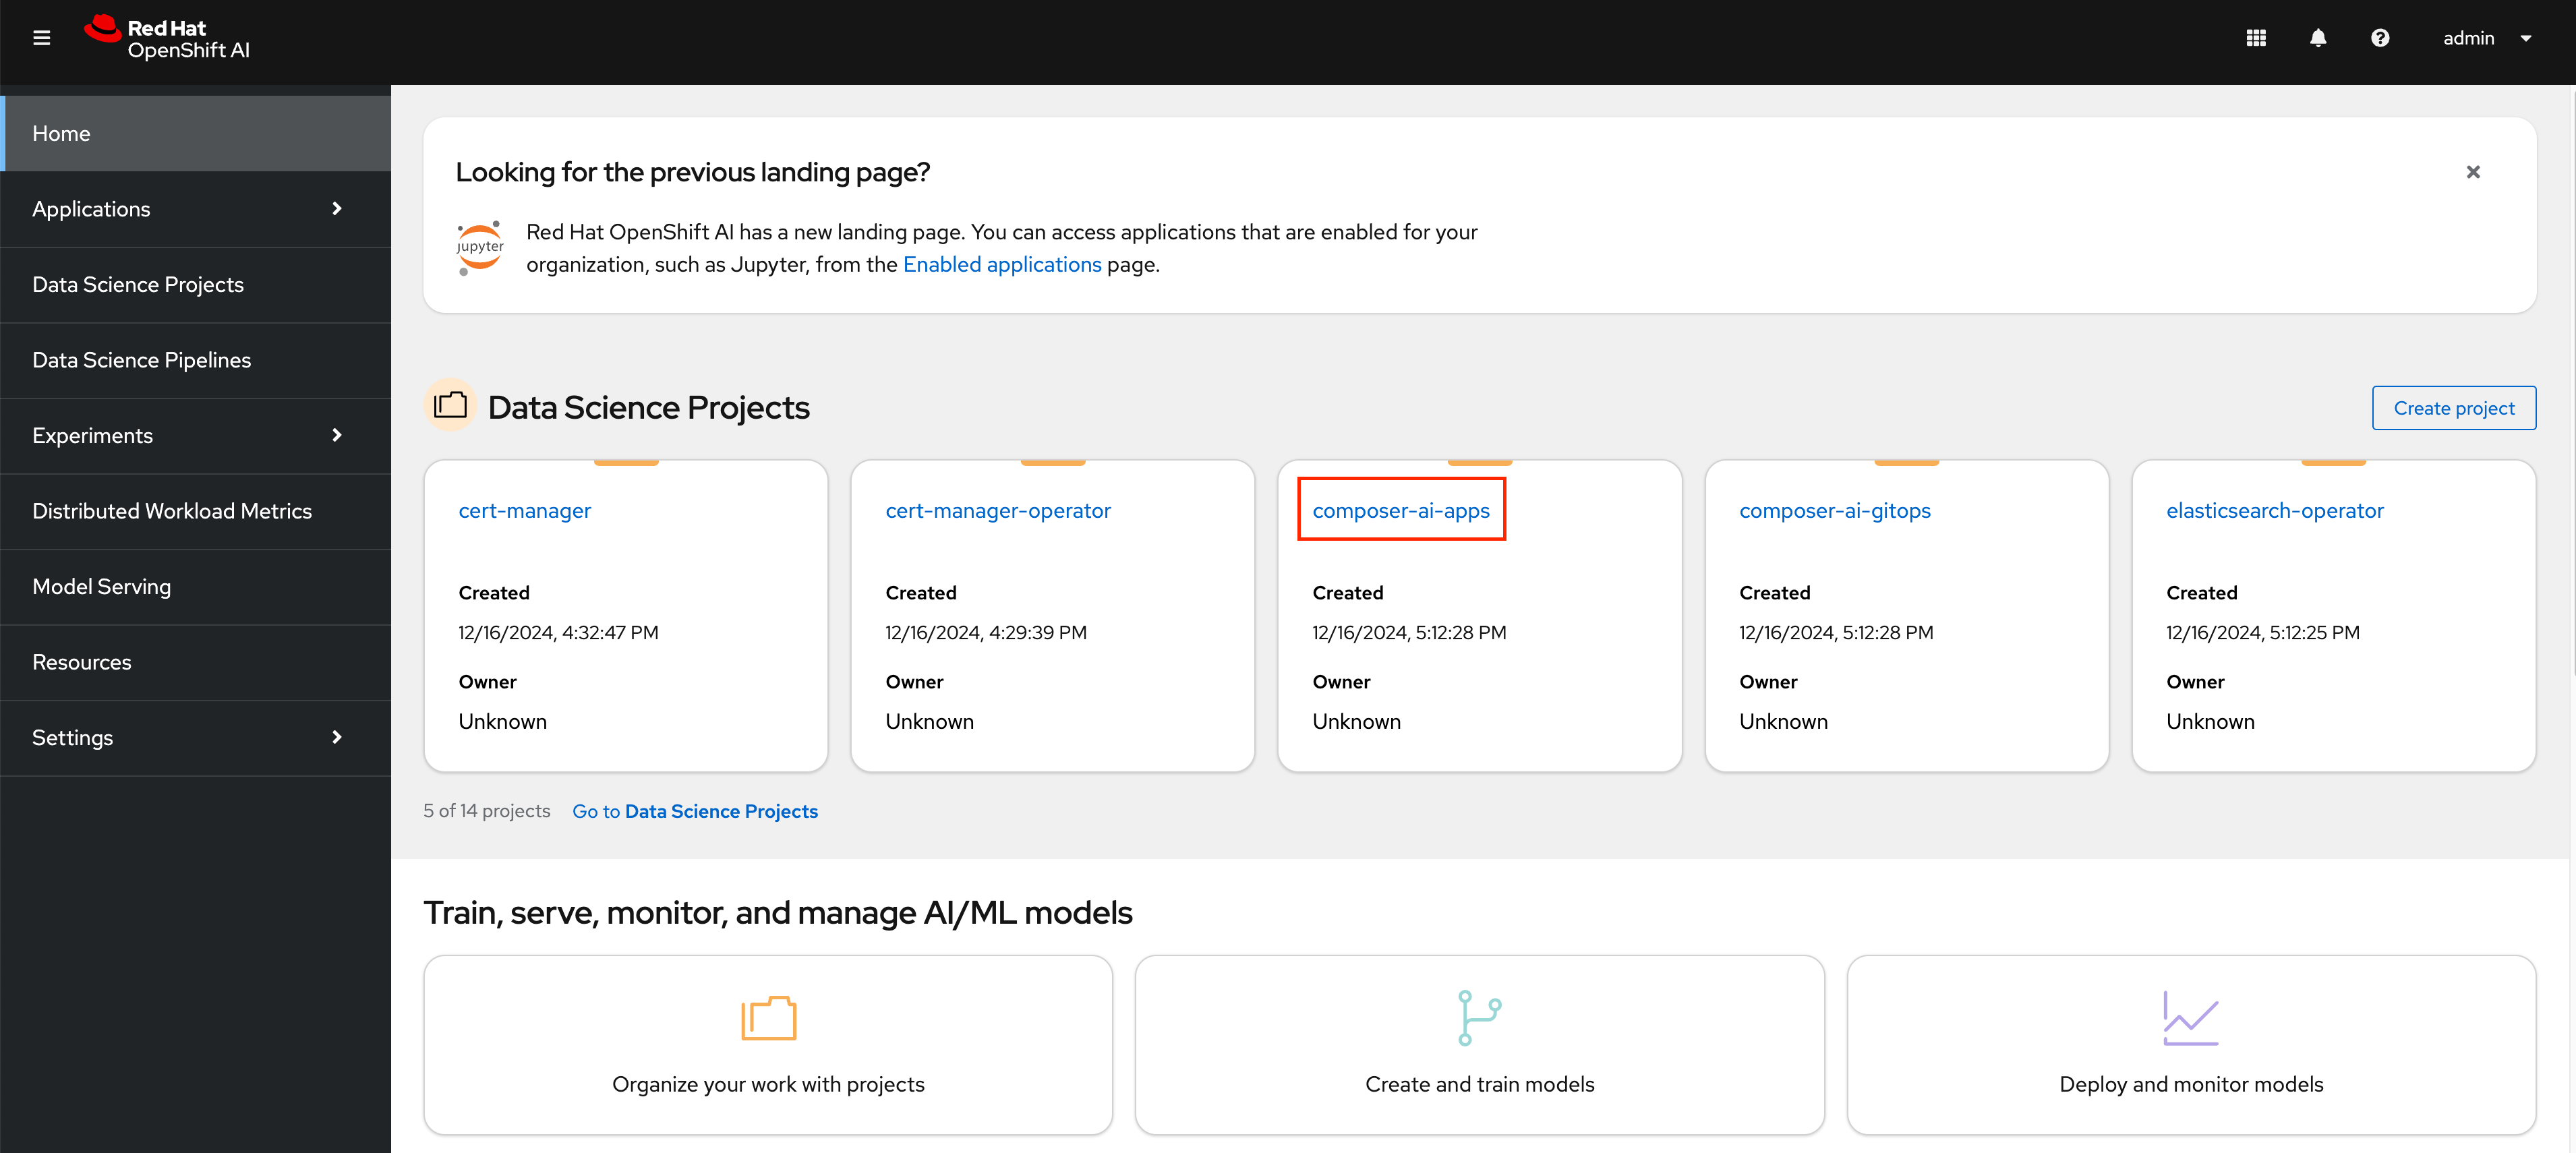
-
Select the
Modelstab and clickSelect single-model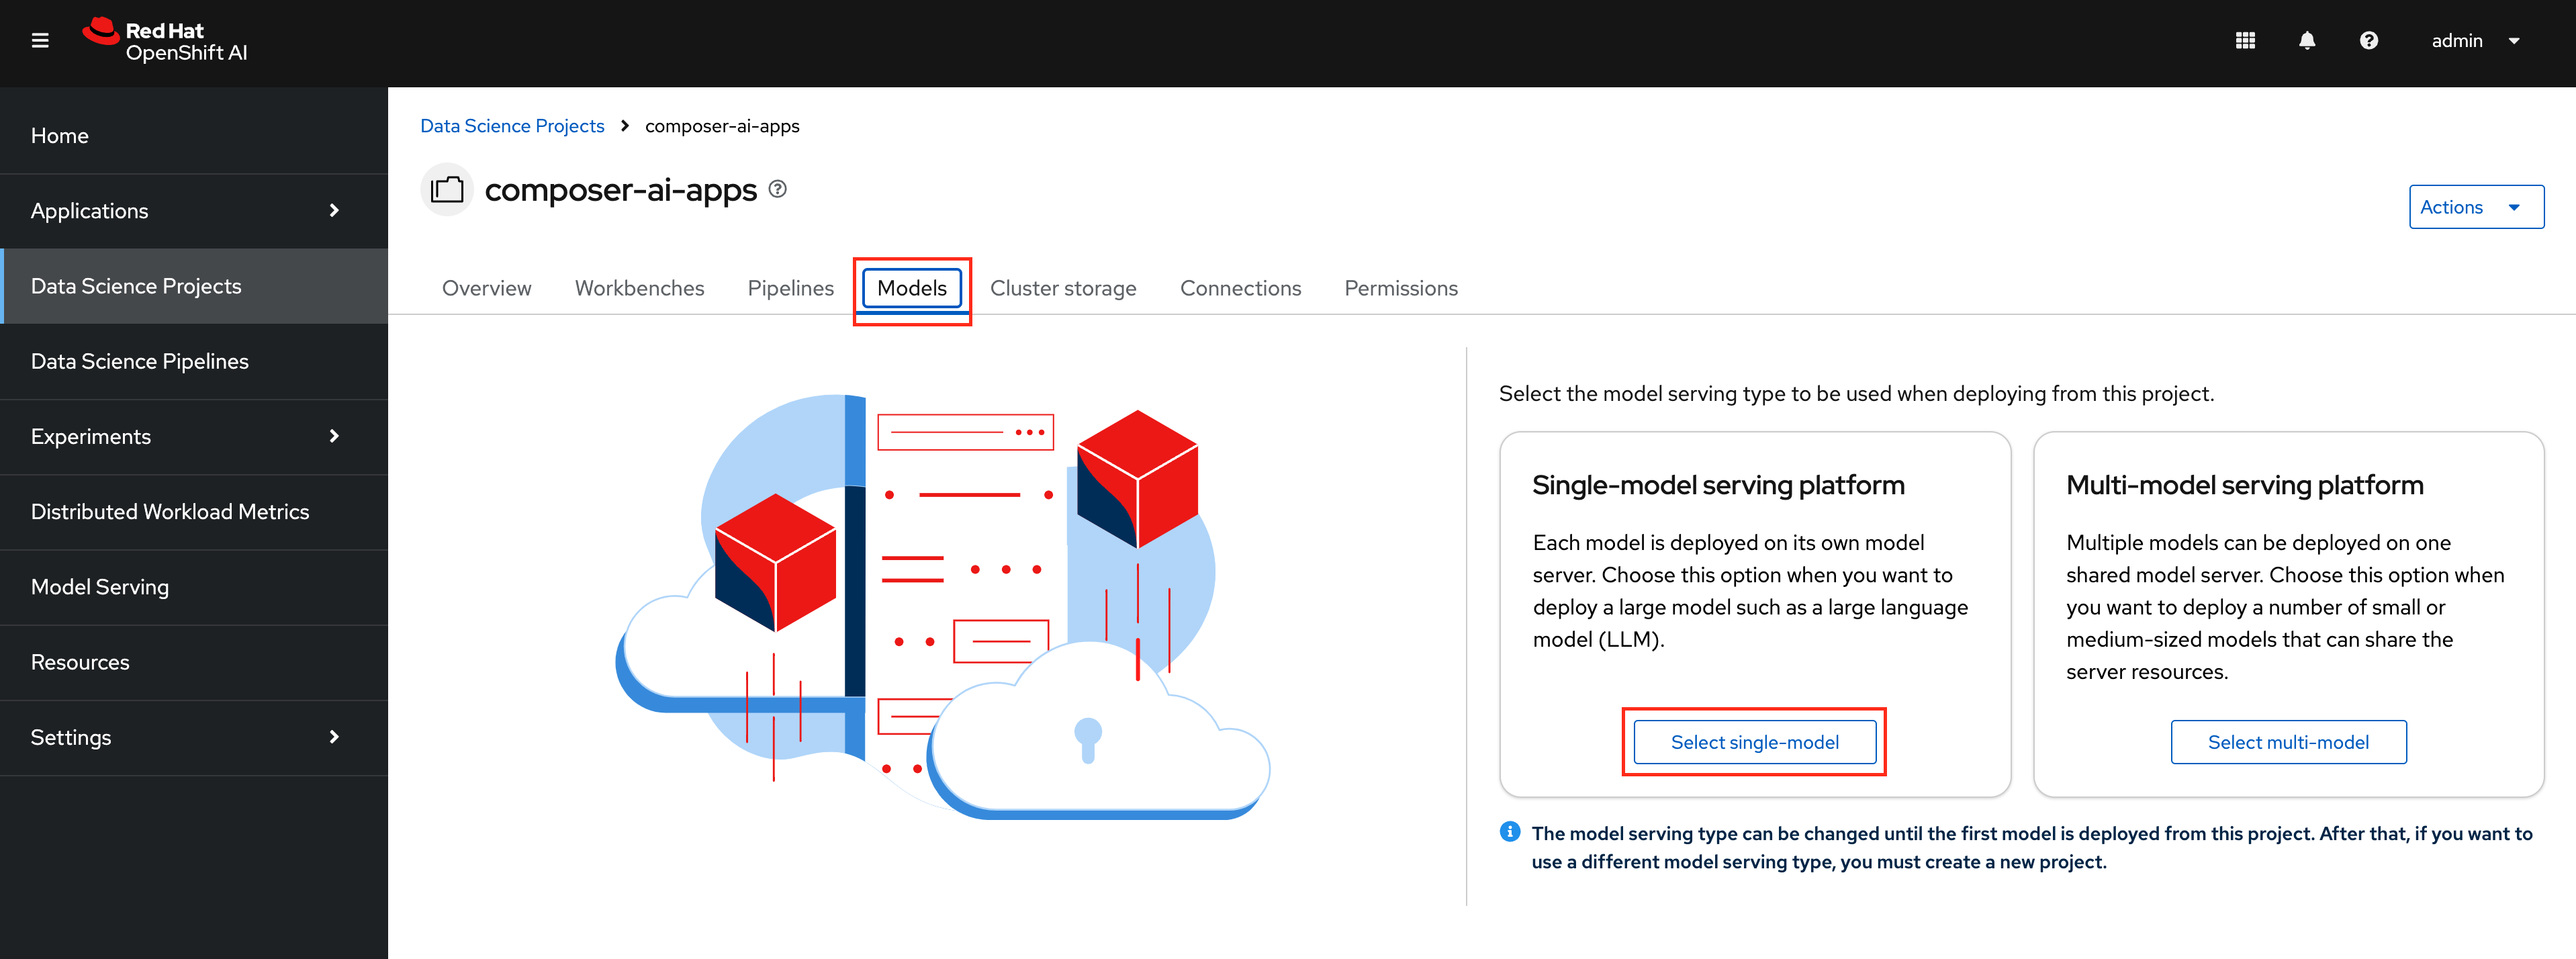
-
Select
Deploy models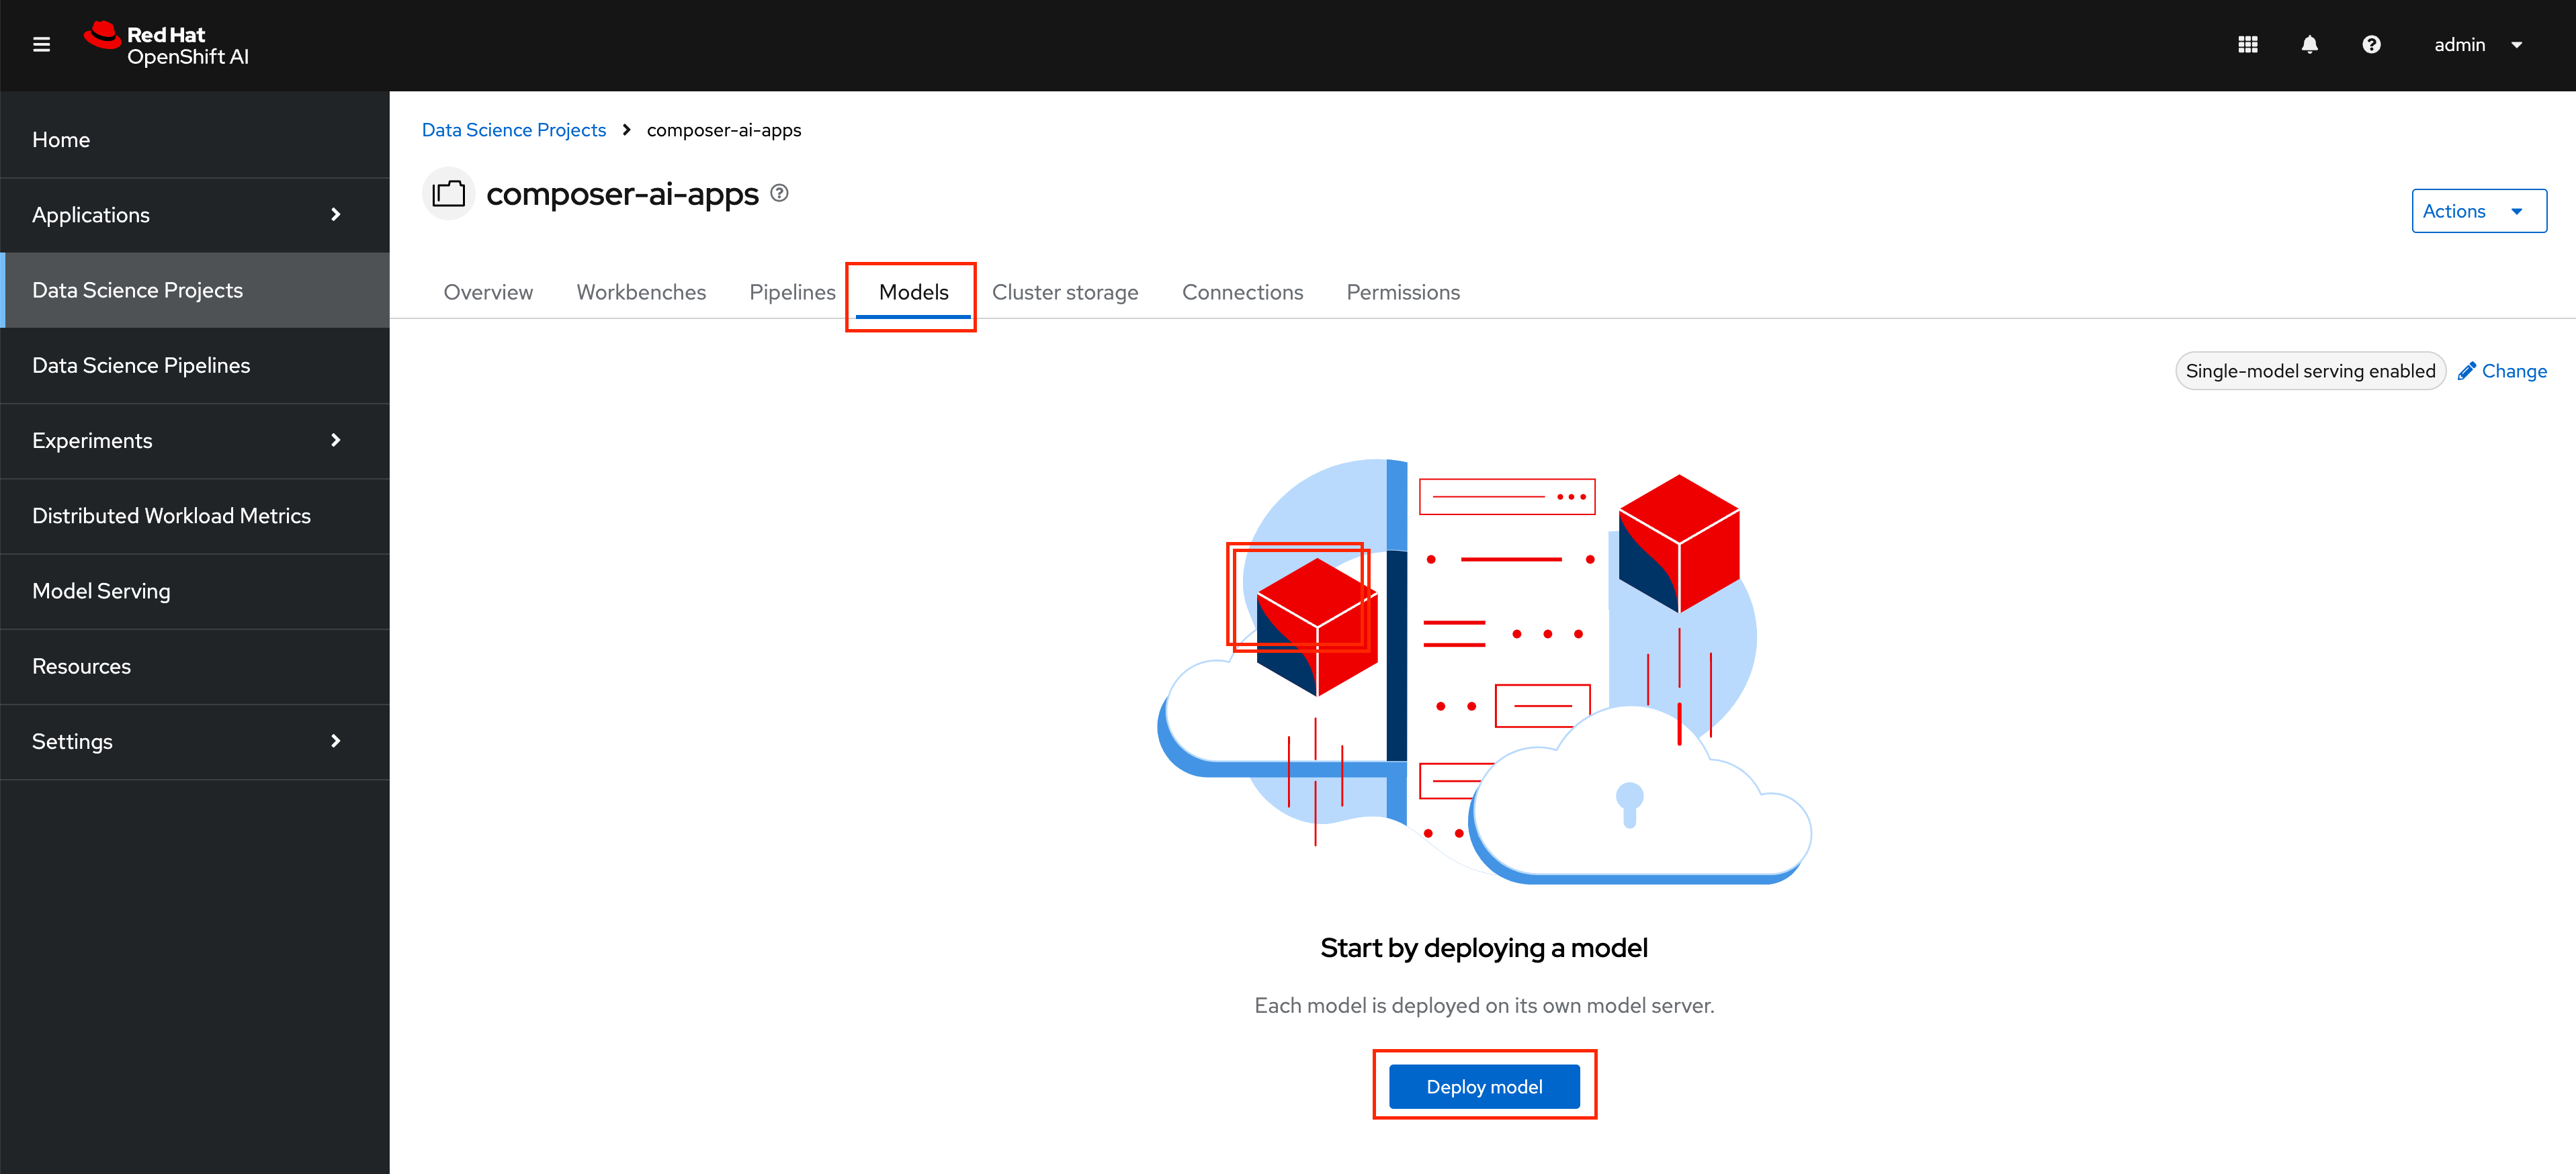
-
Enter the following information:
Model deployment name: vllm
Serving runtime: vLLM ServingRuntime for KServe
Number of model server replicas to deploy: 1
Model server size: Custom
CPUs requested: 2 Cores
CPUs limit: 4 Cores
Memory requested: 16 GiB
Memory limit: 20 GiB
Accelerator: nvidia-gpu
Number of accelerators: 1
Make deployed models available through an external route: Checked
Require token authentication: Unchecked
The name of the model server must be
vllmin order for some of the configurations in Composer AI to match up correctly.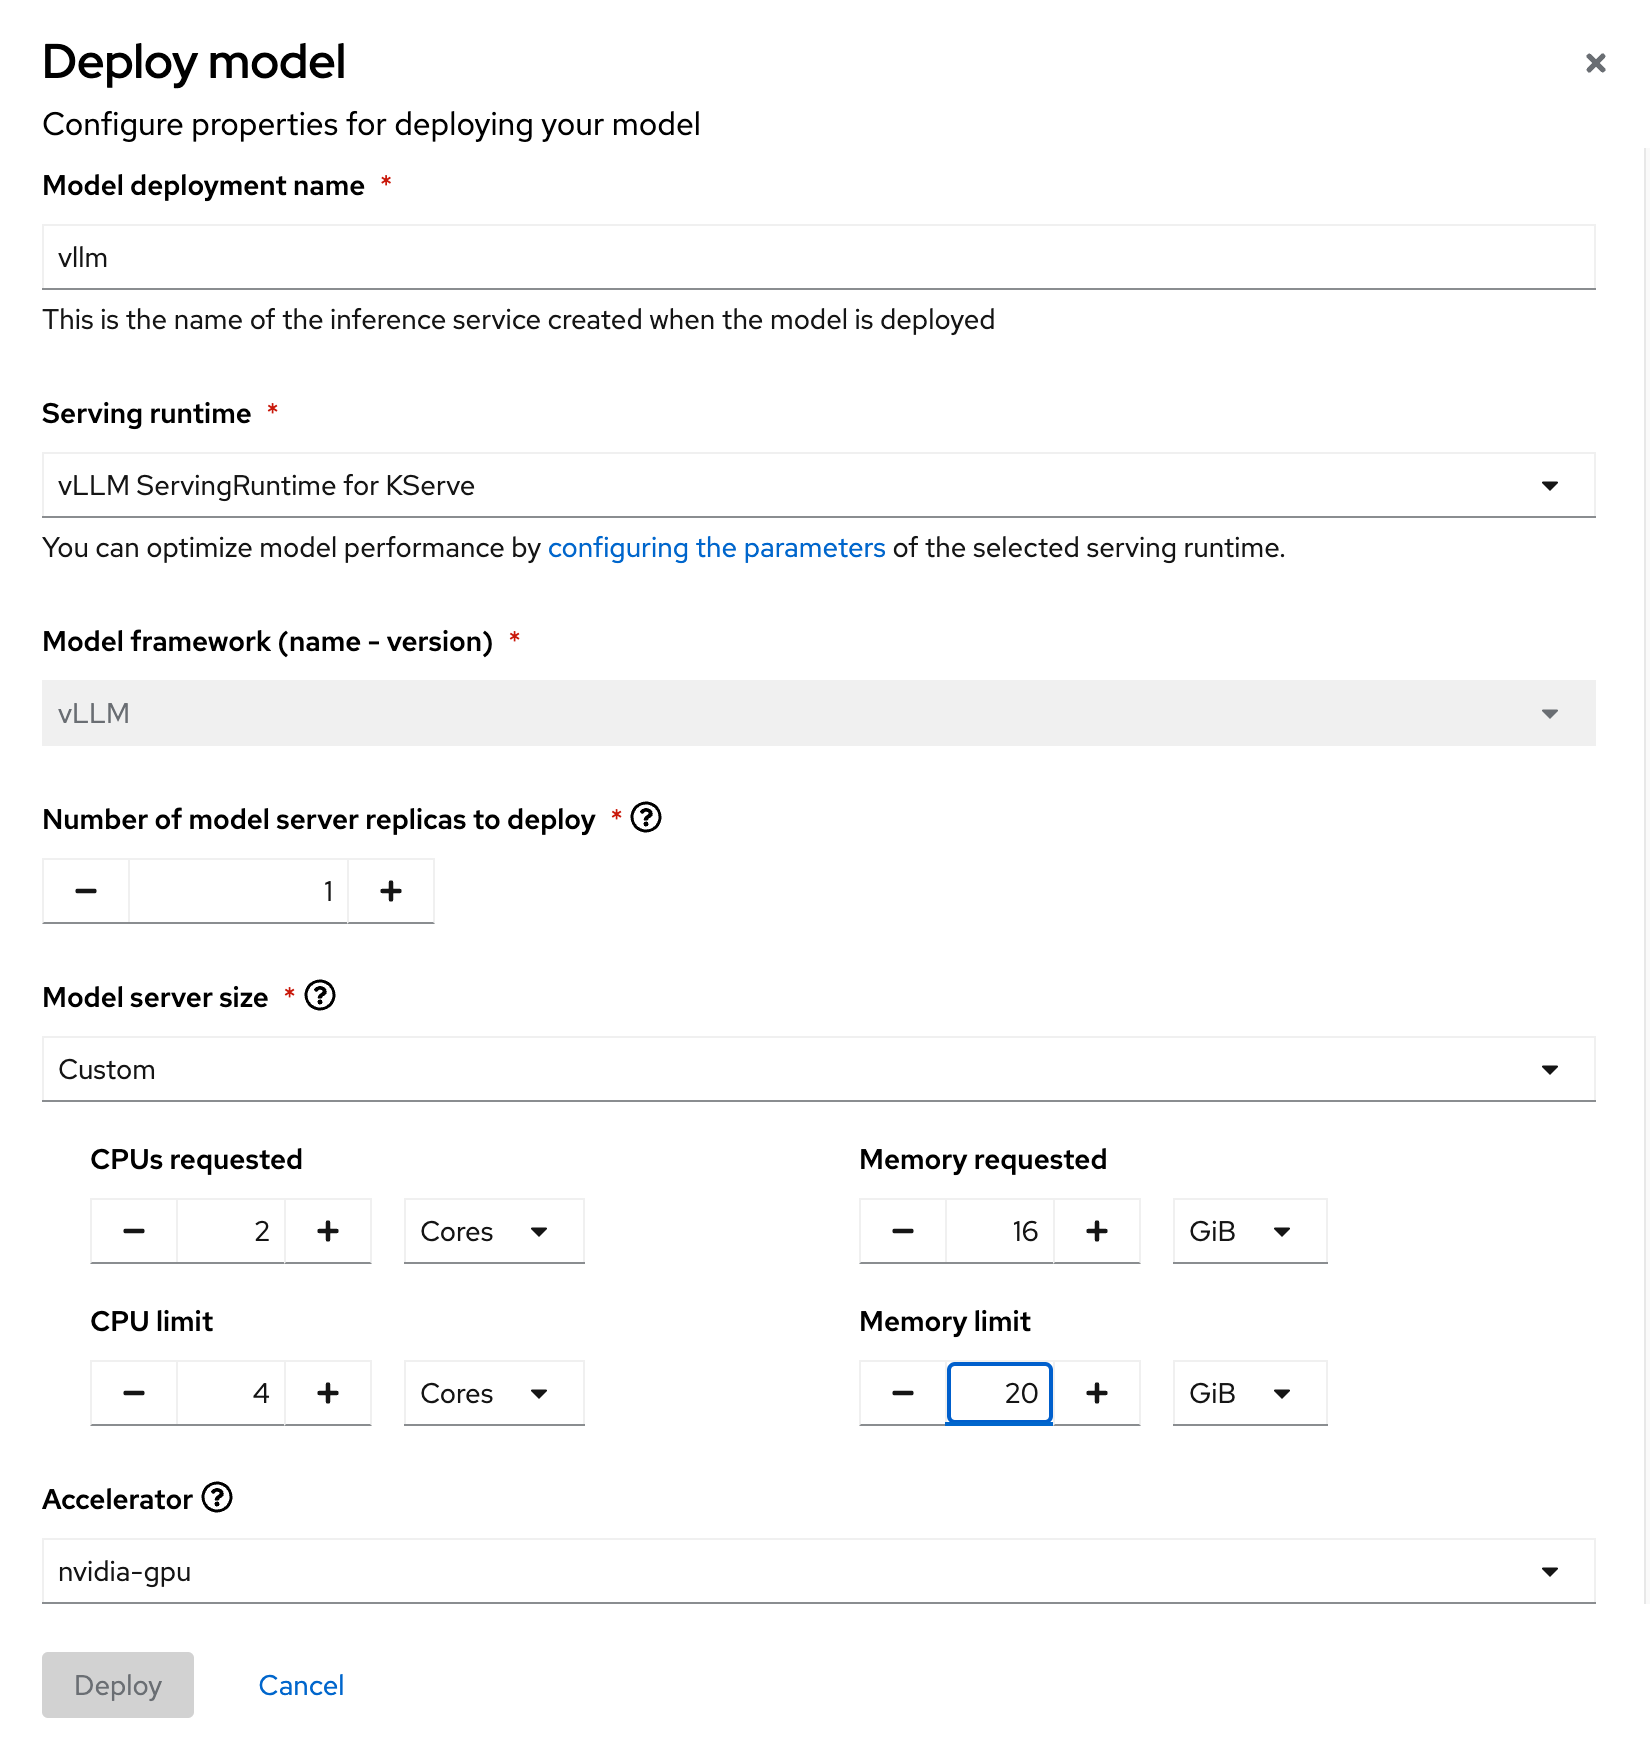
-
In the
Source model locationsection, choose the option toCreate connection. Enter the following information:Connection type: URI - v1 Connection name: granite-3-0-8b-instruct URI: oci://quay.io/redhat-ai-services/modelcar-catalog:granite-3.0-8b-instruct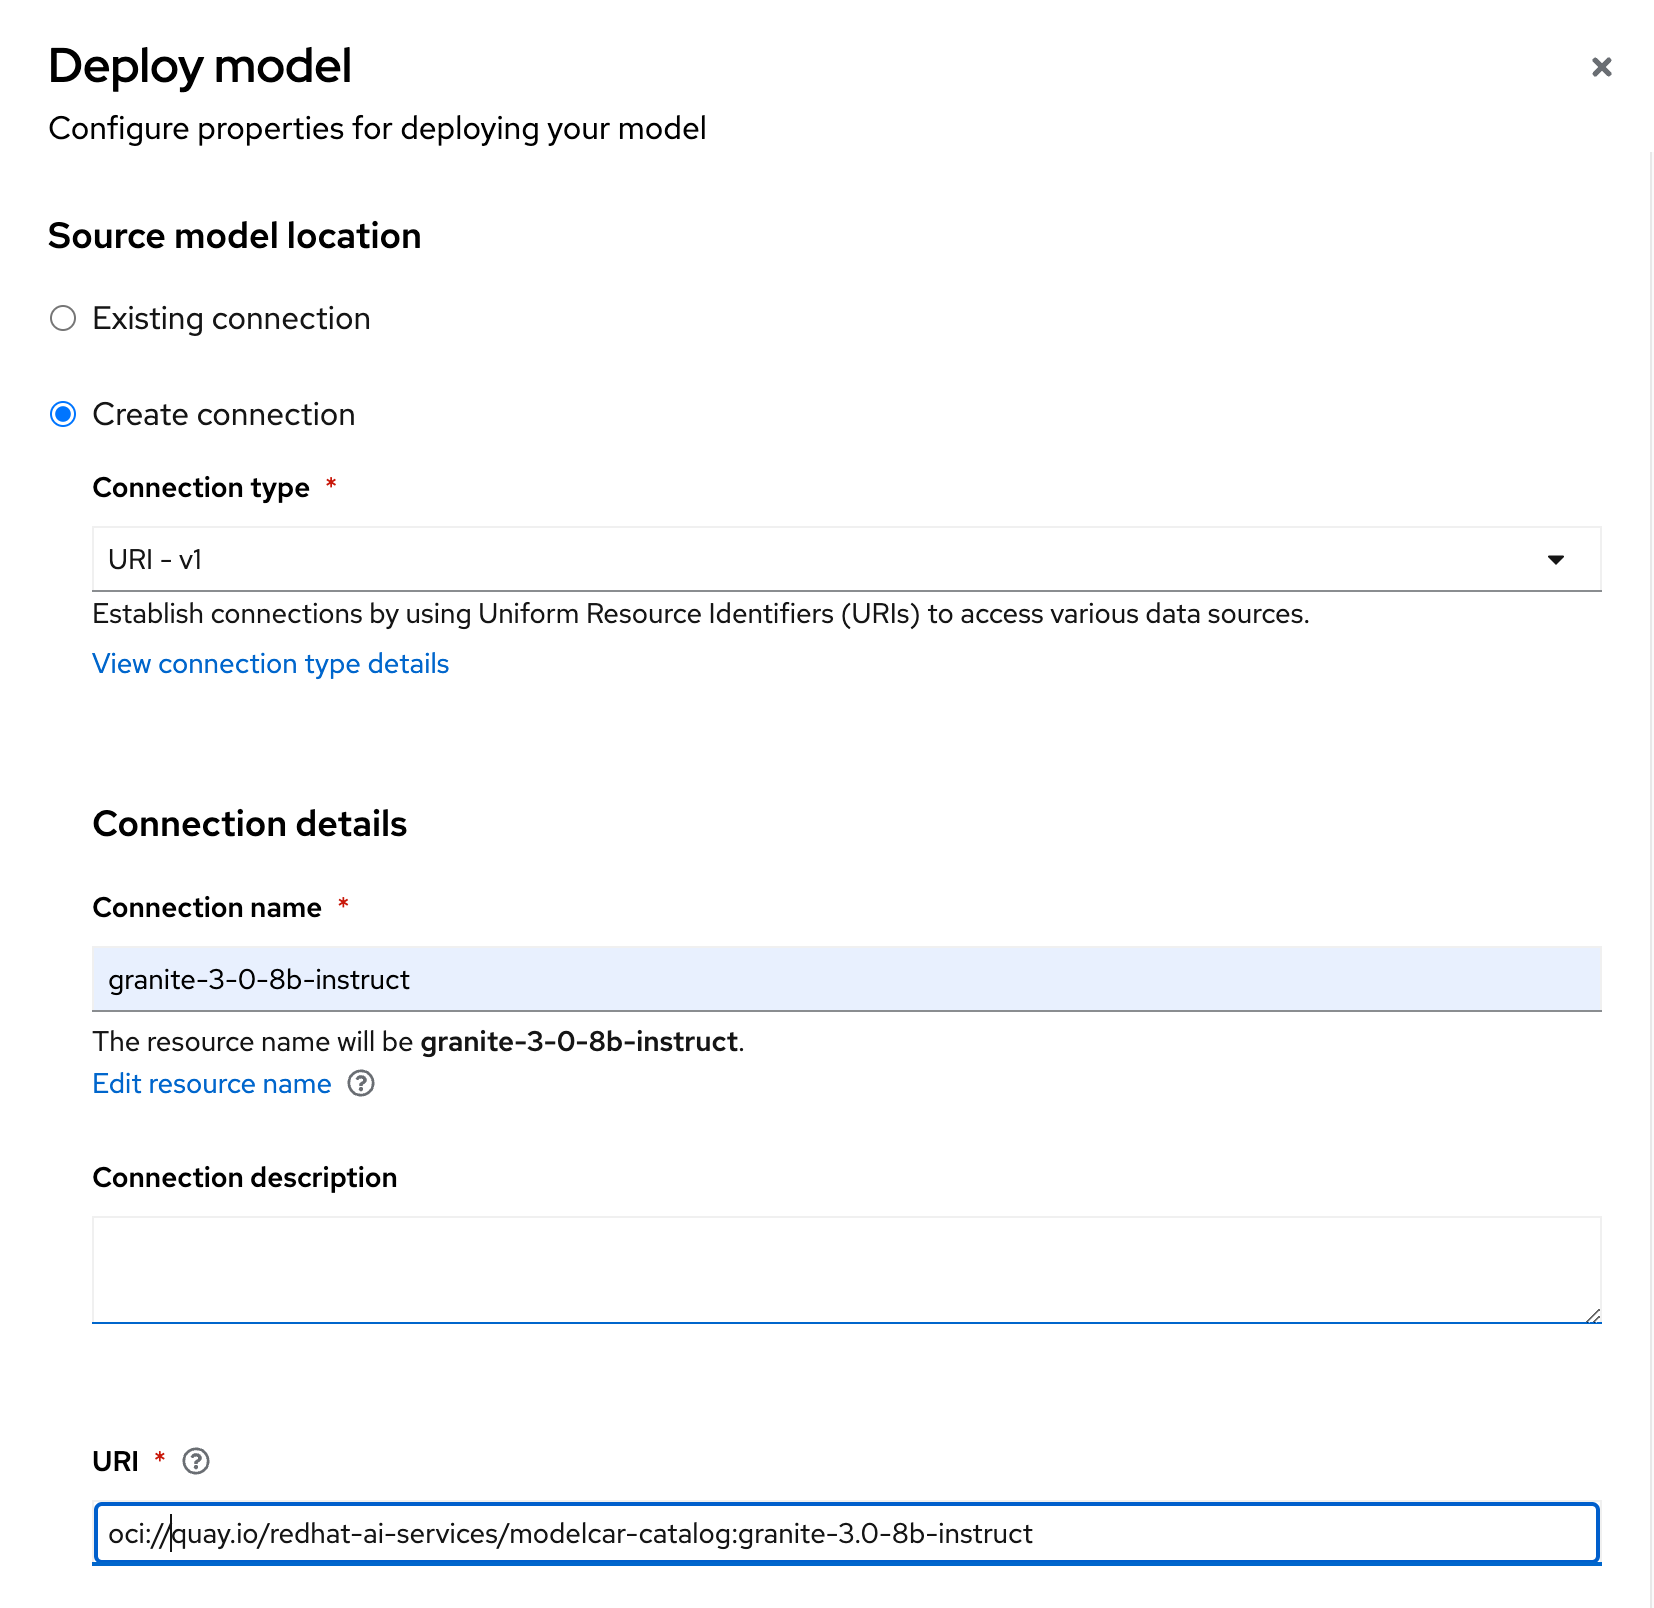
You can find the image container our model here alongside other ModelCar images that you can try.
Additionally, the source for building these ModelCar images can be found on GitHub.
For more information on ModelCar see the KServe Serving models with OCI images documentation.
A copy of the image has already been pulled onto the GPU node to help speed up deploying the model, but deploying LLMs can take quite some time.
KServe uses KNative Serverless to manage the model servers which has a default timeout of 10 minutes which means that if the model server takes longer than 10 minutes to deploy it will automatically terminate the pod and mark it as failed.
You can extend the timeout by adding the following annotation to the
predictorsection of theInferenceService:apiVersion: serving.kserve.io/v1beta1 kind: InferenceService metadata: name: vllm spec: predictor: annotations: serving.knative.dev/progress-deadline: 30m -
A new vLLM instance will be created in the OpenShift AI Dashboard. Return to the OpenShift Web Console and check the pods in the
composer-ai-appsproject. You should find a pod calledvllm-predictor-00001-deployment-*. Check the podsEventsandLogsto follow the progress for the pod until it becomes ready. -
(Optional) The OpenShift AI Dashboard created two KServe objects, a
ServingRuntimeand anInferenceService. From the OpenShift Web Console, navigate to theHome>Searchpage and use theResourcesdrop down menu to search for and select those objects. Spend a few minutes reviewing the objects created by the Dashboard.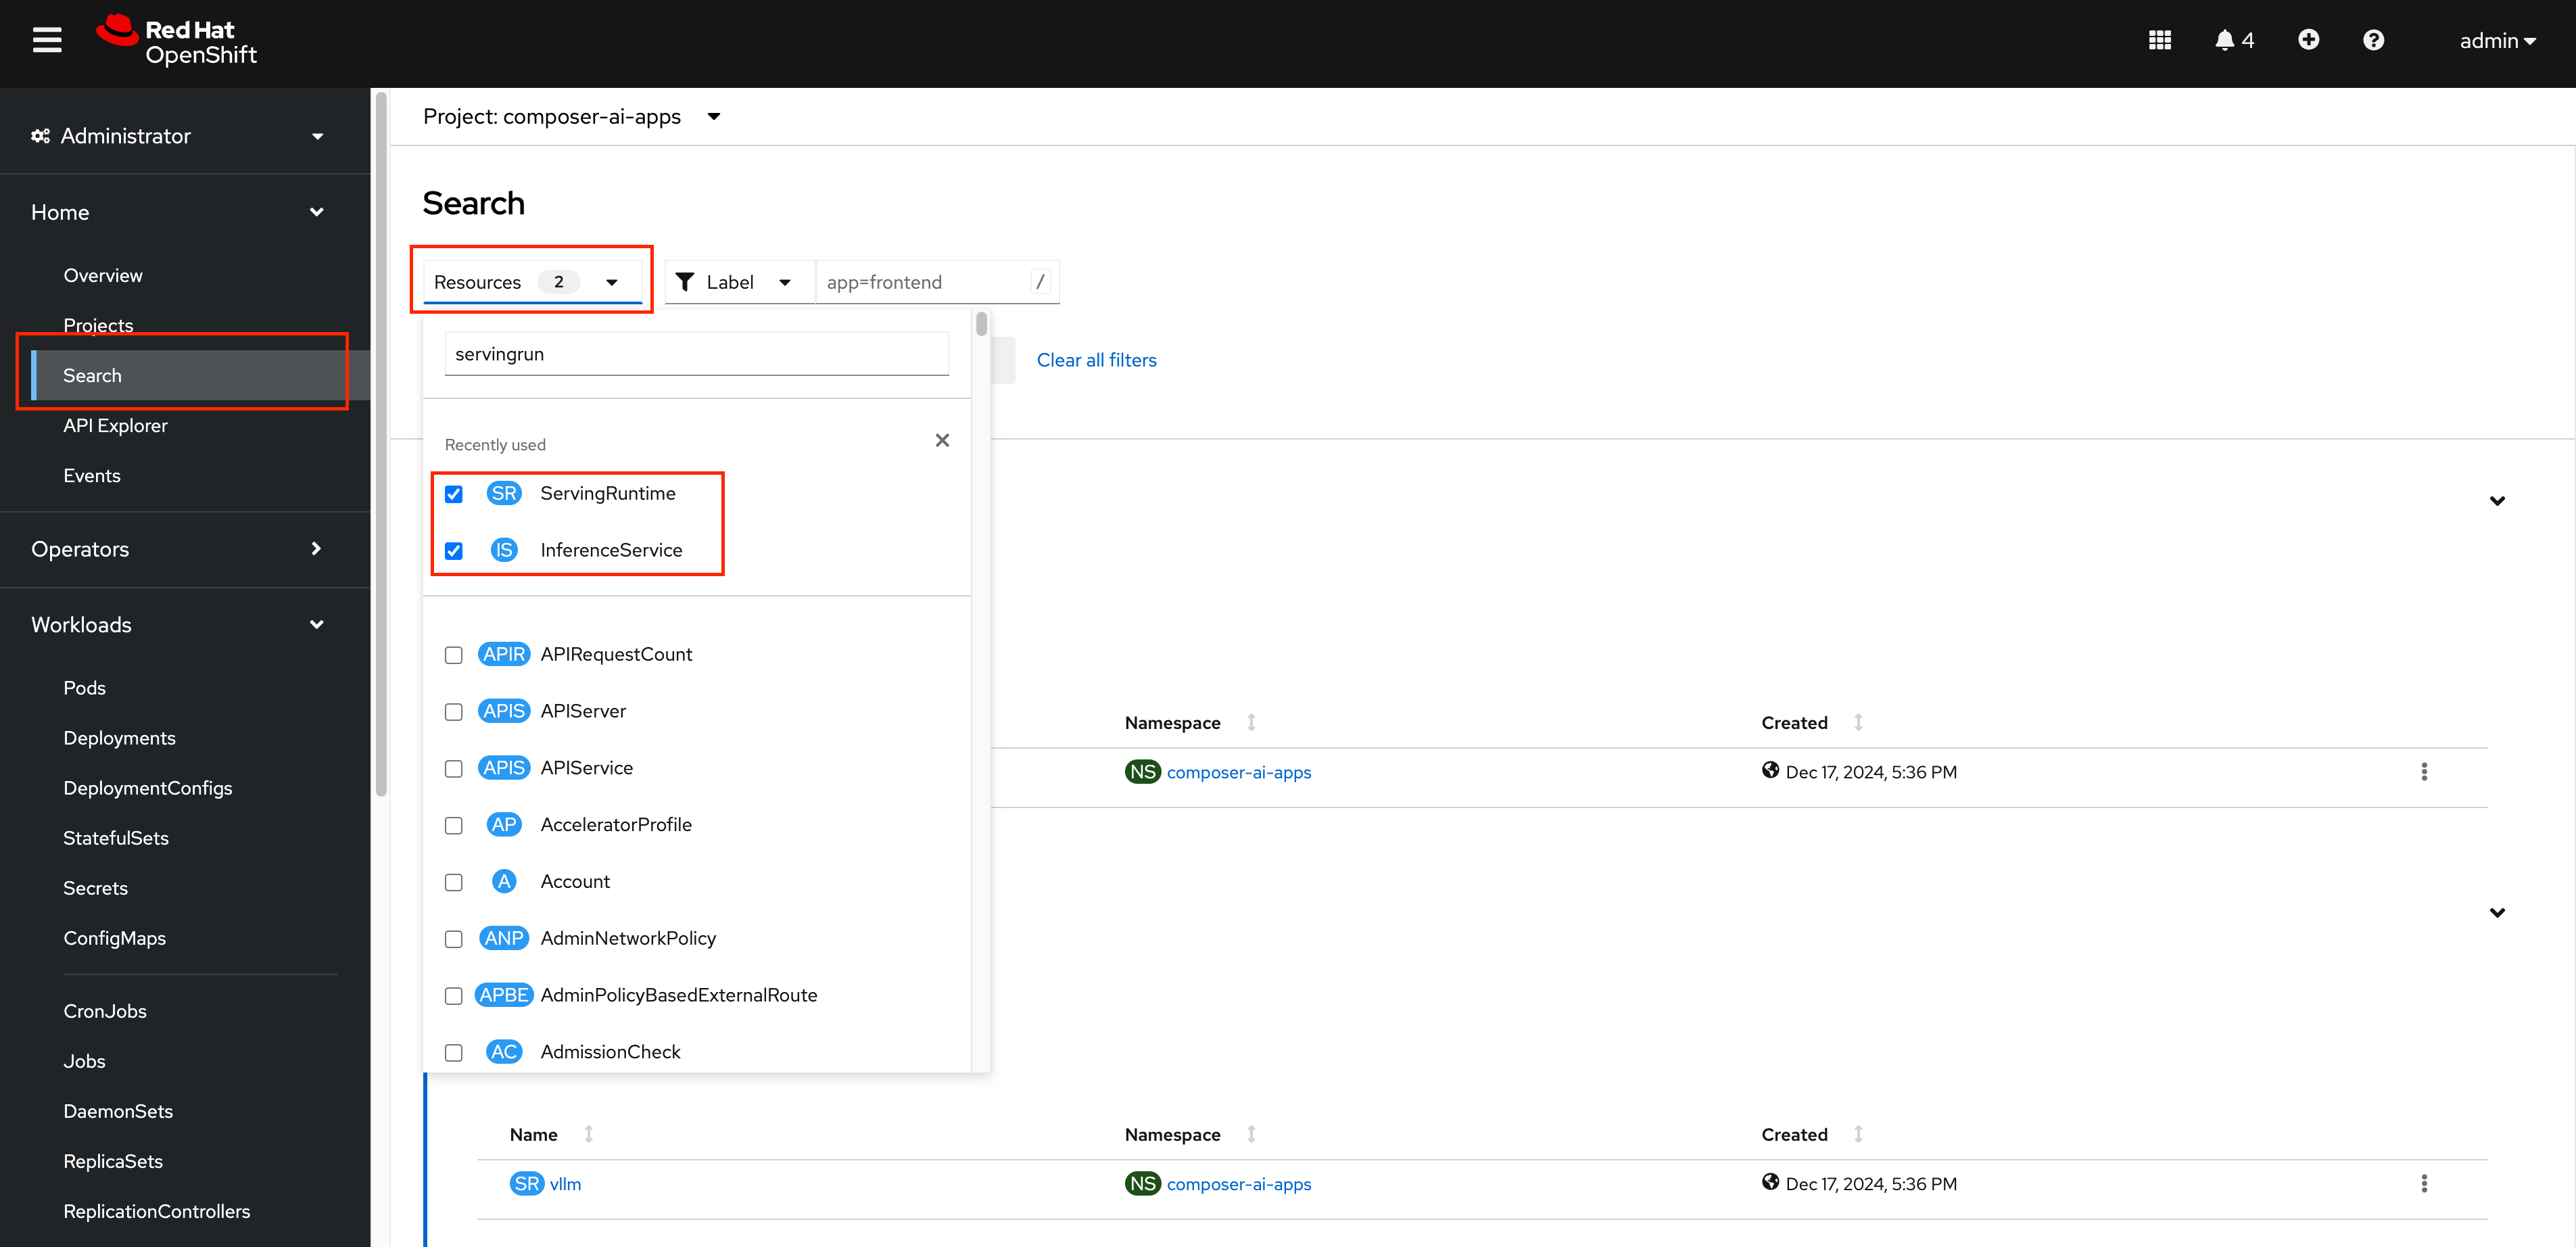
Testing vLLM Endpoints
Accessing the Swgger Docs
To start will test our vLLM endpoint to make sure it is responding by accessing the Swagger docs for vLLM.
-
To start we will need to find the endpoint URL for the served model. From the OpenShift AI Dashboard, navigate to the Models tab and click on the
Internal and external endpoint detailsto find the URL.
Our vLLM instance does not create a normal OpenShift route so you won’t find it under the normal
Networking>Routesmenu.Instead it creates a KNative Serving Route object which can be found in
Serverless>Servingor with the following:oc get routes.serving.knative.dev -n composer-ai-apps
-
Use the
copyoption for the route found in the previous step and paste it into a new tab with/docsat the end to access a FastAPI Swagger Docs page for vLLM. -
Use the
Try it outoption of theGET /v1/modelsendpoint to list the models being deployed by this server. Note that the id for our model matches the name of the model server we created in the OpenShift AI Dashboard.
|
Running into a 404 error on the OCP web console after trying this? Let us know to help identify a bug. Possible fixes include switching wifi networks, switching to Incognito mode, or deleting cookies and cache. |
Testing the model from Composer AI UI
Now that we have done some basic testing we are ready to try the model from inside of the Composer AI Studio UI.
Our Composer instance is already setup to point to the vLLM endpoint we created so no additional configuration is required.
-
Find the
chatbot-uiRoute from the OpenShift Web Console and open it as a new tab.
-
Click on the Assistants on the left hand side, and choose the option to
Create Assistant. Enter the name "Default Assistant", select the default LLM, and clickCreatewithout editing any of the fields. -
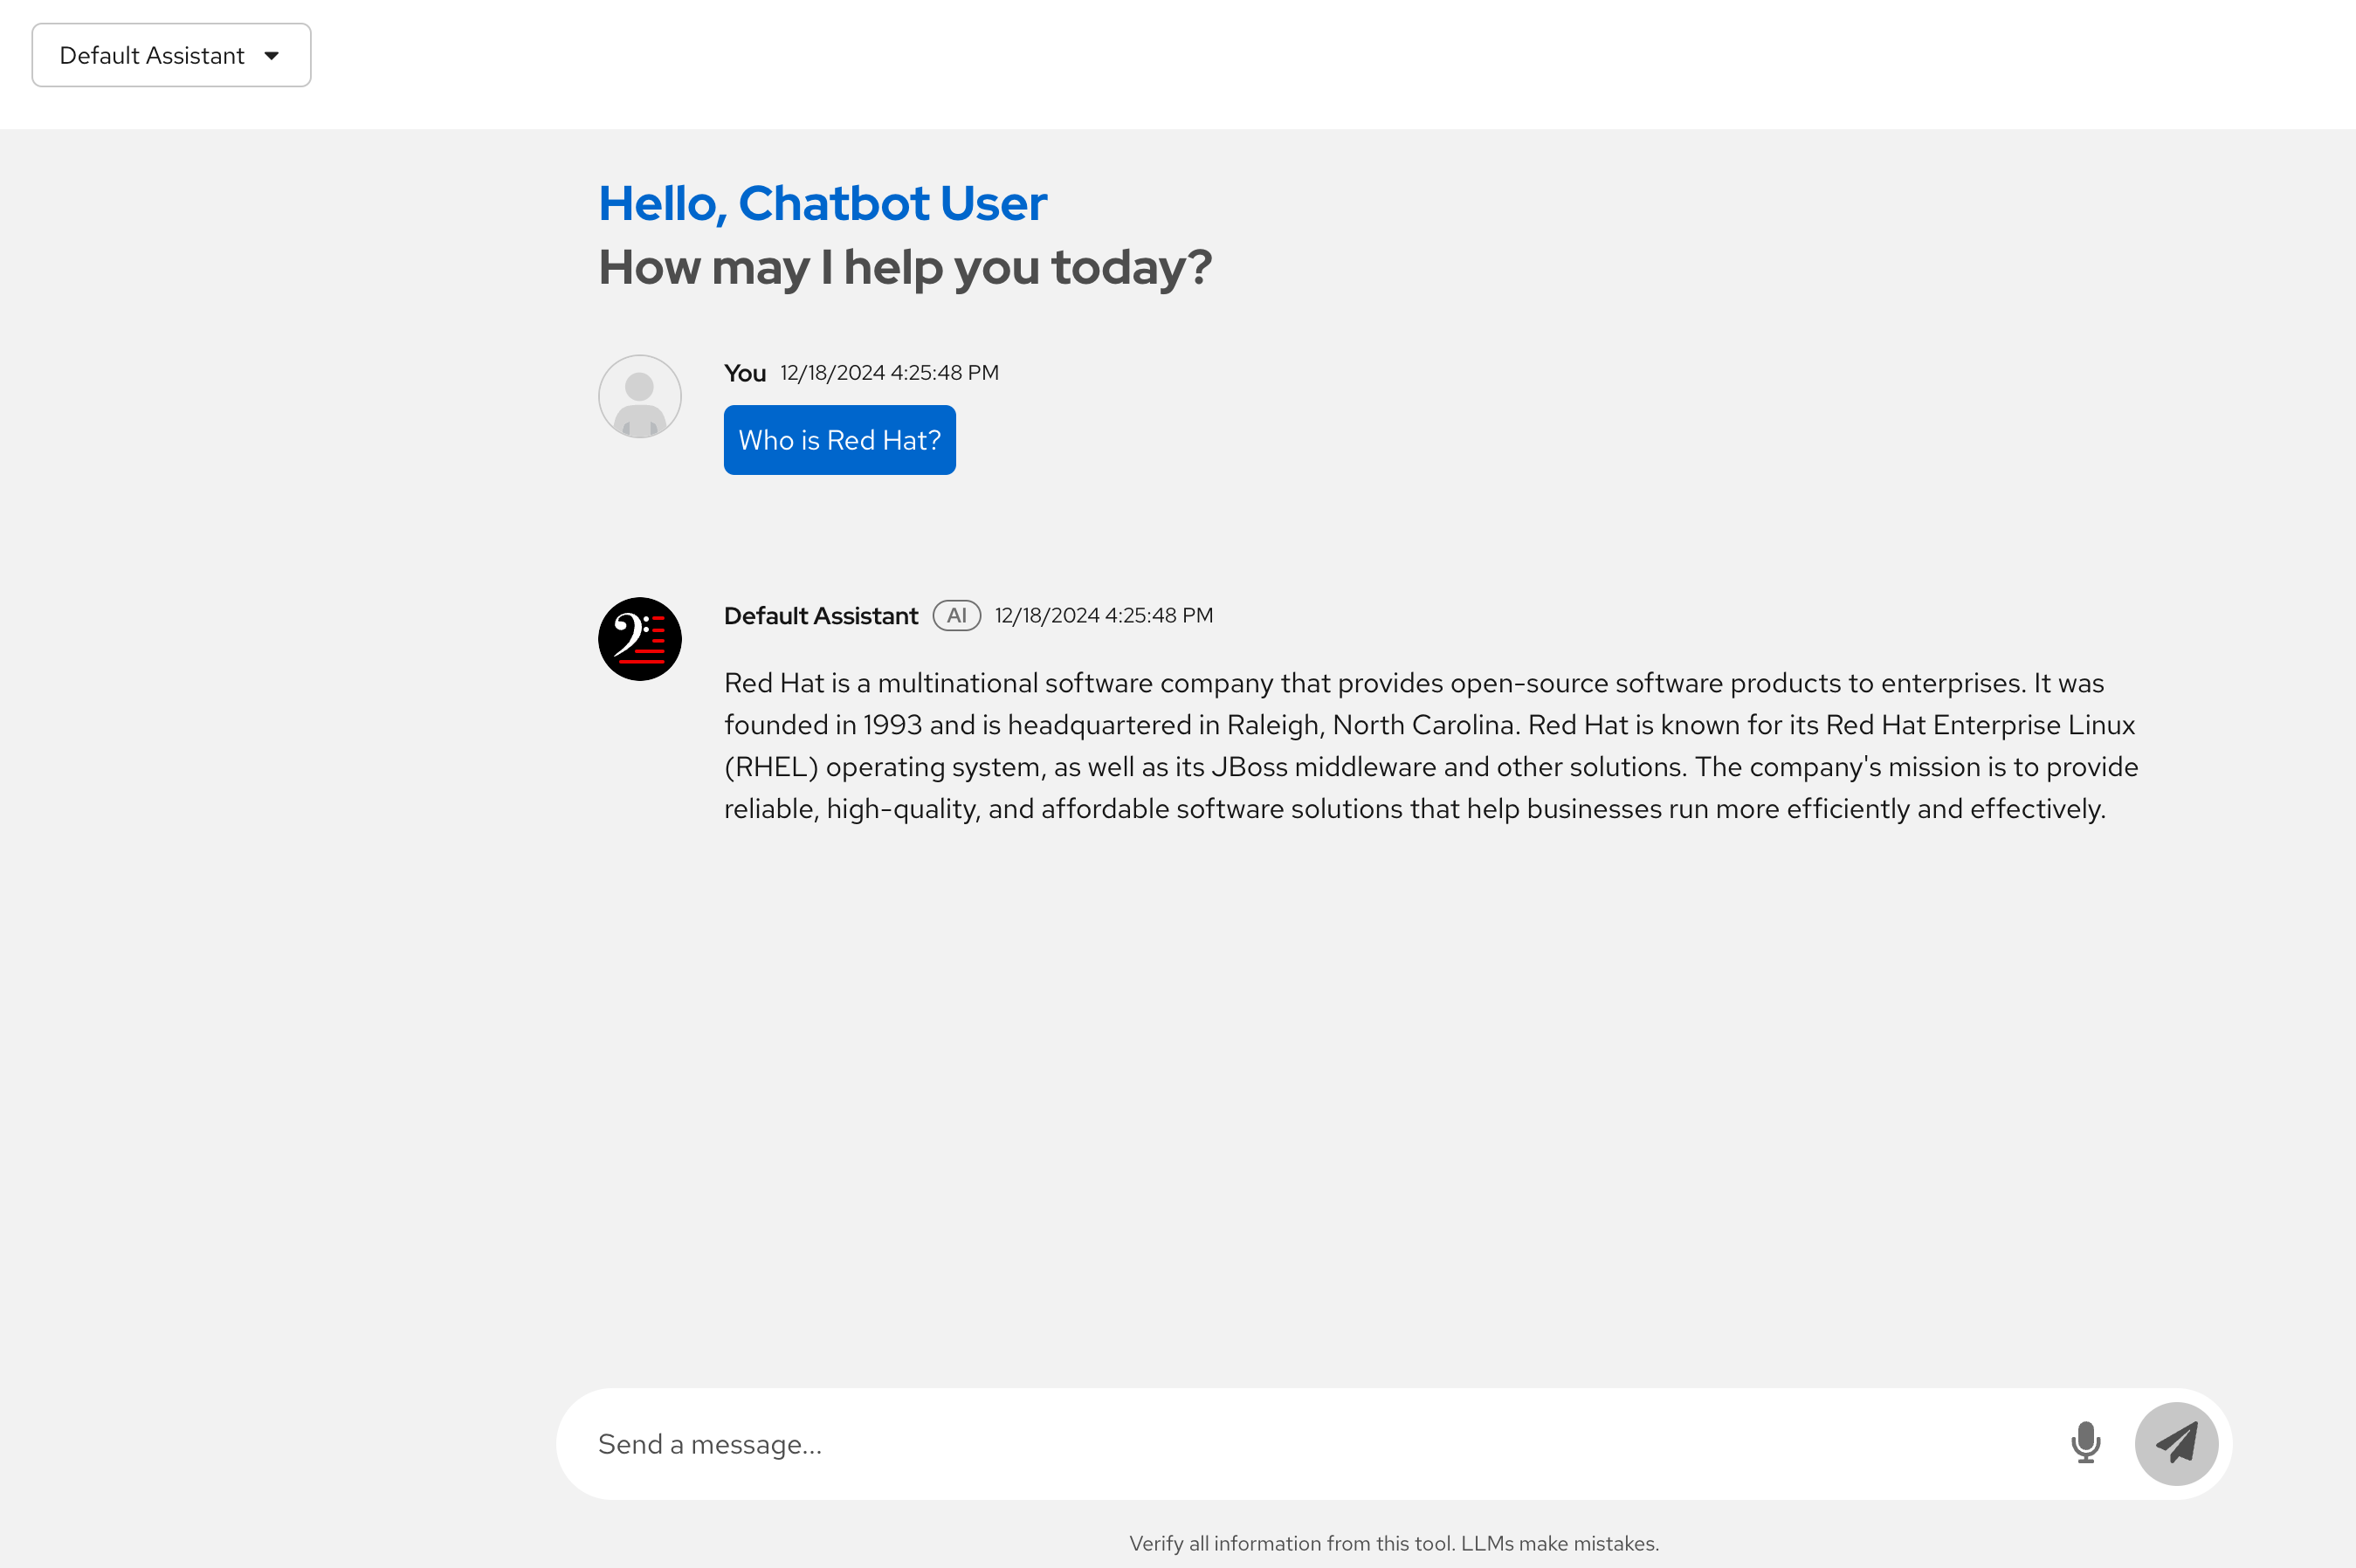
Ask a question in the UI to verify that the LLM is able to respond.
