Solution Addressing The Challenges
Addressing Challenge:
As an administrator, streamlining the integration of the ChatOps system with Event-Driven Ansible Architecture proves to be a seamless process. This integration offers a significant advantage for product managers, enabling them to effortlessly issue commands directly from the chat system. This functionality empowers product managers to swiftly trigger changes for specific categories, such as applying discounts or disabling a particular category on the online retail website.
Solution:
-
Open Visual Studio Code to explore and gain a better understanding of the Ansible playbooks and Event-driven Ansible rulebooks utilized in the 'Solution Addressing The Challenges'.
-
Find the login details for accessing Visual Studio Code below:
-
Vscode Console Url: {codeserver_url}[window=_blank]
-
Password: {codeserver_password}
 Figure 1. VScode Login Page
-
-
Navigate to the 'event-driven-ansible-and-chatops' directory, then expand the 'playbooks' directory. Click on 'chatops-action.yml' to explore the playbook, which will be used to create a job template in the Automation Controller. The template will be triggered by Event-driven Ansible, executing actions on a product when messages are posted by the product manager in RocketChat.
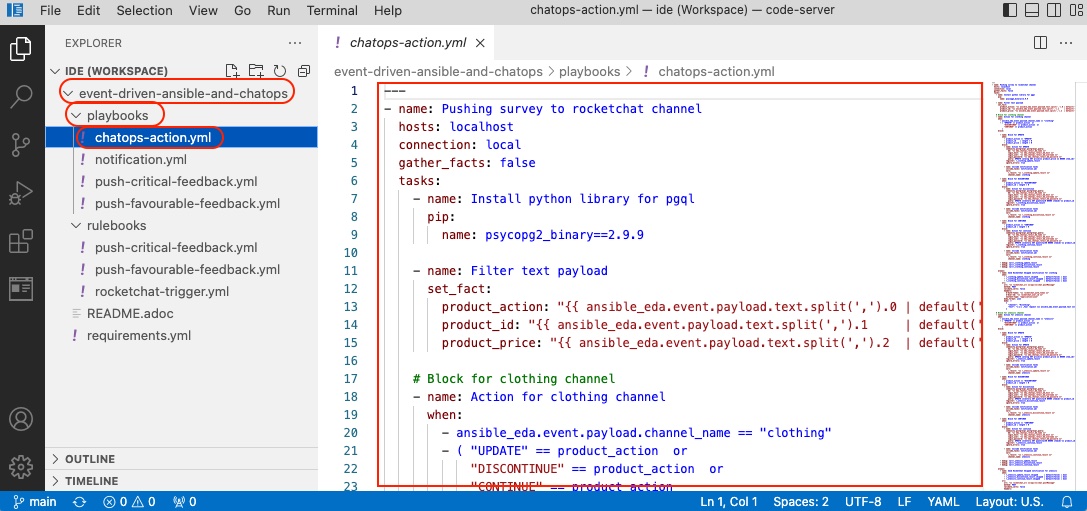 Figure 2. VScode Dashboard Page
 -
Head to the 'event-driven-ansible-and-chatops' directory, then expand the 'rulebooks' directory. Click on 'rocketchat-trigger.yml' to delve into the rulebook. This rulebook will be instrumental in creating a Rulebook activation in Event-driven Ansible. When messages are posted by the product manager in RocketChat, this activation will, in turn, trigger the Automation Controller job template.
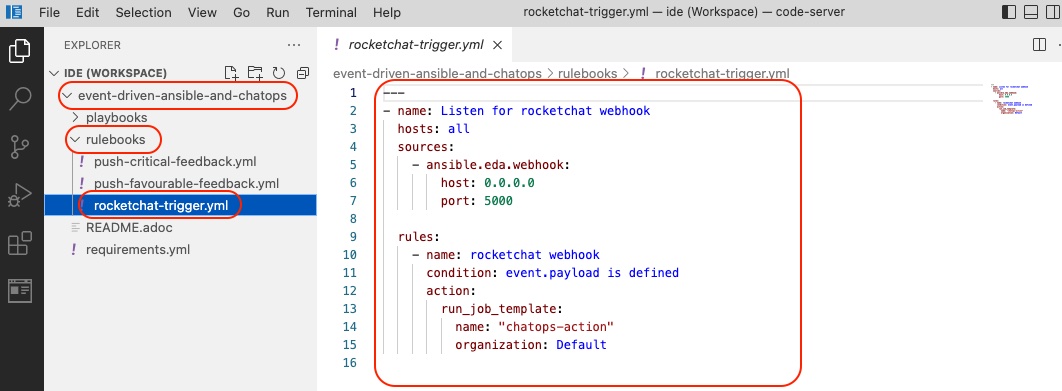 Figure 3. VScode Dashboard Page
-
-
Access the Automation Controller to create a Job Template that facilitates the execution of actions on products within the Smart Retail Application. This should be triggered by messages posted by the product manager in RocketChat. The necessary details are provided below:
-
Find the login details for accessing Automation Controller below:
You can skip the login process if you’re already signed in. -
Automation Controller: {aap_controller_web_url}[window=_blank]
-
Username: {aap_controller_admin_user}
-
Password: {aap_controller_admin_password}
-
-
Navigate to Templates and proceed to create a new template with the following details:
-
Name: chatops-action
-
Job Type: Run
-
Inventory: Demo Inventory
-
Project: event-driven-ansible-and-chatops
-
Playbook: playbooks/chatops-action.yml
-
Credentials:
-
Selected Category: OpenShift or Kubernetes API Bearer Token
-
Select: OpenShift Credentials
-
-
Variables: Select Checkbox: [x] Prompt on Launch
-
Variables: Kindly copy and paste the provided variables into the YAML format below for ease of use and implementation.
eda_chatops_retail_db_host: globex-db.globex.svc.cluster.local
eda_chatops_retail_db_name: globex
eda_chatops_retail_db_password: globex
eda_chatops_retail_db_username: globex
rocketchat_url: {rocketchat_url}
rocketchat_auth_token: {rocketchat_auth_token}
rocketchat_user_id: {rocketchat_user_id}
-
Click Save button to save.
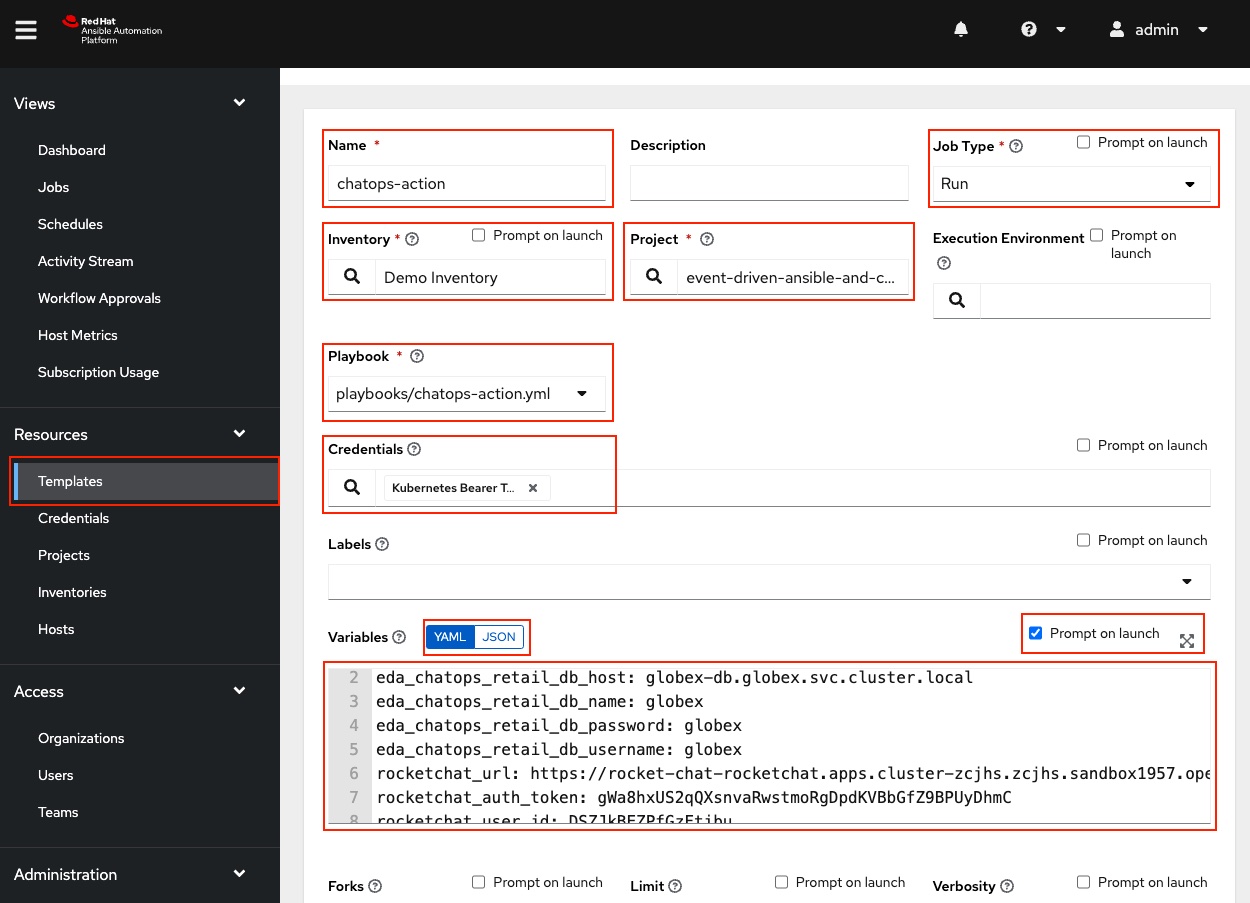 Figure 4. Automation Controller Job Template Page
 -
-
-
Access Event-driven Ansible to configure Rulebook Activation, facilitating the automatic triggering of an Ansible Controller Job Template upon submitting feedback in the Smart Retail Application. Please refer to the details provided below:
-
Find the login details for accessing Event-driven Ansible below:
You can skip the login process if you’re already signed in. -
Event-driven Ansible: {eda_controller_web_url}[window=_blank]
-
Username: {eda_controller_admin_user}
-
Password: {eda_controller_admin_password}
-
-
Navigate to Rulebook Activation and proceed to add a new rulebook following the details provided below:
-
Name: rocketchat-trigger
-
project: AI Based Smart Retail
-
Rulebook: rocketchat-trigger.yml
-
Decision environment: de-kafka-scram
-
Restart policy: On failure
-
Rulebook activation enabled?: Enabled
-
Click Create rulebook activation to create rulebook
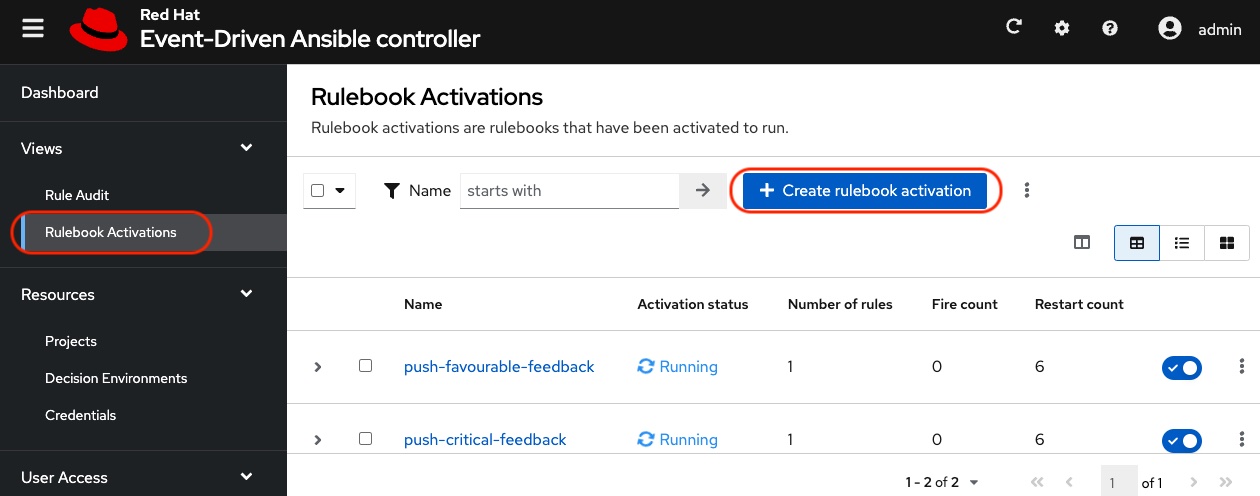 Figure 5. Event-driven Ansible Rulebook Activations Page
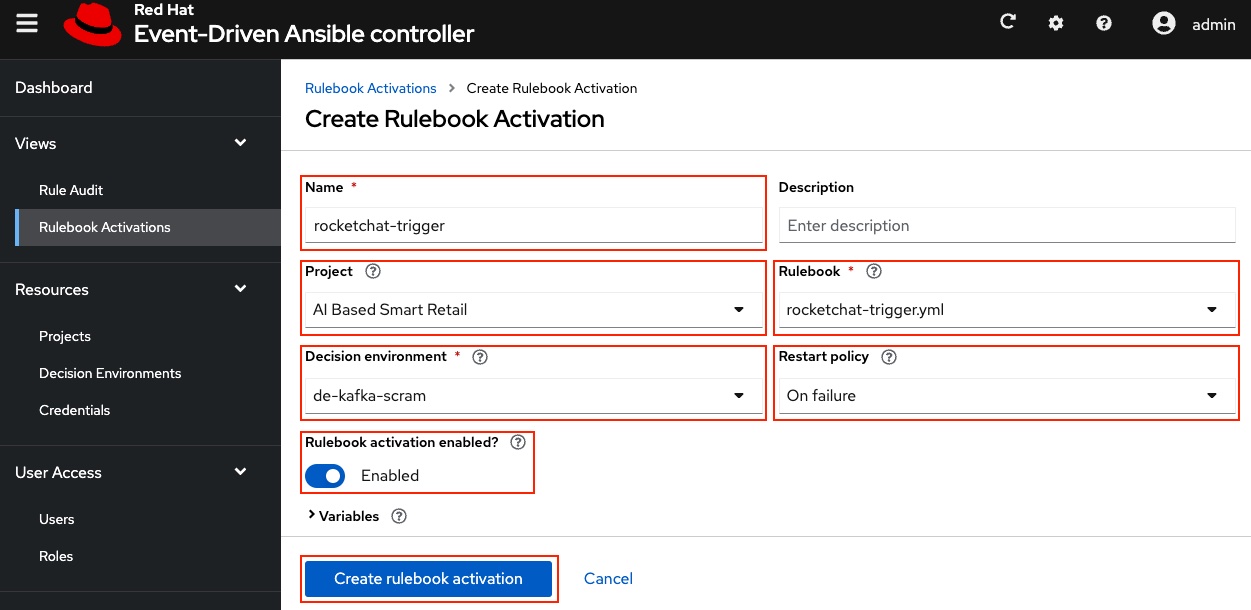 Figure 6. Event-driven Ansible Create Rulebook Activation Page
 -
-
-
Access the OpenShift Console to configure routing for the Event-driven Ansible rulebook activation created in the previous step. Refer to the details provided below:
-
Find the login details for accessing Openshift Console below:
-
Console URL: {openshift_console_url}[window=_blank]
-
Username: {openshift_cluster_admin_username}
-
Password: {openshift_cluster_admin_password}
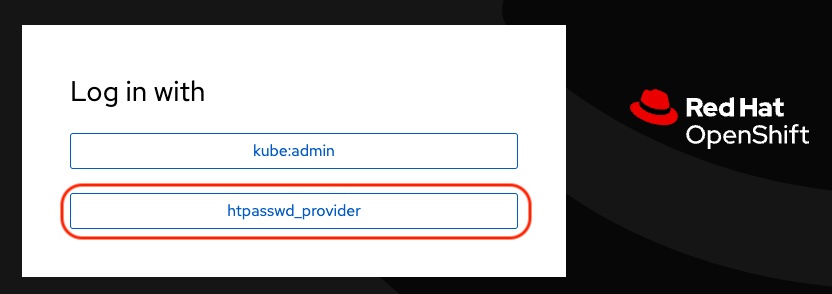 Figure 7. OpenShift Console Login Page
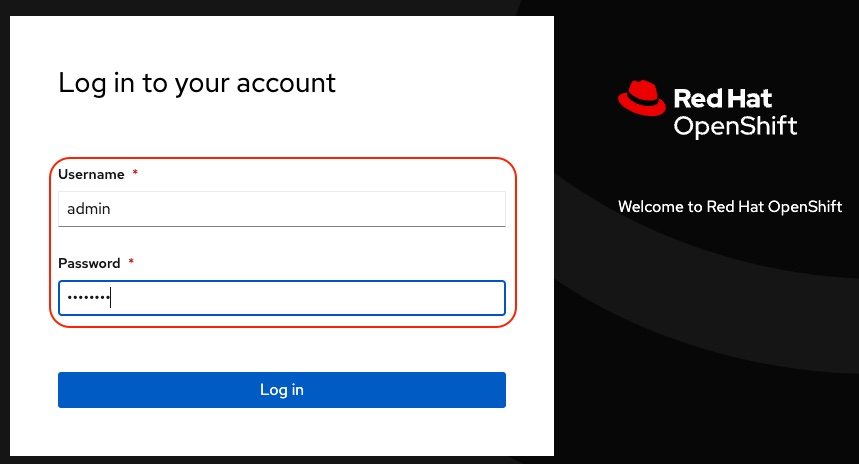 Figure 8. OpenShift Console Login Page
 -
-
Navigate to the 'Networking' section, select 'Route,' change the project to
aap, and then click on the 'Create Route' button to configure the Event-driven Ansible route.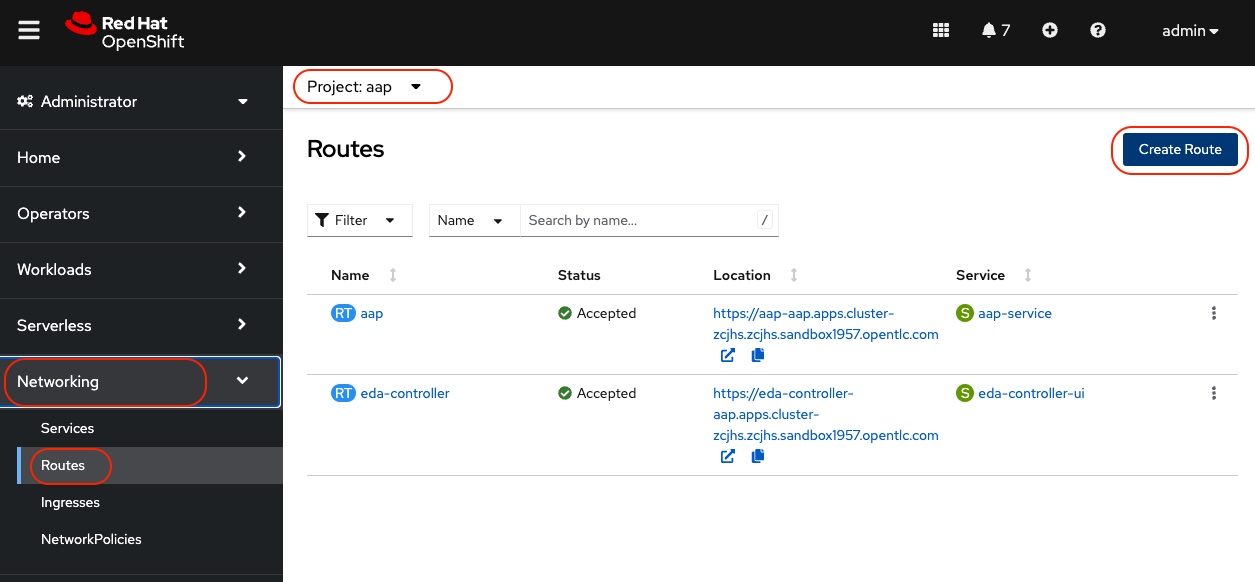 Figure 9. OpenShift Route Page
 -
To set up an Event-driven Ansible route for the 'rocketchat-trigger' rulebook, follow the details provided below:
-
Name: eda-trigger
-
Service: activation-job-X-X-5000
-
Target port: 5000 → 5000 (TCP)
-
Click Create button to save.
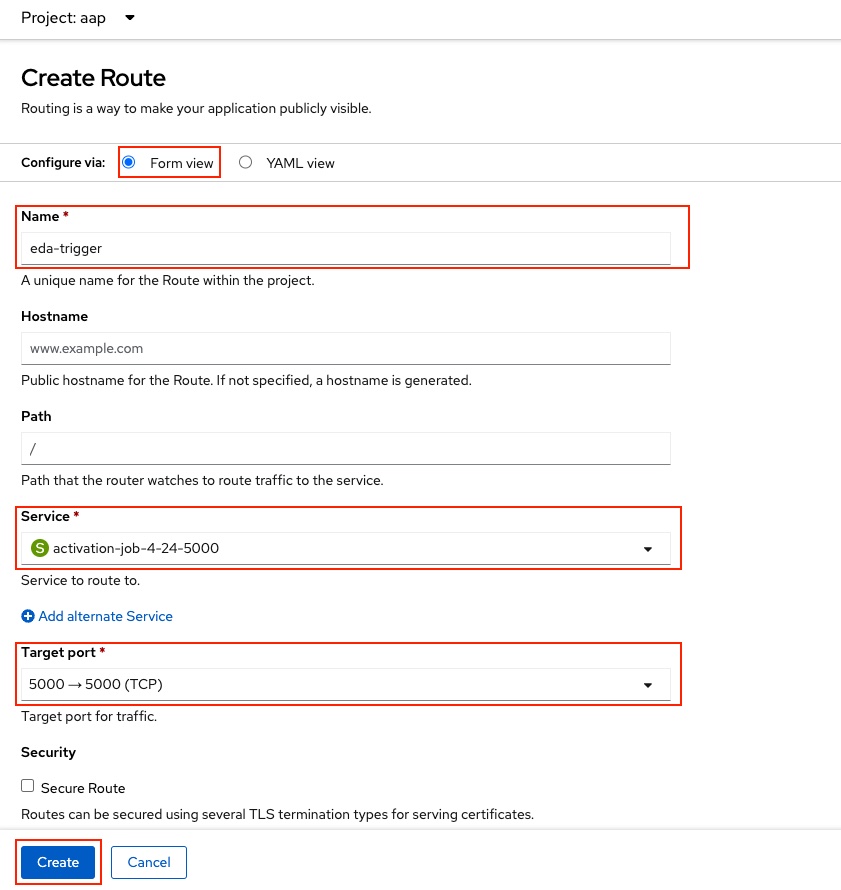 Figure 10. OpenShift Route Page
 -
-
Copy the 'eda-trigger' route, which will serve as the webhook URL for use in RocketChat.
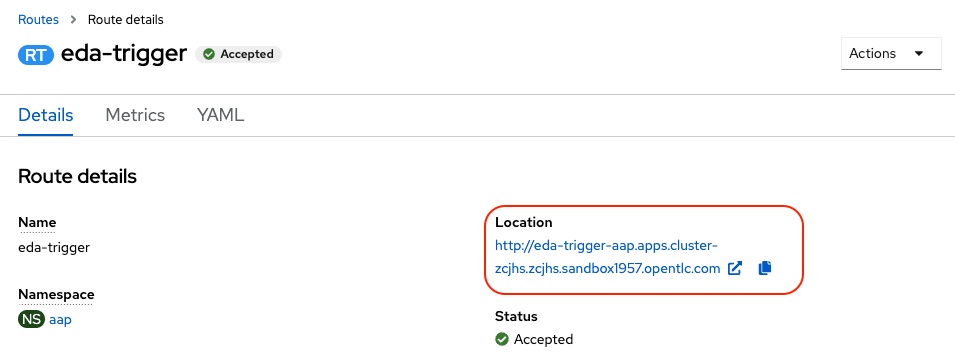 Figure 11. OpenShift Route Page
-
-
Access RocketChat to establish a webhook for Event-driven Ansible, following the details provided below:
-
Find the login details for accessing RocketChat below:
Kindly log out and log back in as an admin if you are currently signed in. This will ensure that you have the appropriate access and privileges for the next steps -
RocketChat Url: {rocketchat_url}[window=_blank]
-
Username: admin
-
Password: {rocketchat_admin_password}
-
-
Navigate to administration.
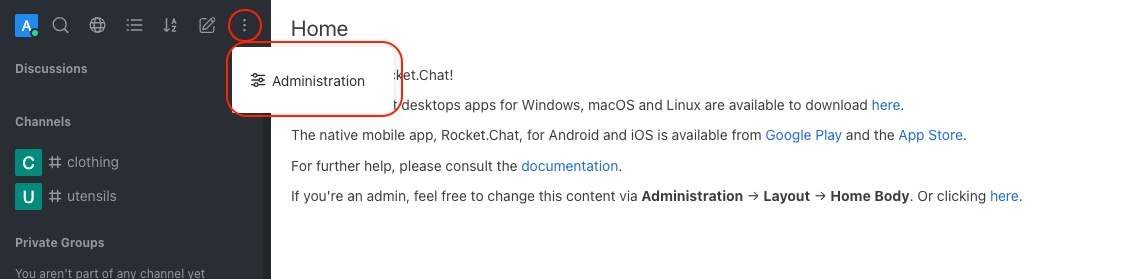 Figure 12. RocketChat Administration Page
 -
Navigate to the 'Integration' section, and click on the 'New Integration' button to create a webhook for outgoing messages.
If nothing appears upon the initial click, try clicking on other links and then return to the 'Integration' section to refresh and display the content. 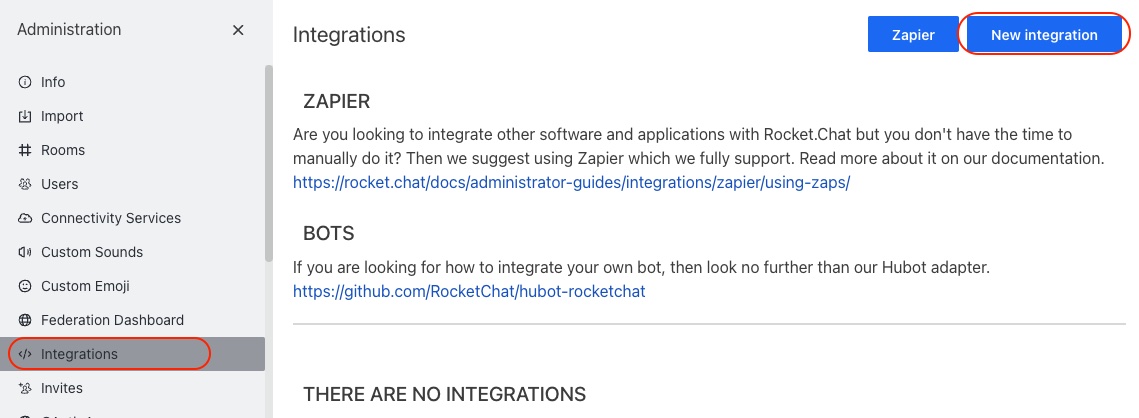 Figure 13. RocketChat Webhook Page
 -
Select Outgoing WebHook.
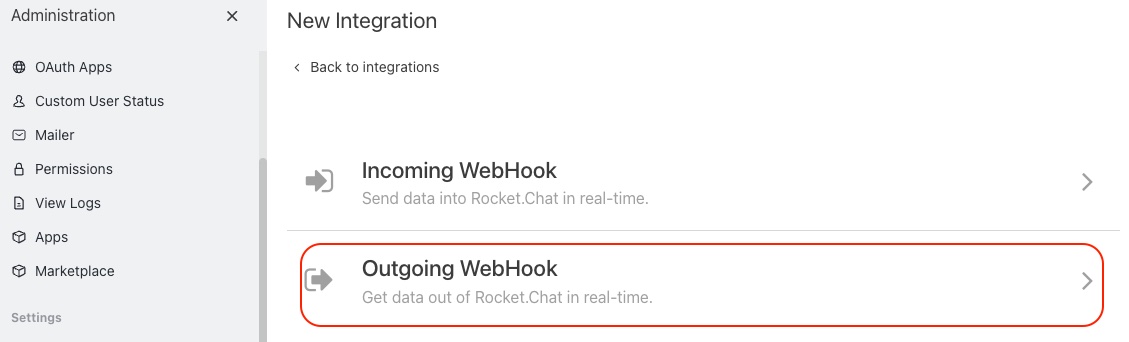 Figure 14. RocketChat Webhook Page
 -
Select Message Sent from drop down list.
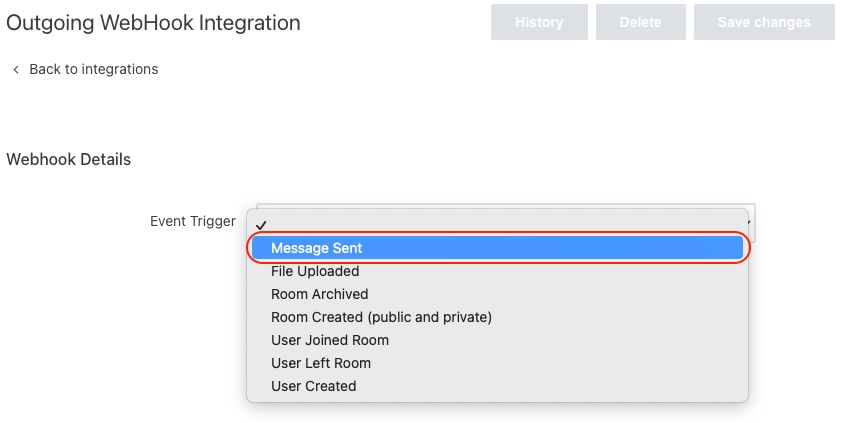 Figure 15. RocketChat Webhook Page
 -
Please provide the following details:
-
Enabled: True
-
Name (optional): Event-driven Ansible and ChatOps
-
Channel: #clothing,#utensils
-
Trigger Words: update,continue,discontinue
-
URLs: <Paste eda-trigger route created in openshift>
-
Impersonate User: True
-
Post as: admin
-
Keep the remaining settings as default.
-
Save your changes by clicking on the 'Save Changes' button in the upper right corner.
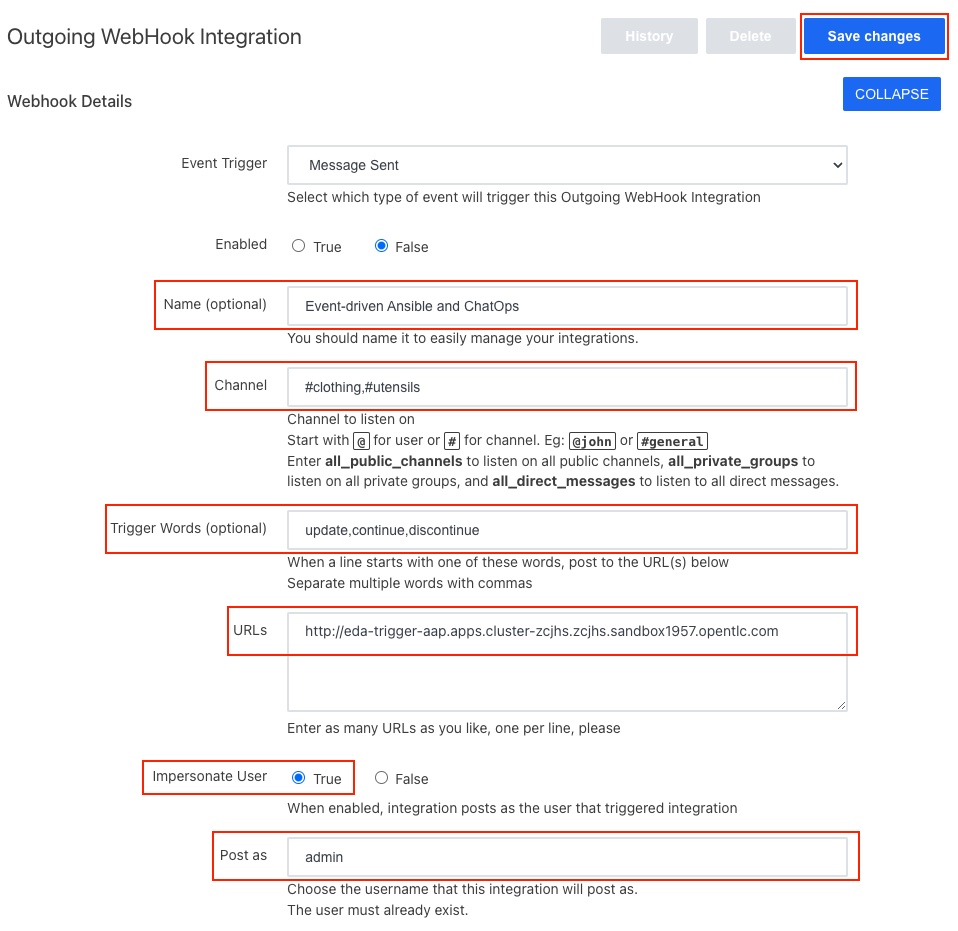 Figure 16. RocketChat Webhook Page
 -
-
Summary:
As an administrator, seamlessly integrating the ChatOps system with Event-Driven Ansible Architecture proves advantageous for product managers. This streamlined process empowers them to issue commands directly from the chat system, enabling swift changes for specific categories, from applying discounts to disabling particular sections on the online retail website.
Let’s move forward to the next page where we’ll delve into the analysis of live messages and the timely execution of actions through ChatOps commands