Chapter 3: Red Hat Trusted Application Pipeline to the Rescue
-
In the final chapter of our story, you demonstrate to the team how the Red Hat Trusted Application Pipeline (RHTAP) and Red Hat security tools can effectively tackle their security concerns, equipping the organization with a Trusted Software Supply Chain.
Demonstrating the Secure Build Process
-
You switch to the Red Hat Developer Hub (RHDH) dashboard, ready to demonstrate the new GPT with the security enhancements.
Running the Secure GPT
-
You click Create in the left menu and then select the Choose button for the Secured Quarkus Service Software Supply Chain GPT.
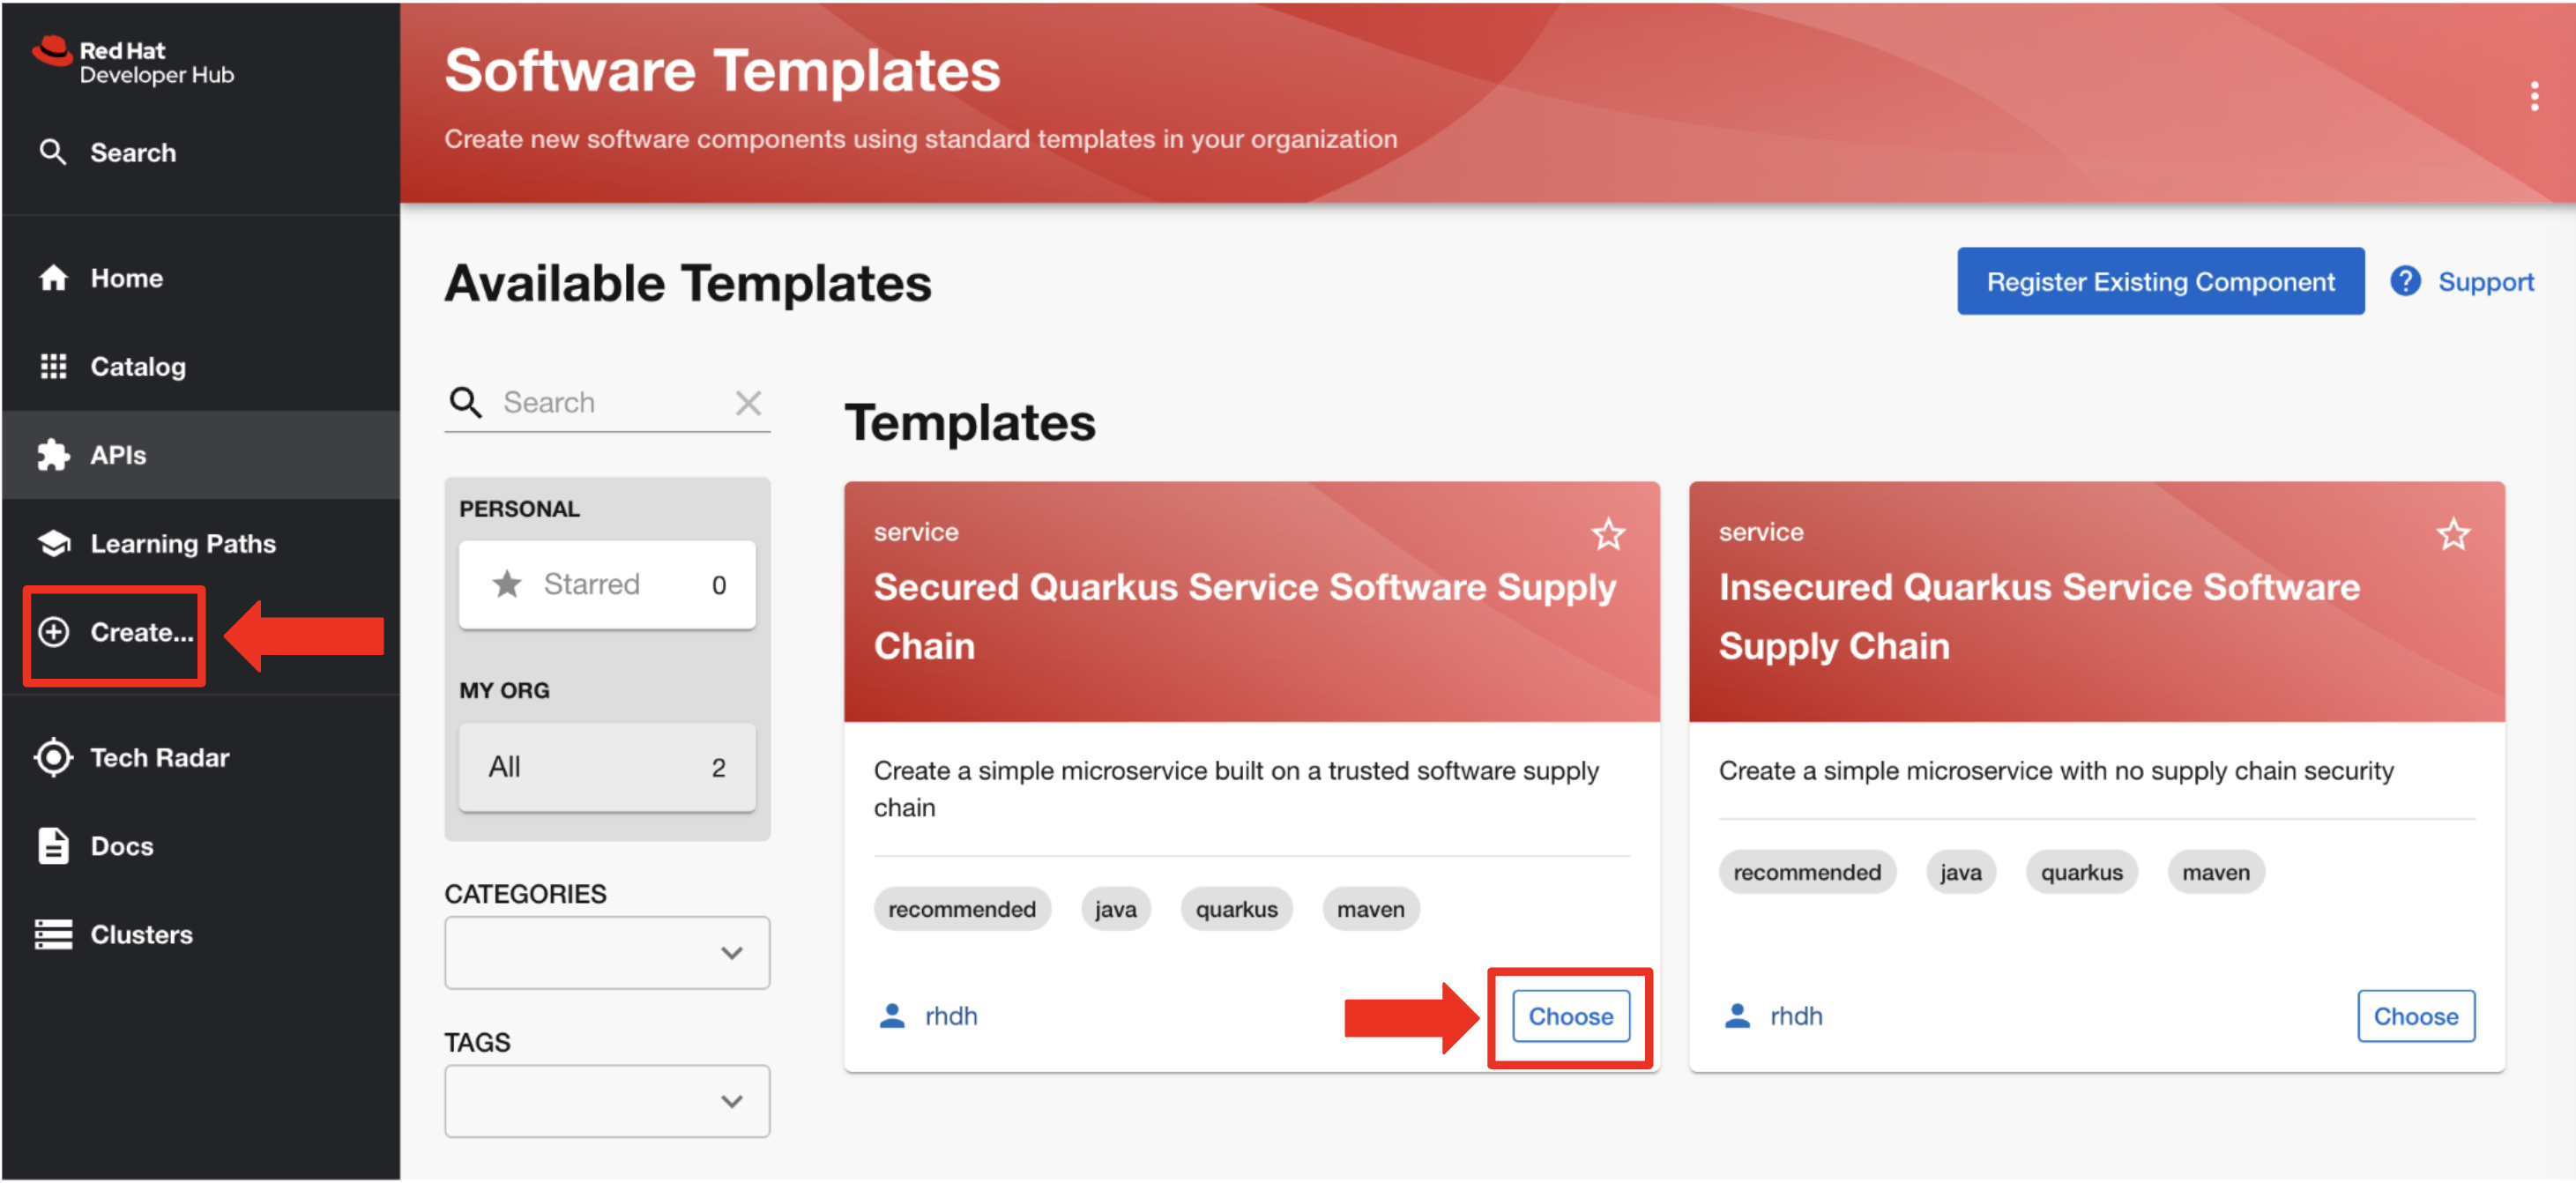
-
You keep the default values and click the Next button on the first two forms.
-
Before you click the Review button on the third form, you show the team that Verify Commits is set to enabled in this form.
-
This is because this GPT is using the Trusted Artifacts Signer to verify that code commits are signed.
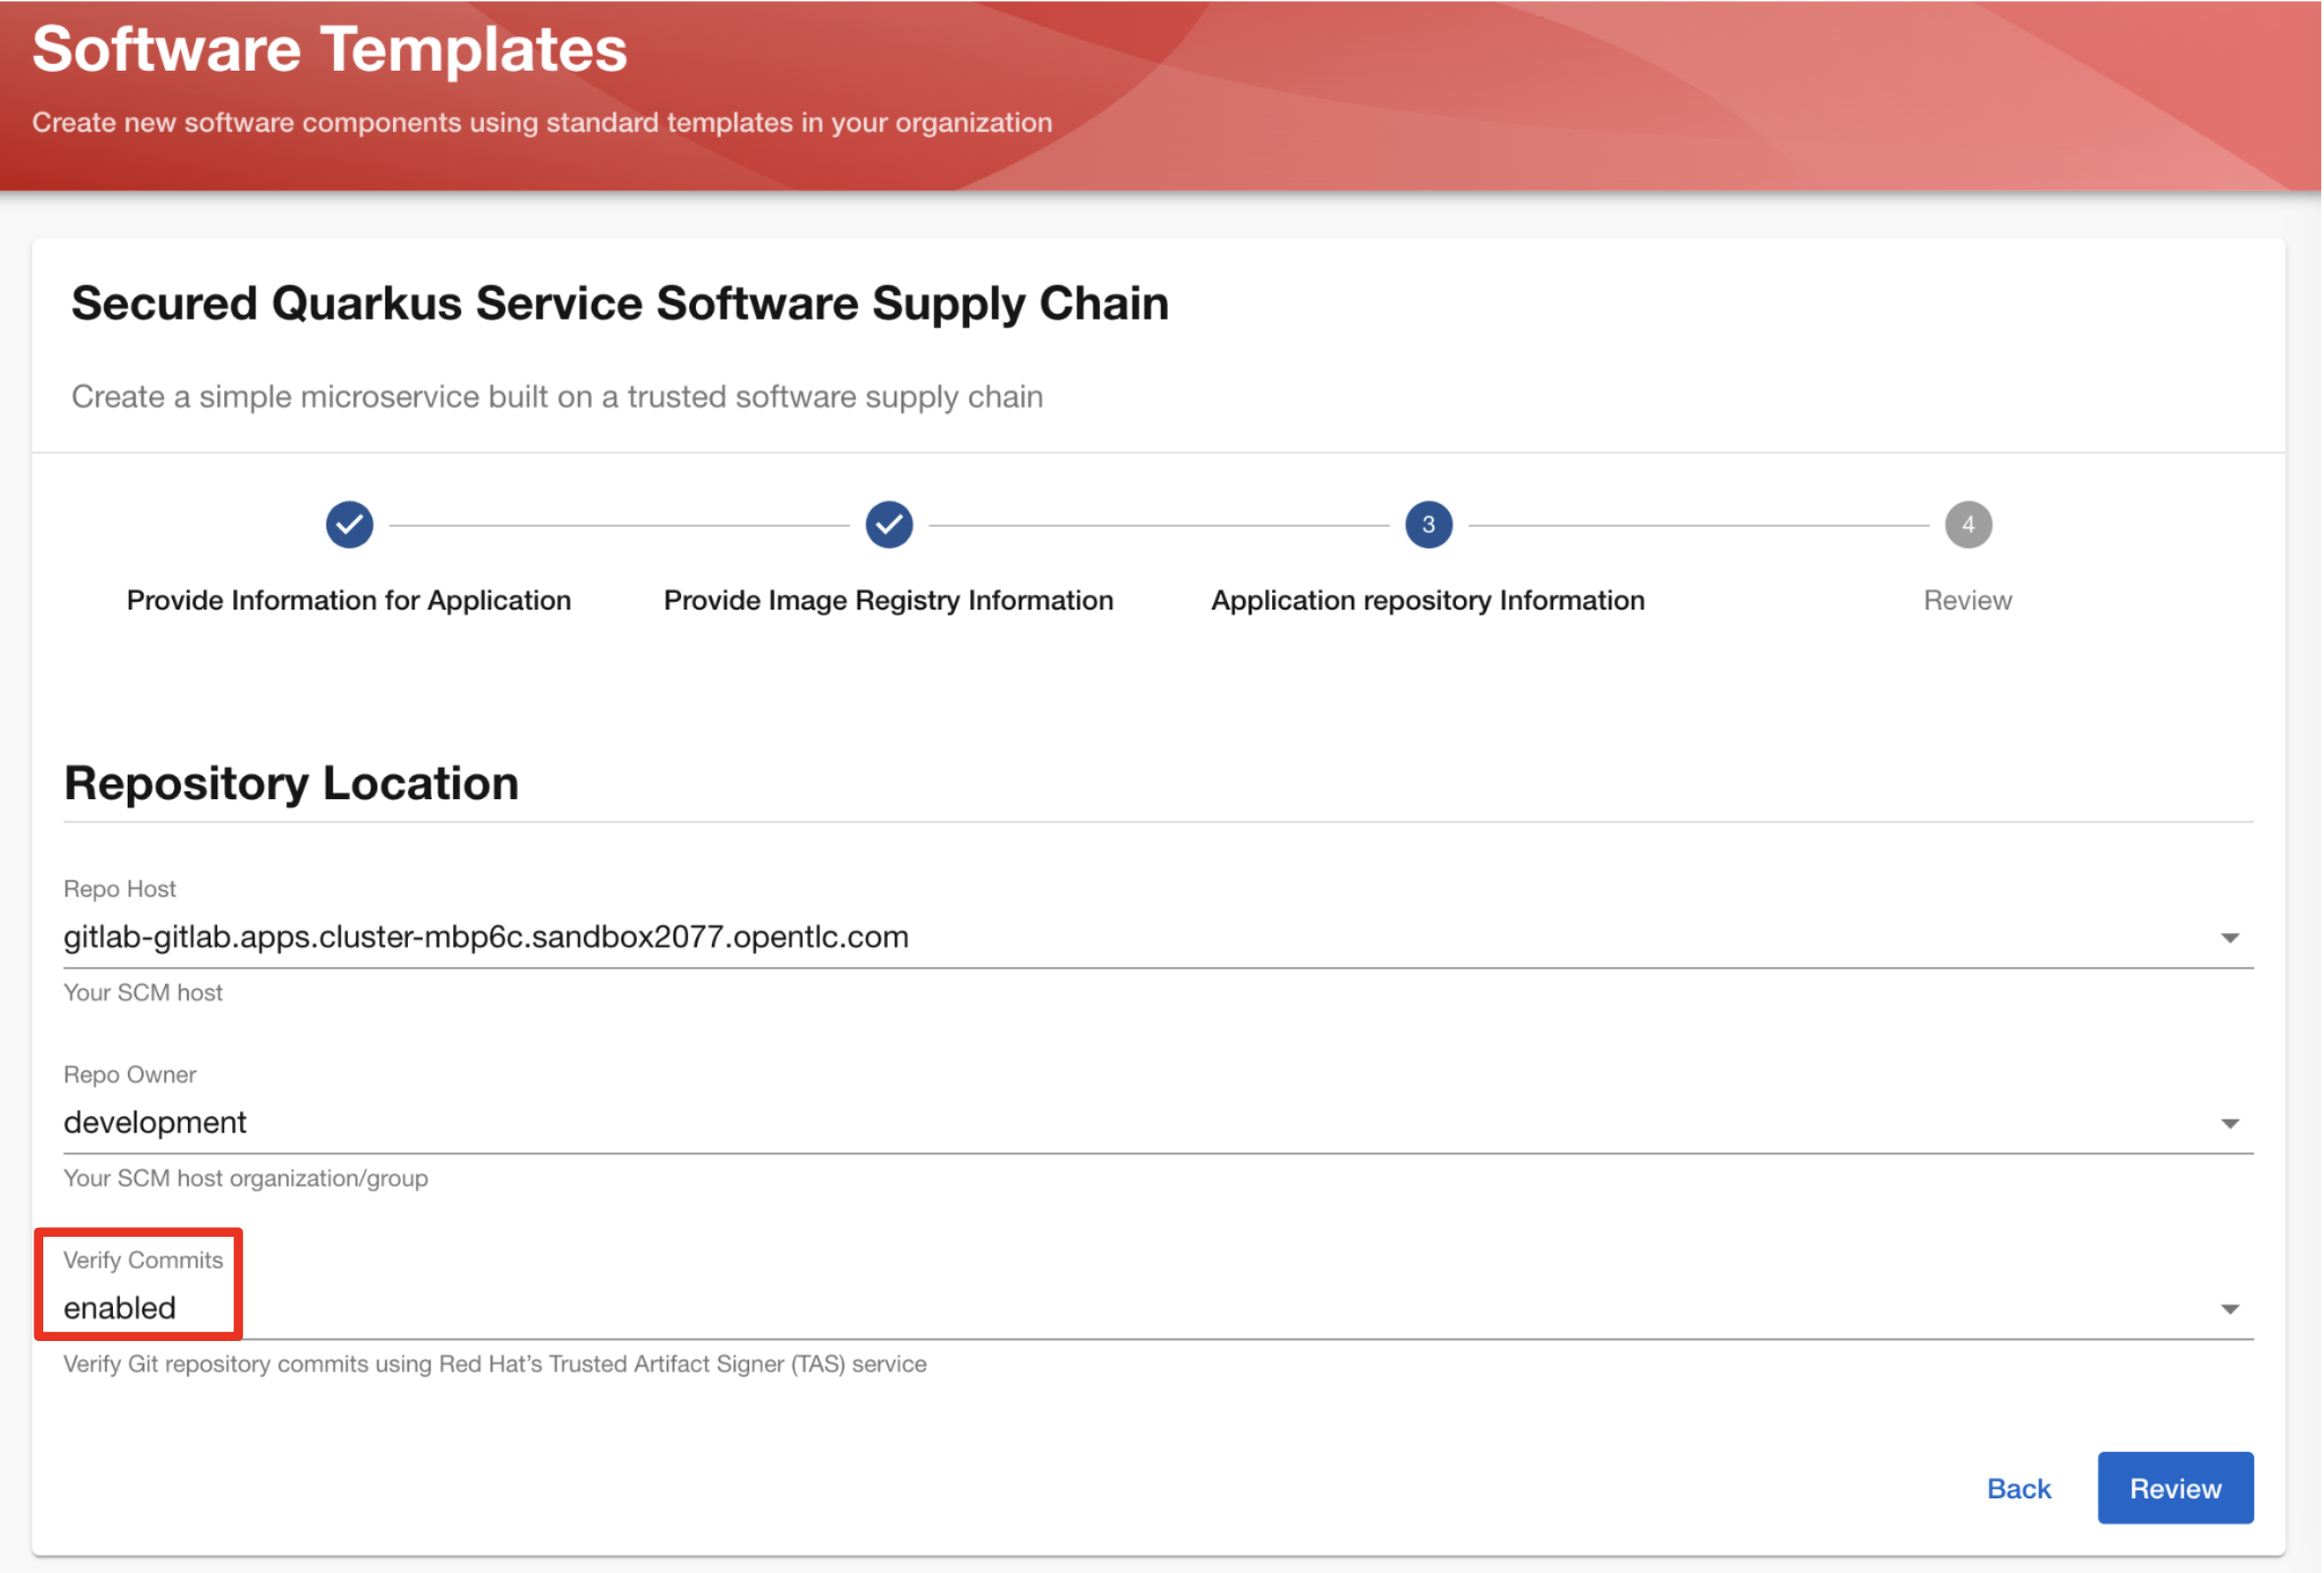
-
You click the Review button.
-
After quickly reviewing the summary and seeing that everything looks great, you proceed to click the Create button.
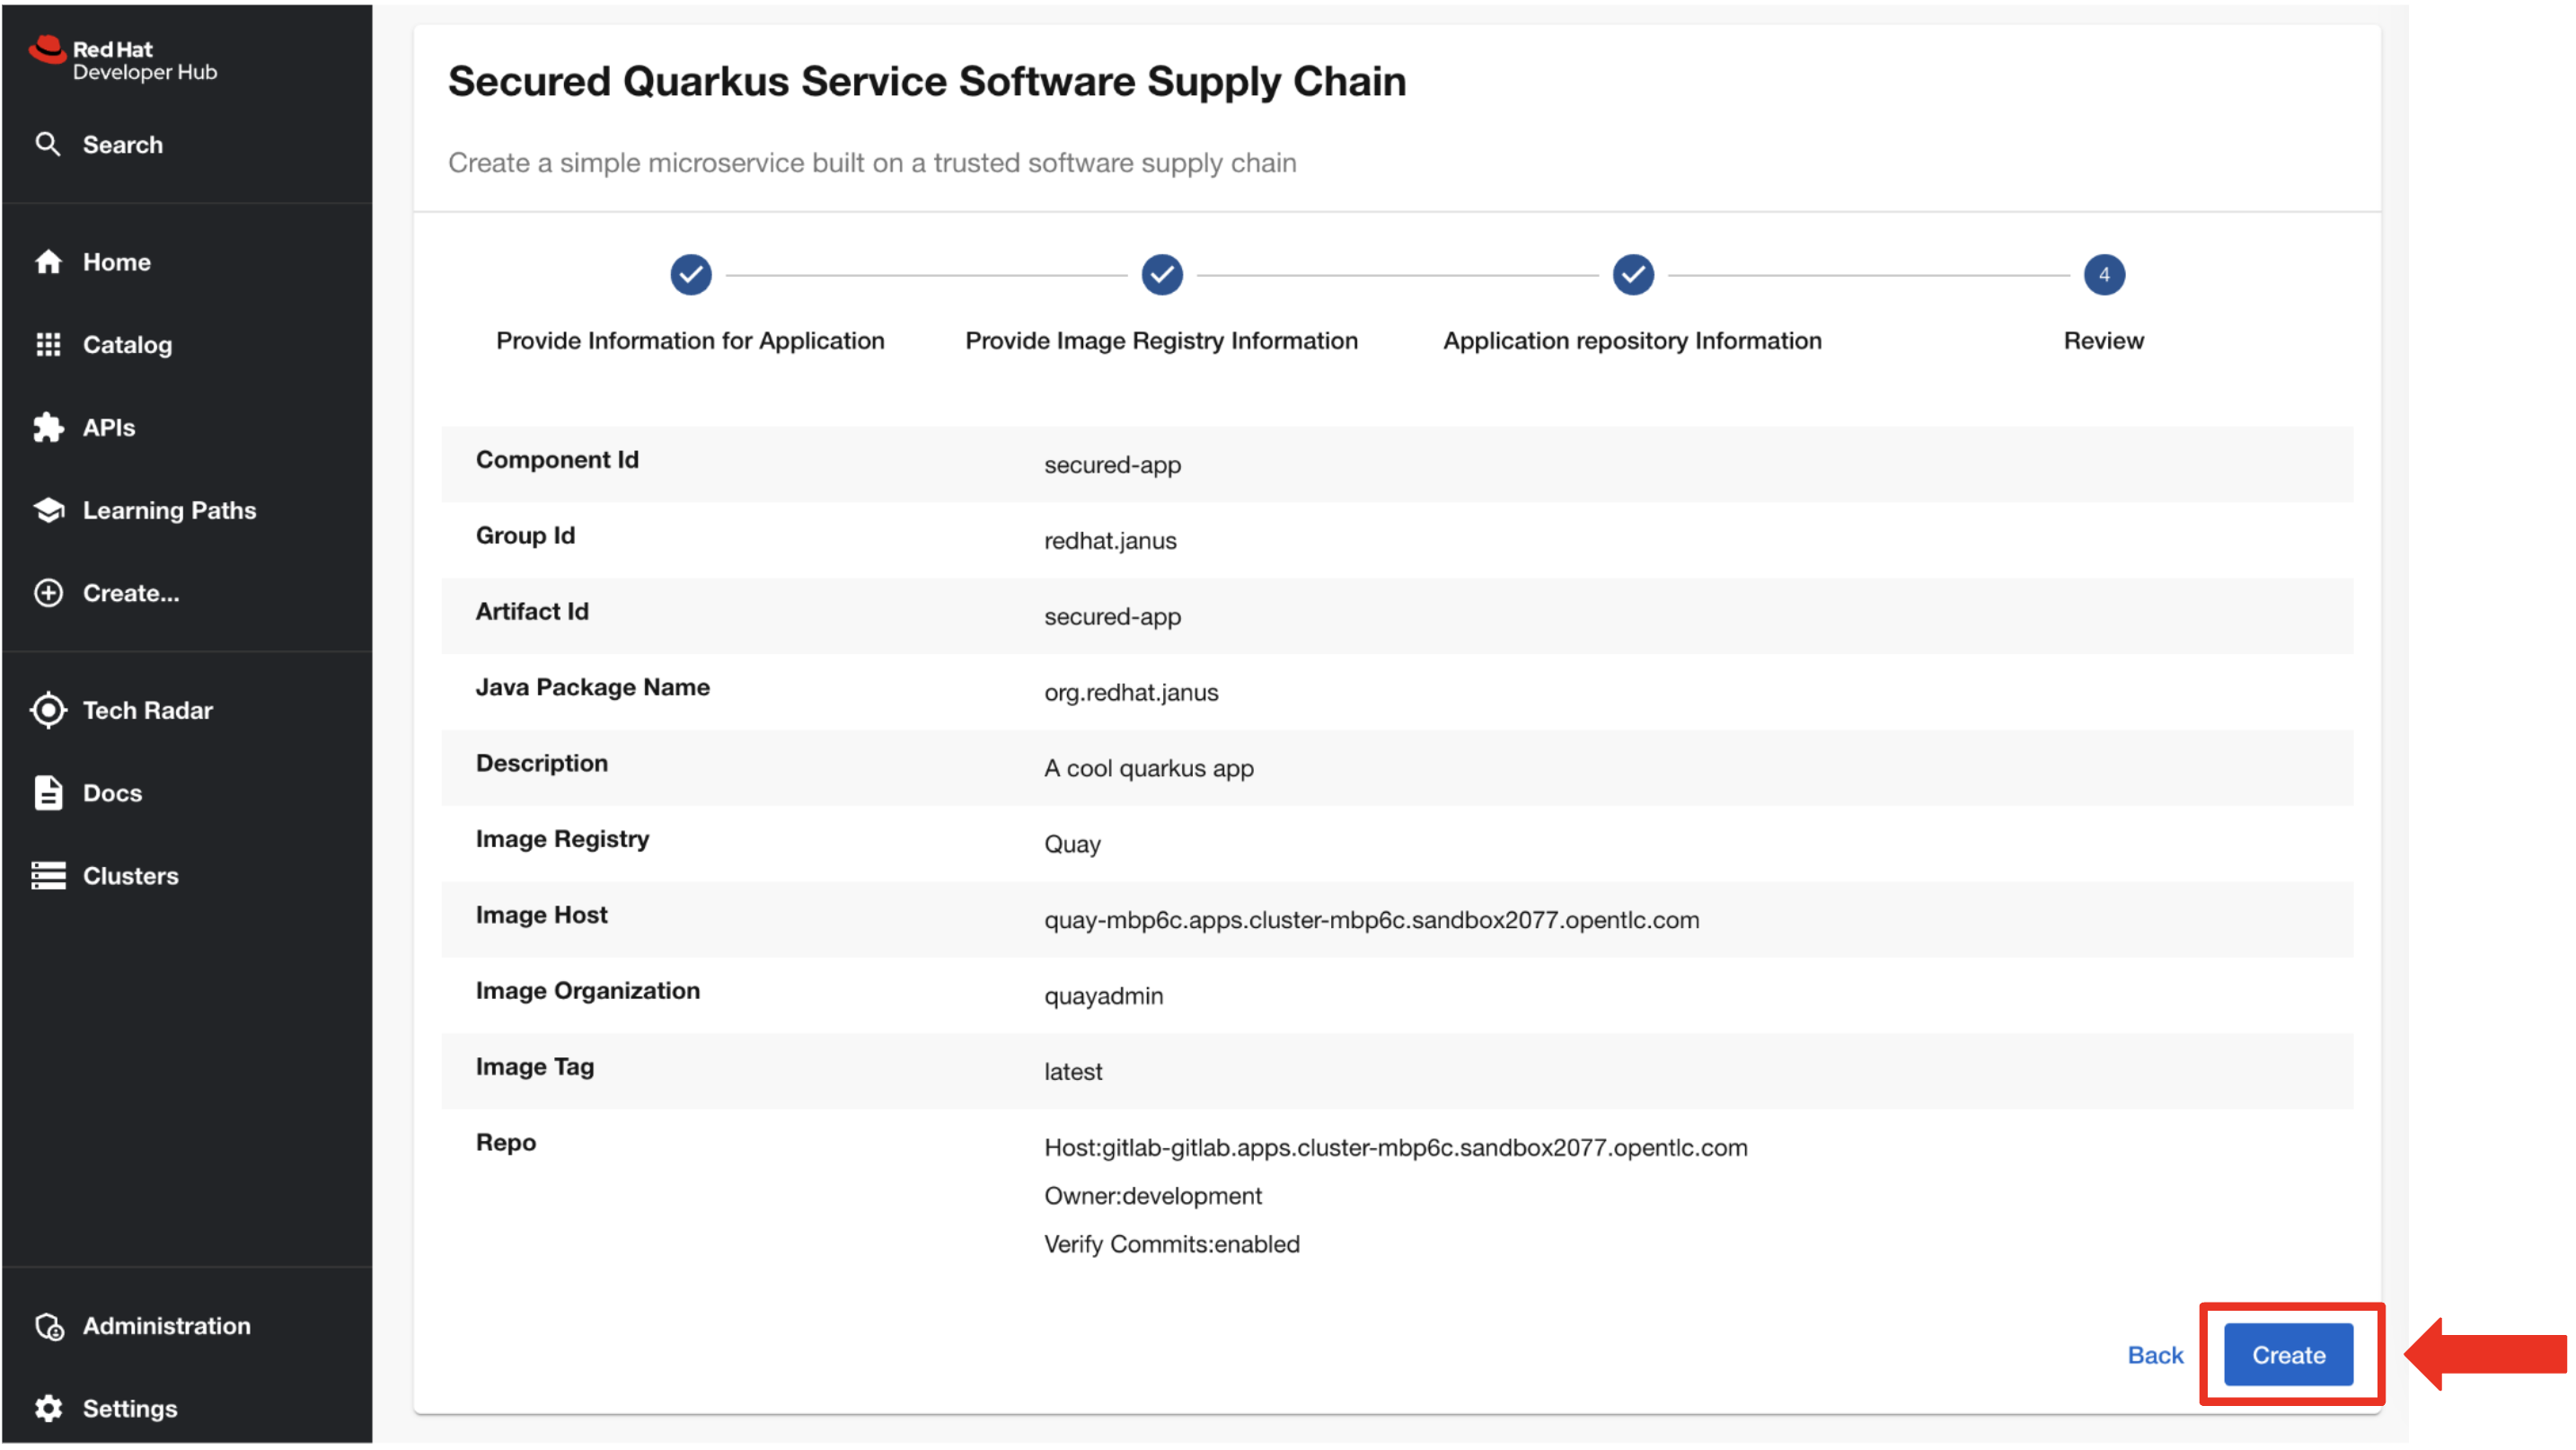
-
The secure GPT executes successfully, you seize this moment to explain the value of using GPTs in this scenario.
-
"This environment," you explain, "is created with all the security guardrails we discussed. What’s fantastic about Golden Path Templates is that the enhancements in the security pipeline are entirely transparent to our developer. This means they won’t impact how he codes or builds applications."
Code Commit
-
"To trigger our secure build pipeline, let’s open VSCode and make a small change to the documentation.", you say.
-
You click on the Open Component in Catalog link.

-
You find and click on the OpenShift Dev Spaces (VSCode) link.
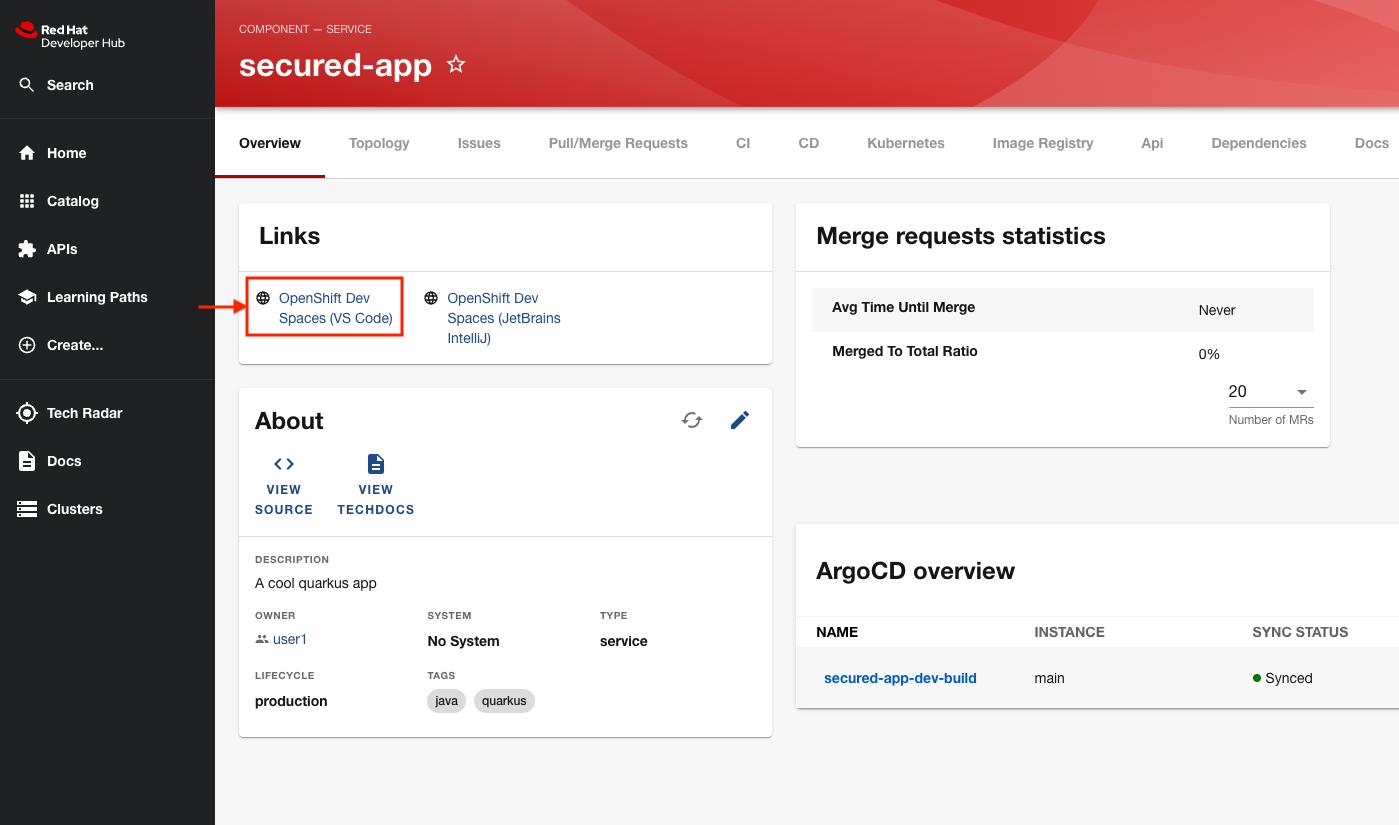
-
OpenShift Dev Spaces then begins creating your workspace, just like before.
-
After waiting a few minutes for OpenShift Dev Spaces to finish setting up your workspace, you’re presented with your IDE.
-
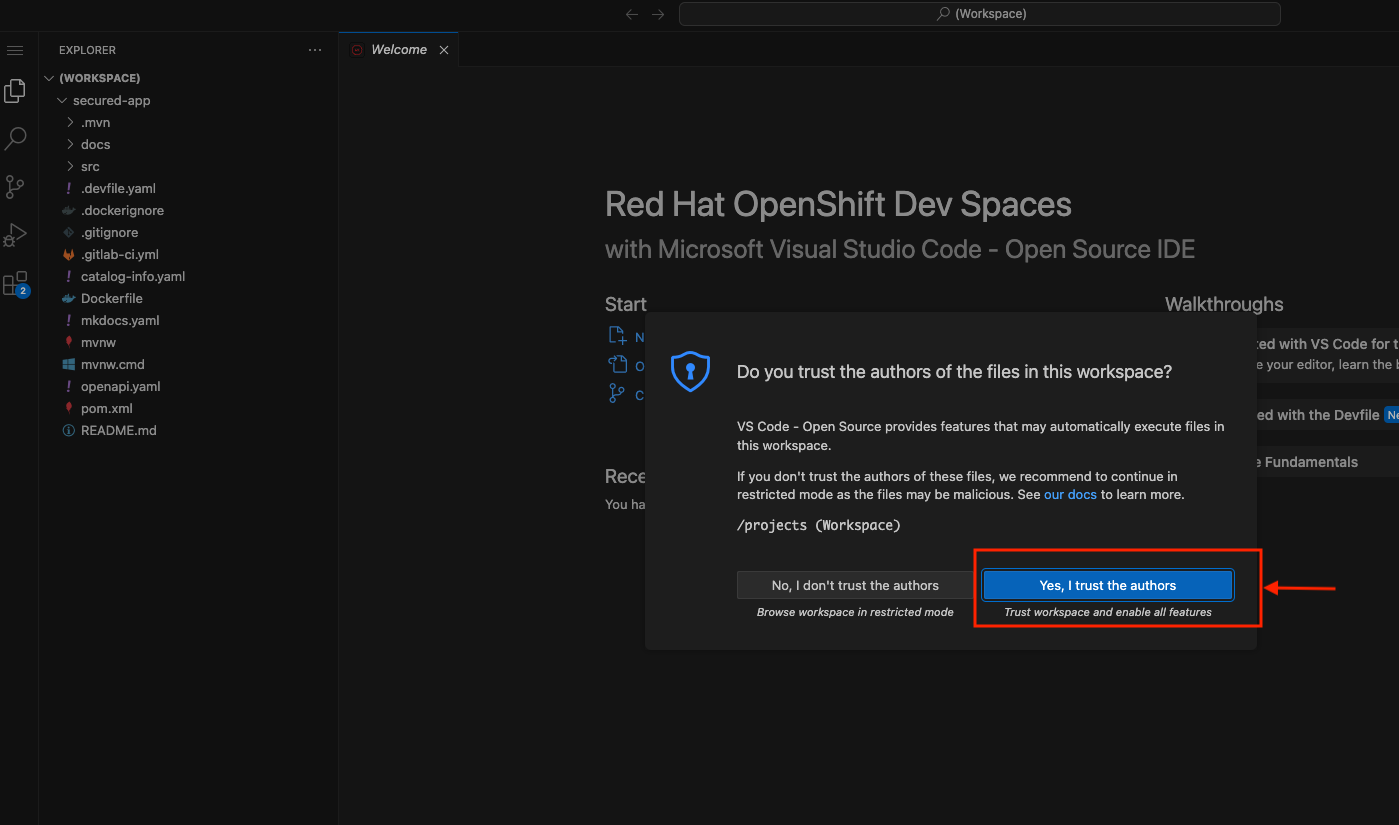
You click the button Yes, I trust the authors.
-
"For the purpose of this demo, updating the documentation will be enough to trigger the new build pipeline" you explain.
-
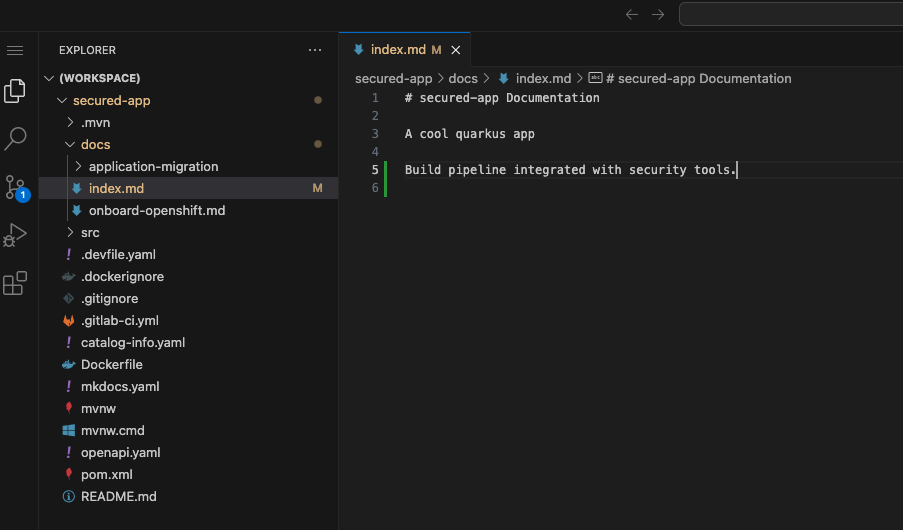
You expand the docs folder and open the markdown file index.md.
-
At the document’s end, you add: "Build pipeline integrated with security tools."
-
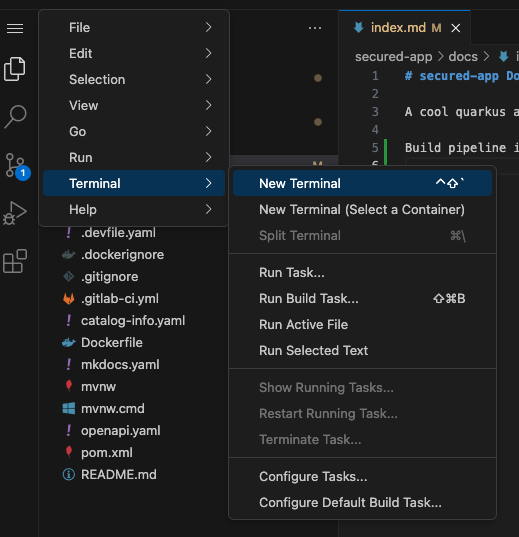
You click on the Hamburger button (three horizontal bars) on the top left of your screen and select Terminal → New Terminal
-
Before you start committing your code, you confirm the Gitsign git config.
-
"As you see, our development environment has been configured for Gitsign", you explain.
-
Run the below command on the VS Code terminal to view the Gitsign global git config:
git config --global --list
| You may need to allow paste functionality when prompted by the browser. |

-
To begin commiting your code to the repository, run the following command to add your changes to staging:
git add . -
Run the next command to commit your changes:
git commit -m "Doc Update" -
You will notice that you receive an error message that states error opening browser: exec: "xdg-open": executable file not found in $PATH. This is because our VS Code terminal is trying to open a browser window to obtain your credentials for signing but is unable to as it is running as a container.
-
However, Gitsign allows you to provide your signing credentials by copying and pasting the url it outputs into a separate browser window.
-
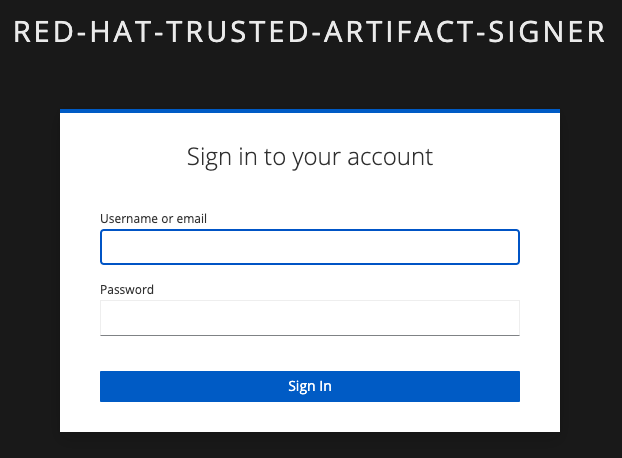
Copy and paste the url into a new browser tab/window and hit enter.

-
The browser will prompt you for your credentials. Enter {developer_cluster_devspaces_user} for the username and {developer_cluster_devspaces_user_password} for the password.
-
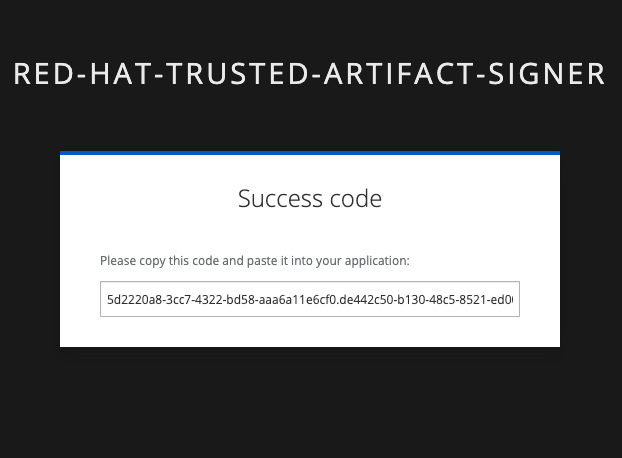
You will then be redirected to another page that will present a verification code. Copy this code into your clipboard.
-
Return to Dev Spaces and paste this code into the waiting prompt in the VS Code terminal.
Enter verification code:Once you’ve pasted the code, depending on your browser, you may be presented with a popup to allow paste functionality in Devspaces. Click Allow and then hit Enter. If no popup appears, just hit Enter. -
If successful, you should receive a successful commit message:

-
Push the code to the repository with the below command:
git push -
This action sets the build pipeline into motion.
-
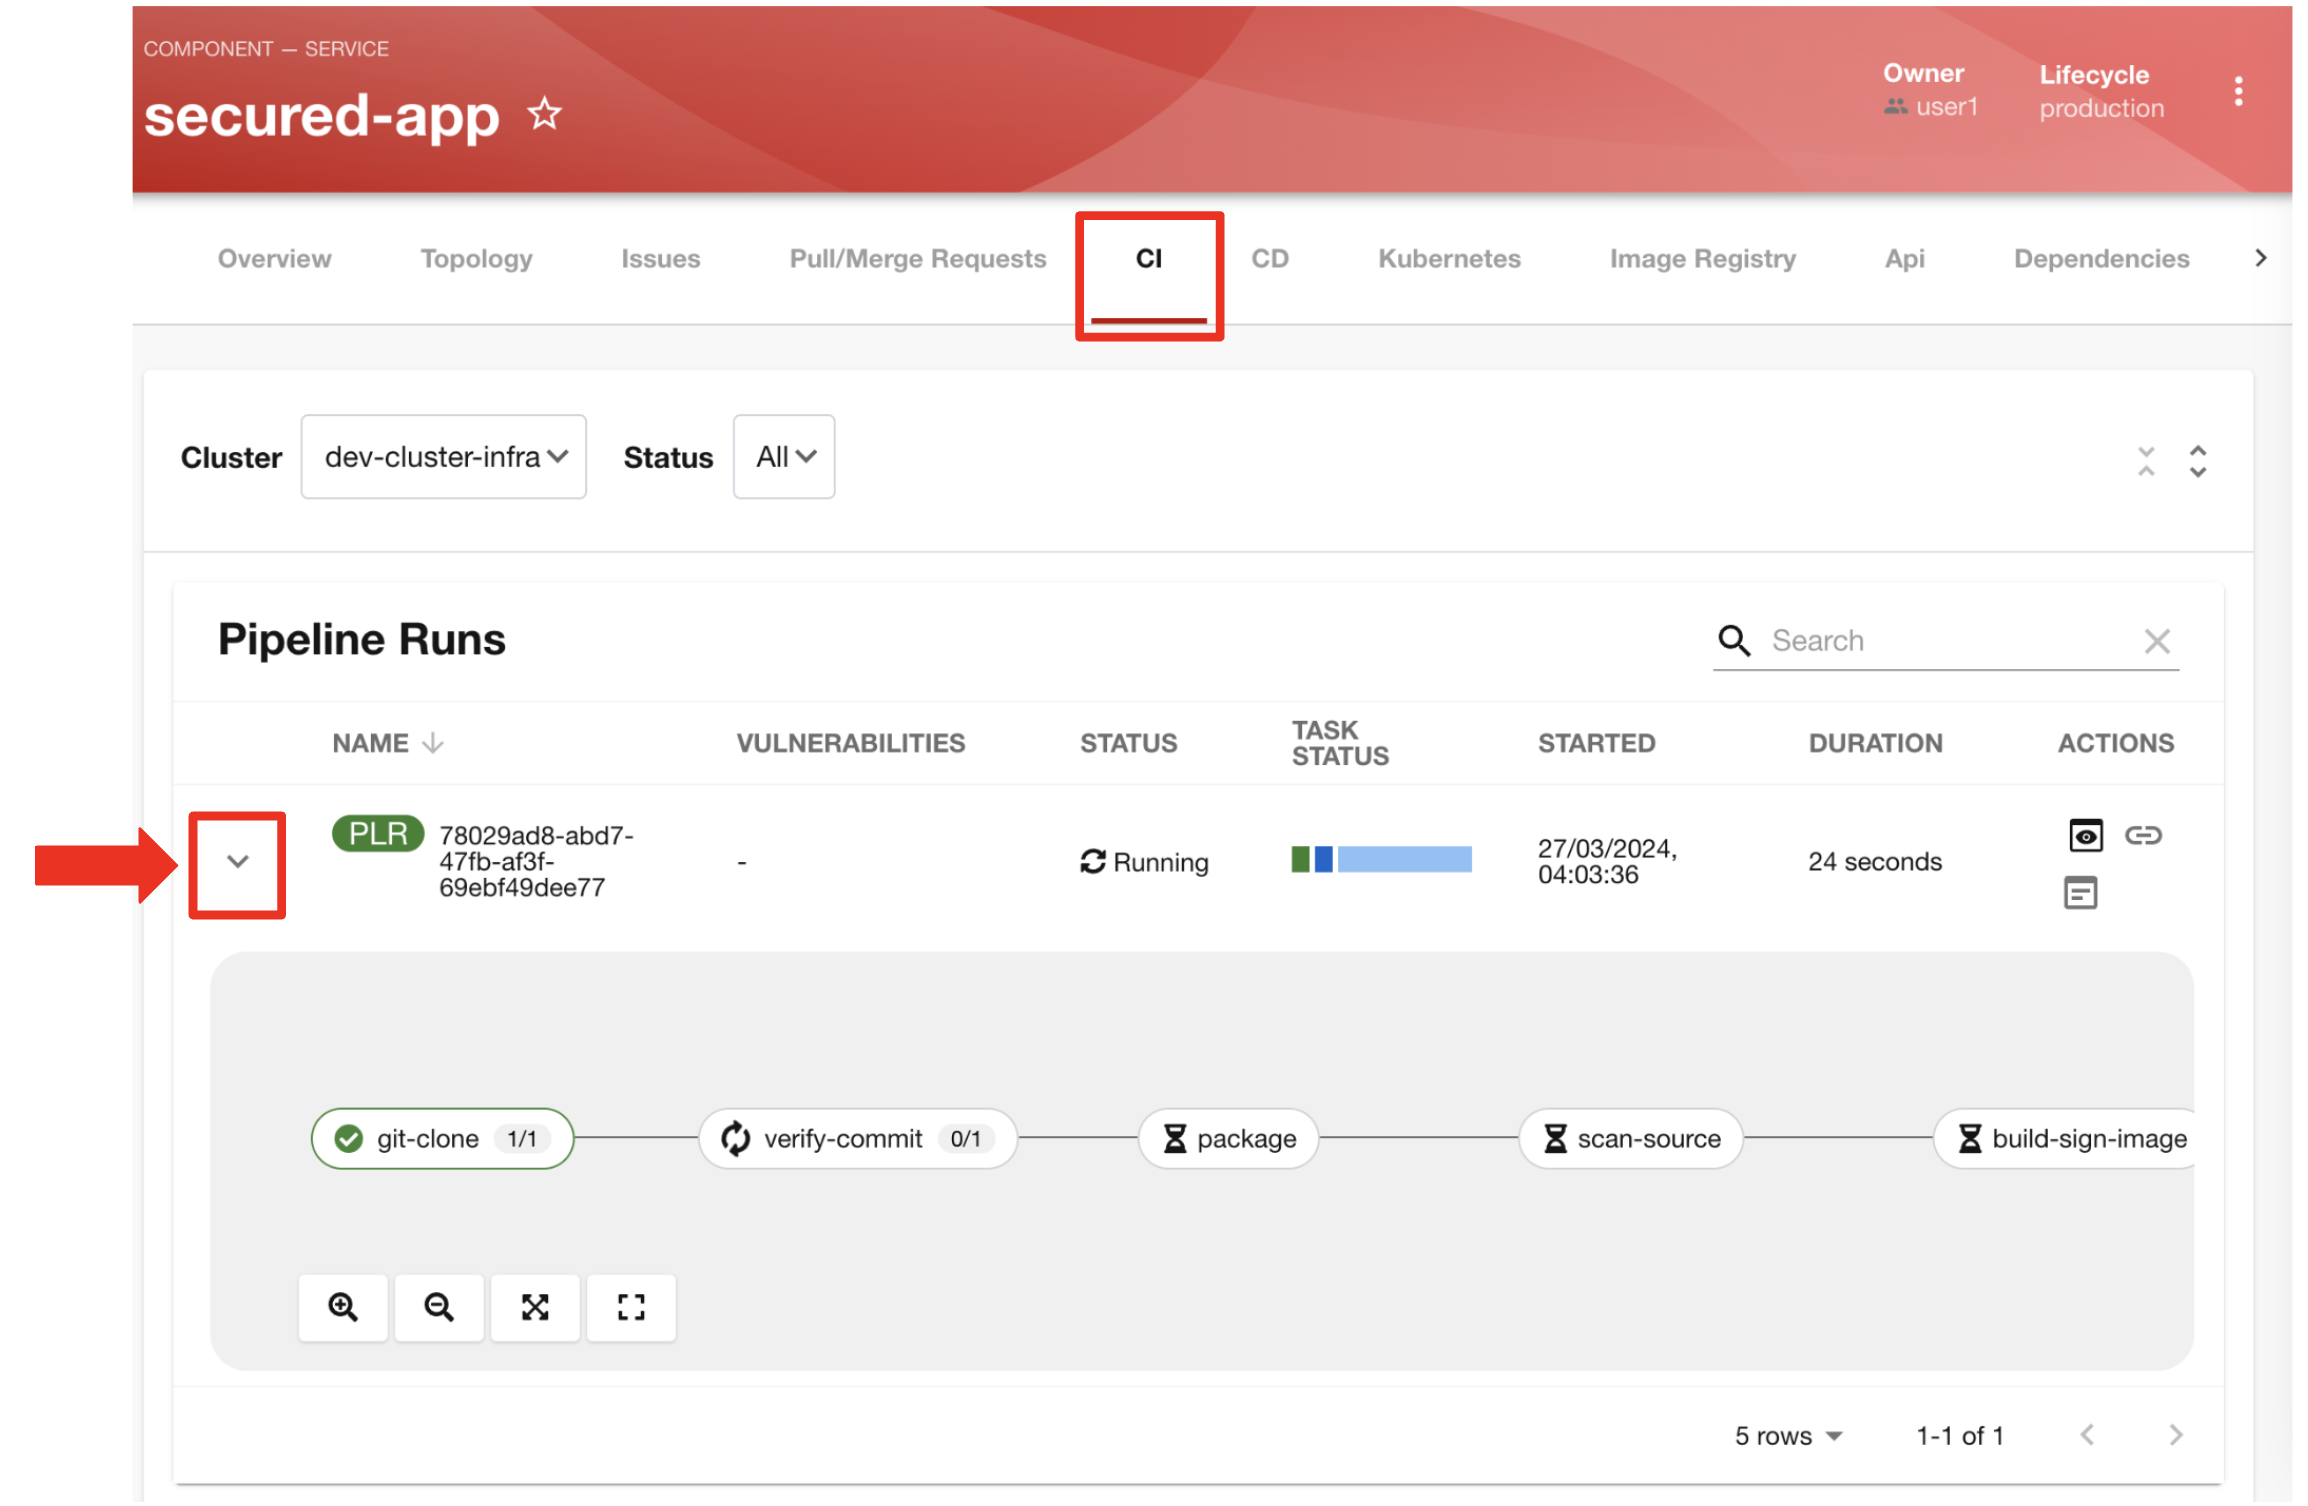
You switch back to the Developer Hub and select the CI tab from the top menu, and expand the pipeline view to show the team that pipeline execution is in progress.
-
You wait a few minutes until the build pipeline execution is complete, before you start explaining the security enhancements made to the build pipeline.
-
"Remember the build process we used for the insecure application? We’ve now added six new tasks to the pipeline, incorporating the security recommendations I outlined earlier."

Task 1: Verify Commit
-
"The first task after cloning our git repo, is ensuring the source code modifications were made by a trusted sourc," you explain.
-
"This task will only succeed if it can verify a trusted signature on the last commit that triggered the pipeline. This is the signature we provided using GitSign when we committed the code from Dev Spaces."
-
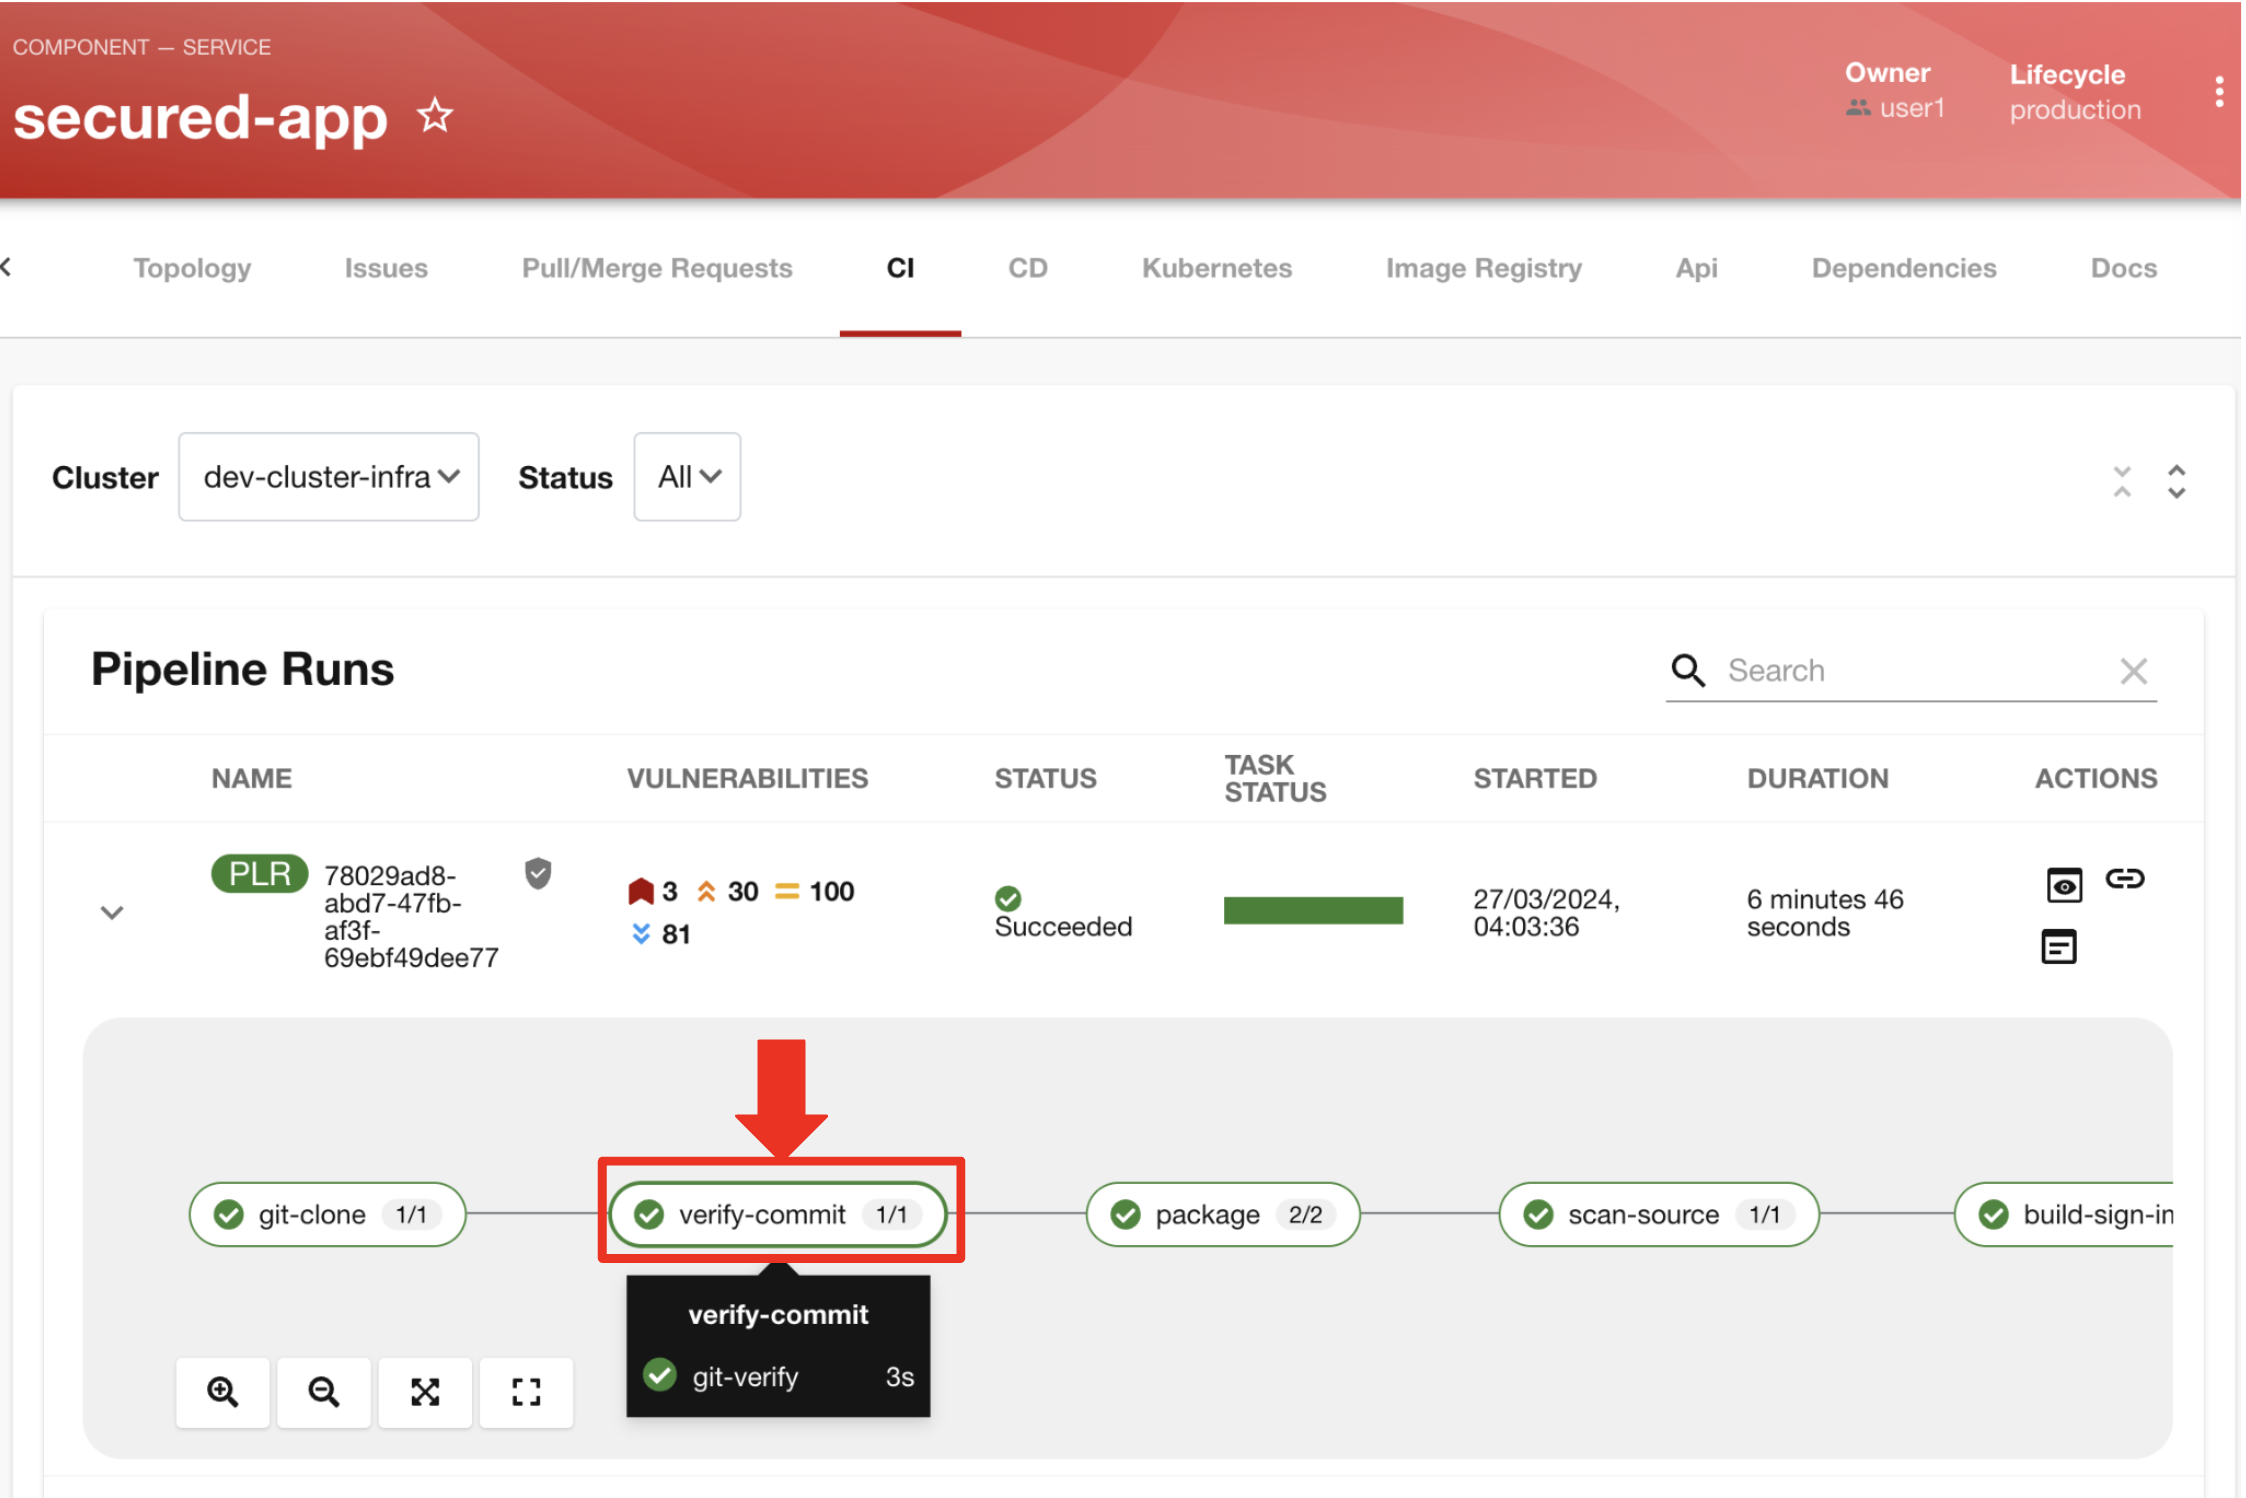
You then click on the task verify-commit and pull up the logs.
-
"Here in the log, you can see the user we used and the comment we provided when we made the last code change.”
-
"The verify-commit task executes the command git verify-commit to verify that the signature is valid, before the pipeline moves to the next task." you point out.

Task 2: Scan Source
-
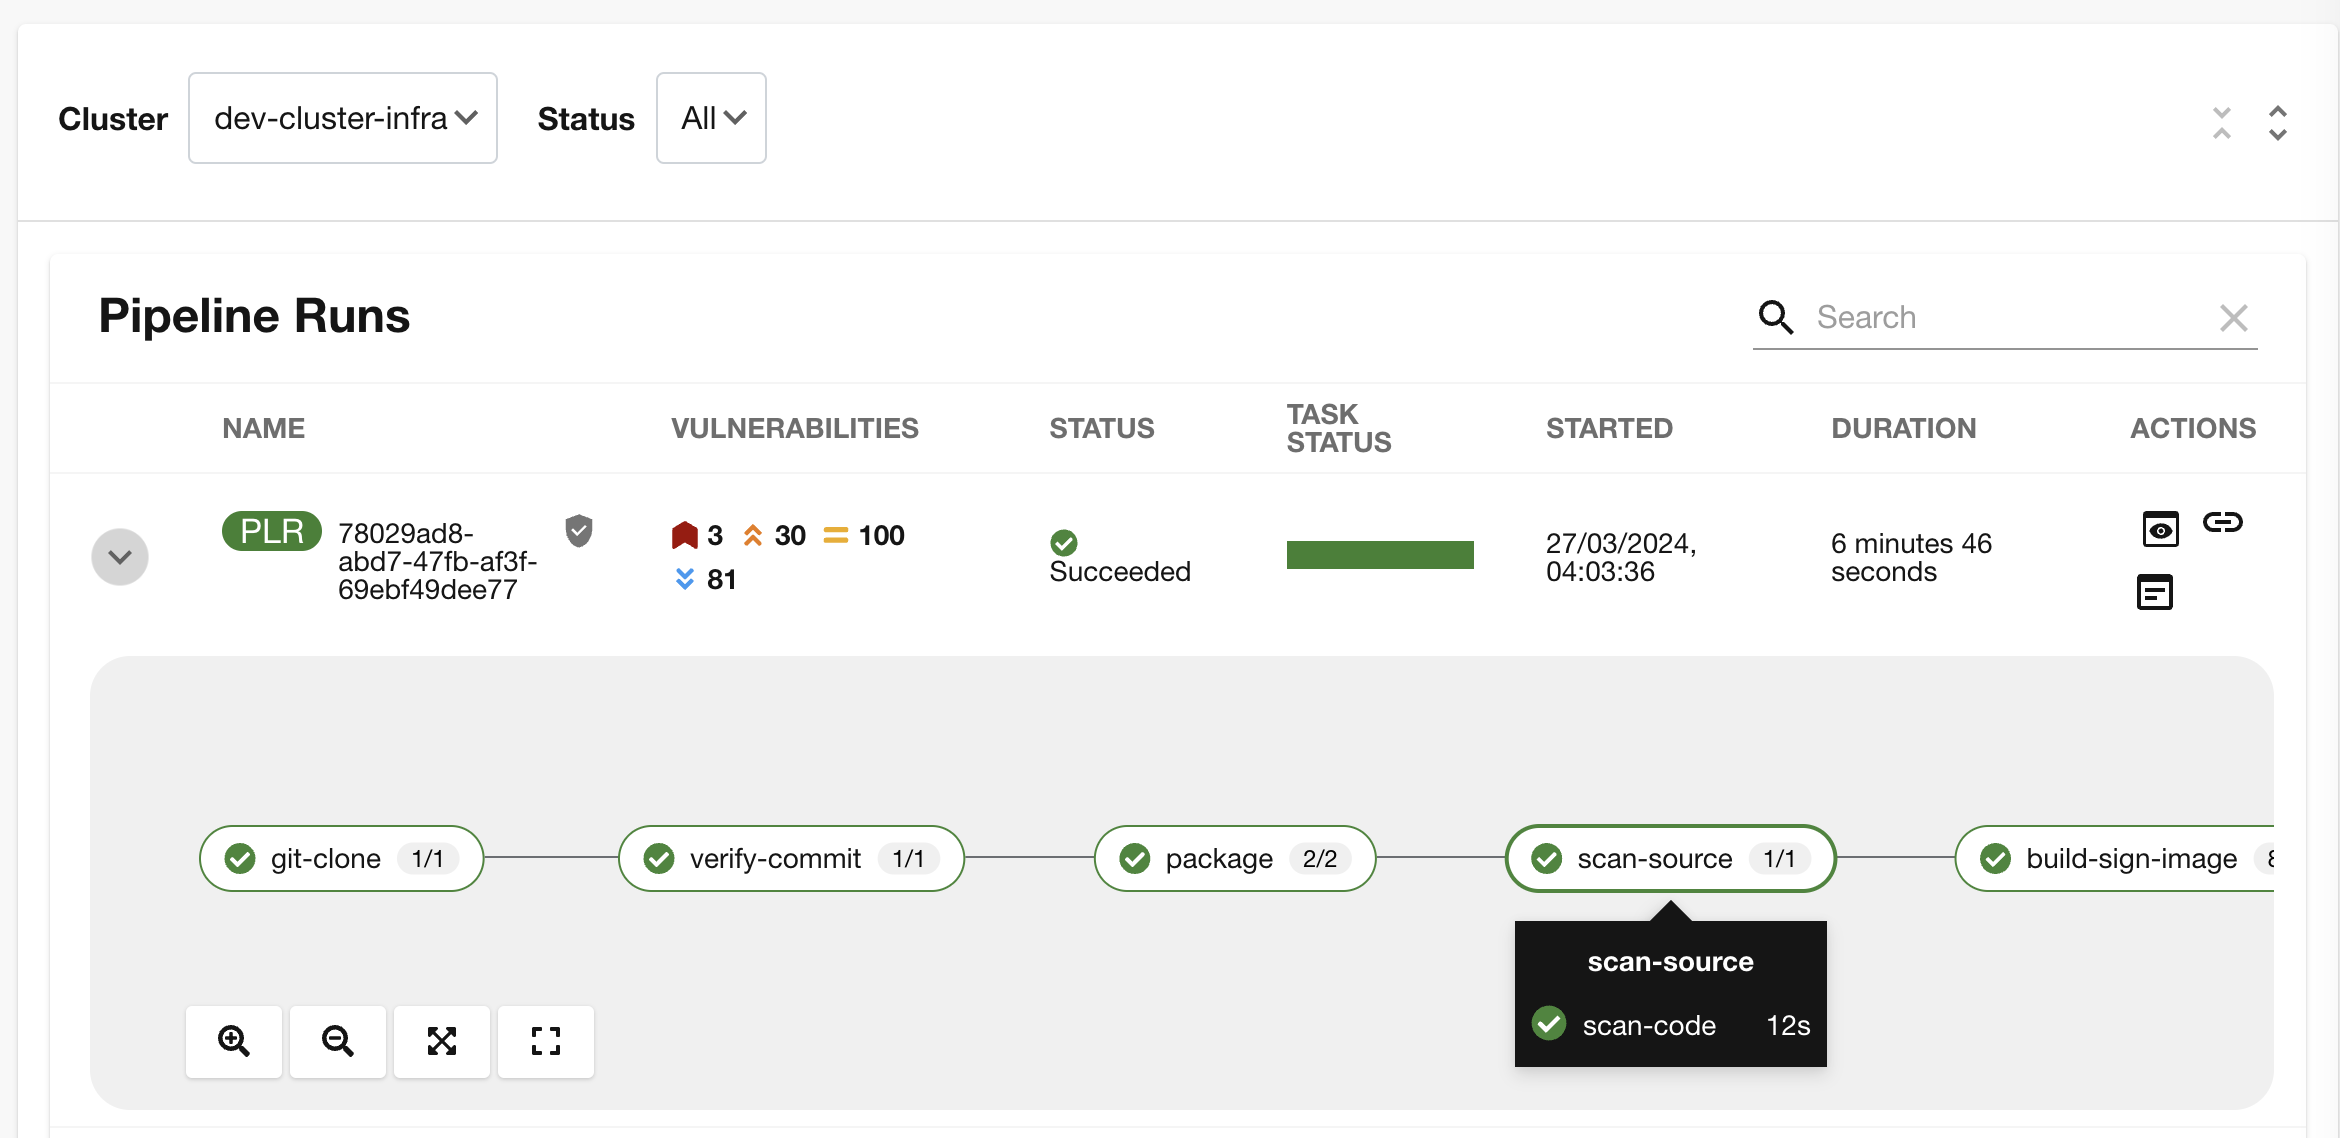
"After we package the code, running a static analysis to detect any potential bugs or code style violations is a good idea."
-
I’ve setup a task called scan-source task, we utilize a tool called SonarQube to analyze the source code and provide reports based on its quality.
-
"We can view the scan results from the pipeline logs as we did before, or we could log in to SonarQube to get an in-depth report."
-
"Let’s look at the SonarQube report this time," you decide.
-
To access SonarQube, you use the following link:
-
SonarQube URL: SonarQube
-
Username: {developer_cluster_sonarqube_username}
-
Password: {developer_cluster_sonarqube_password}
-
-
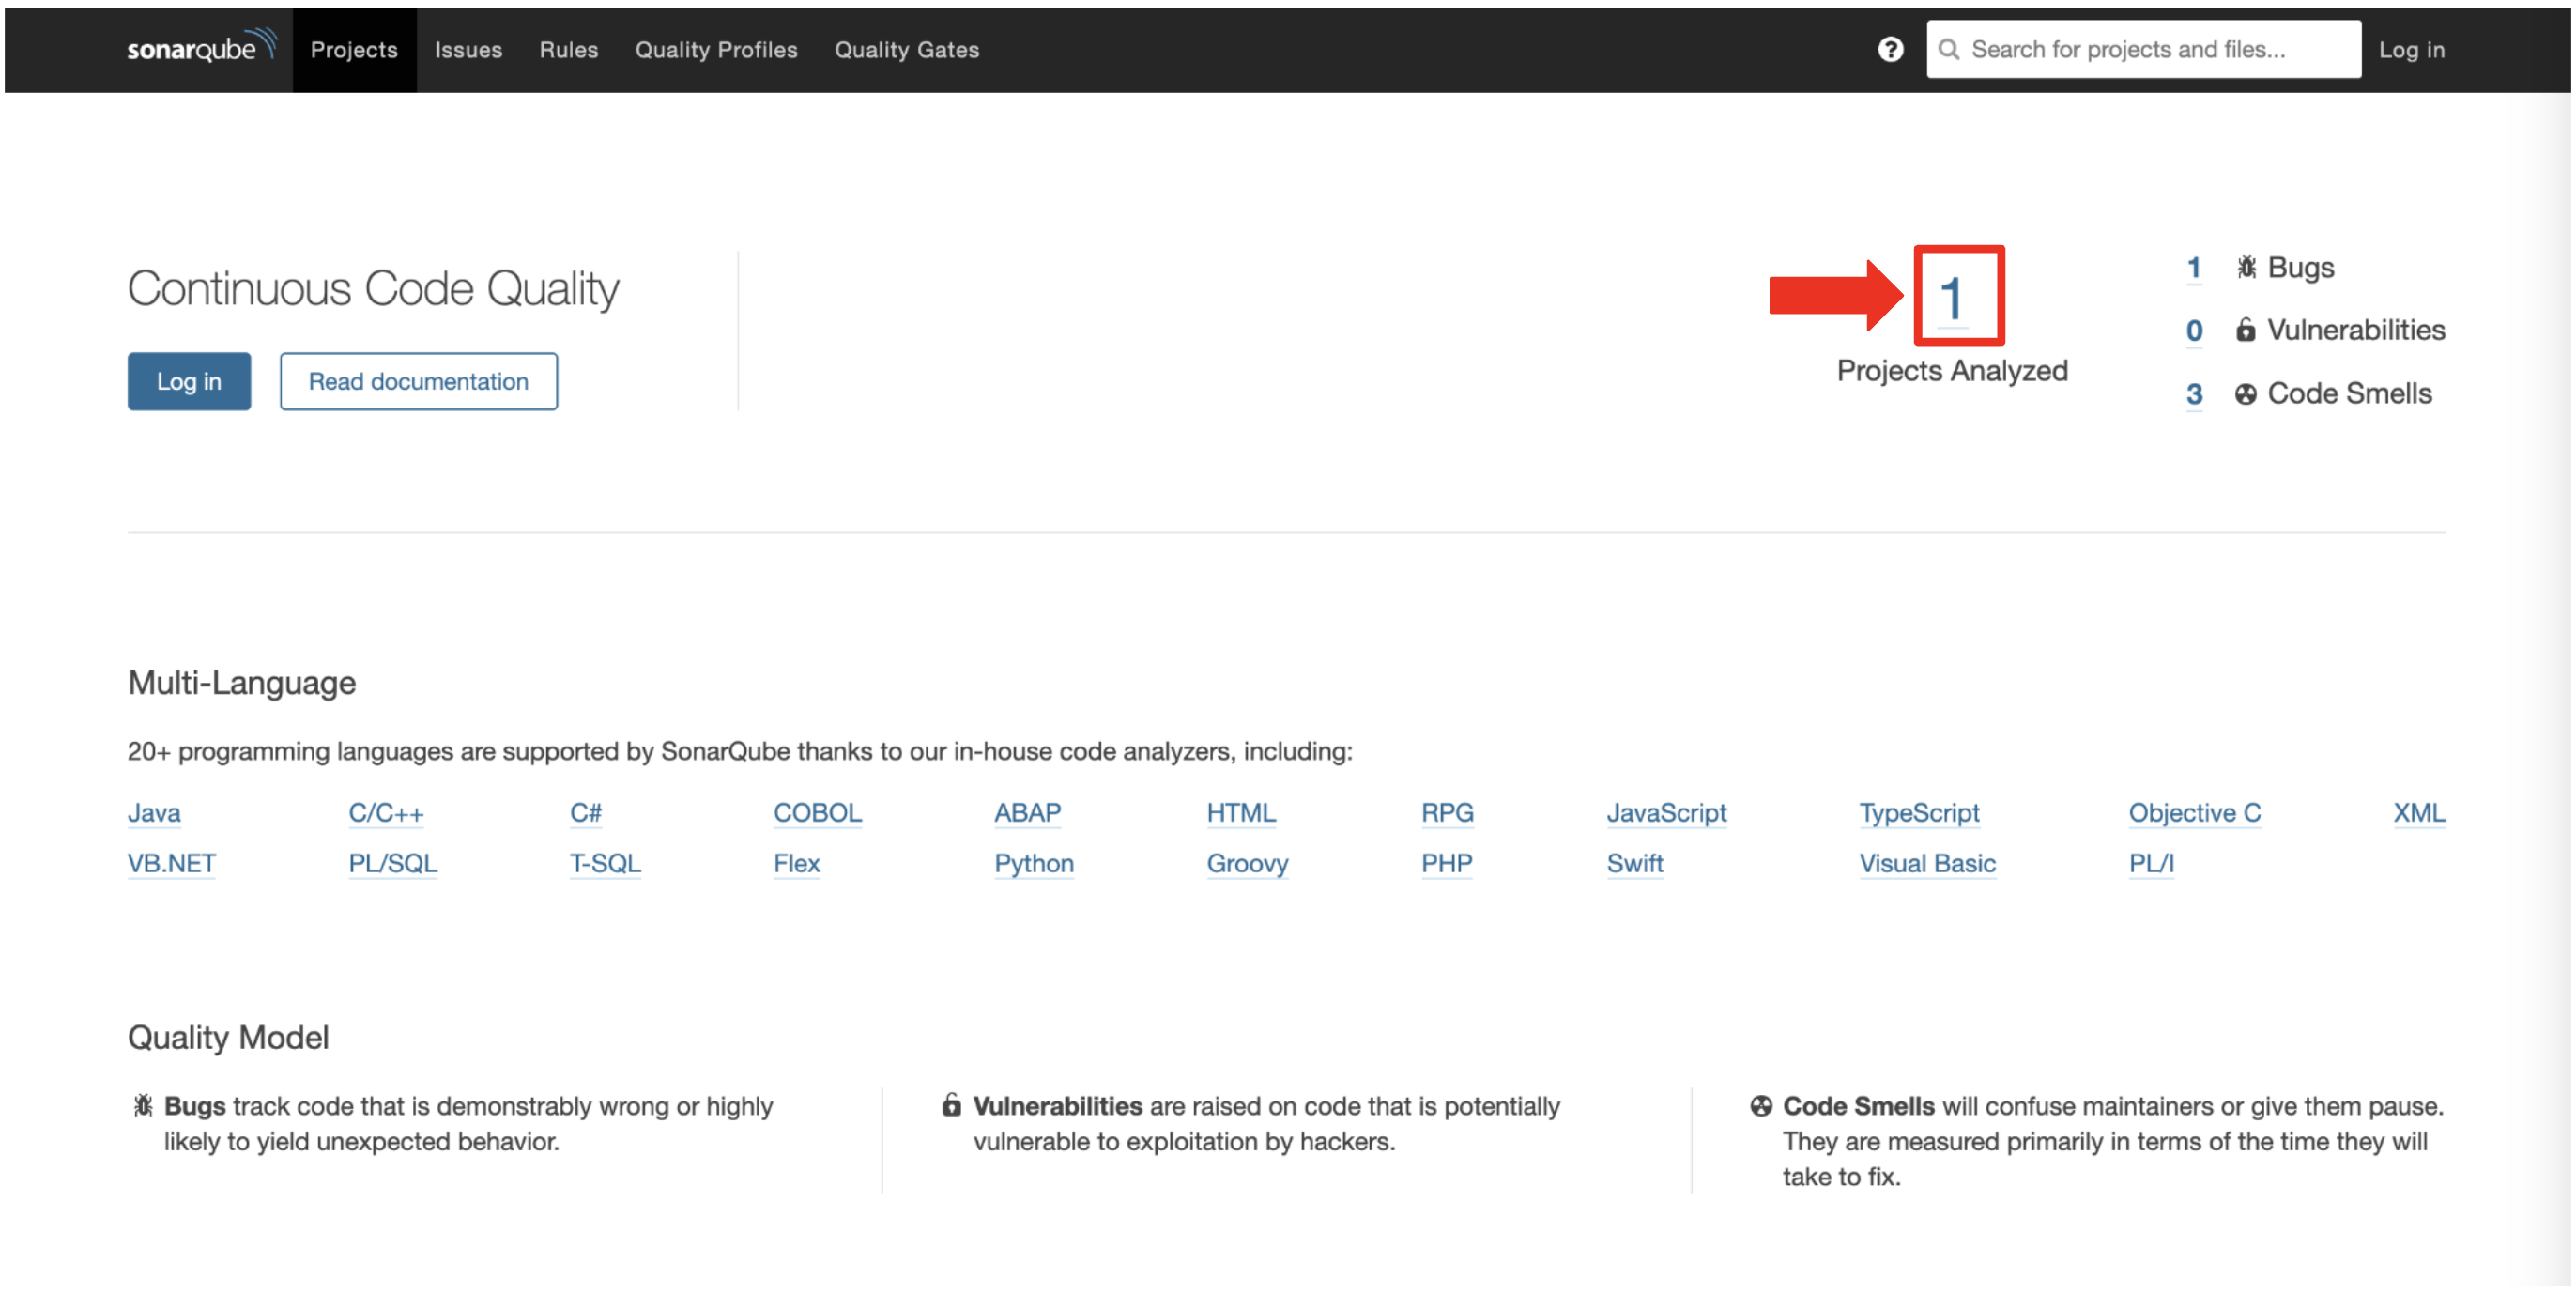
You click on the project link in the SonarQube Dashboard.
-
"Our application has passed the validation test by SonarQube, with a few minor issues," you observe.
-
"I do recommend that you look into those issues nevertheless."

Task 3: Build and Sign Image
-
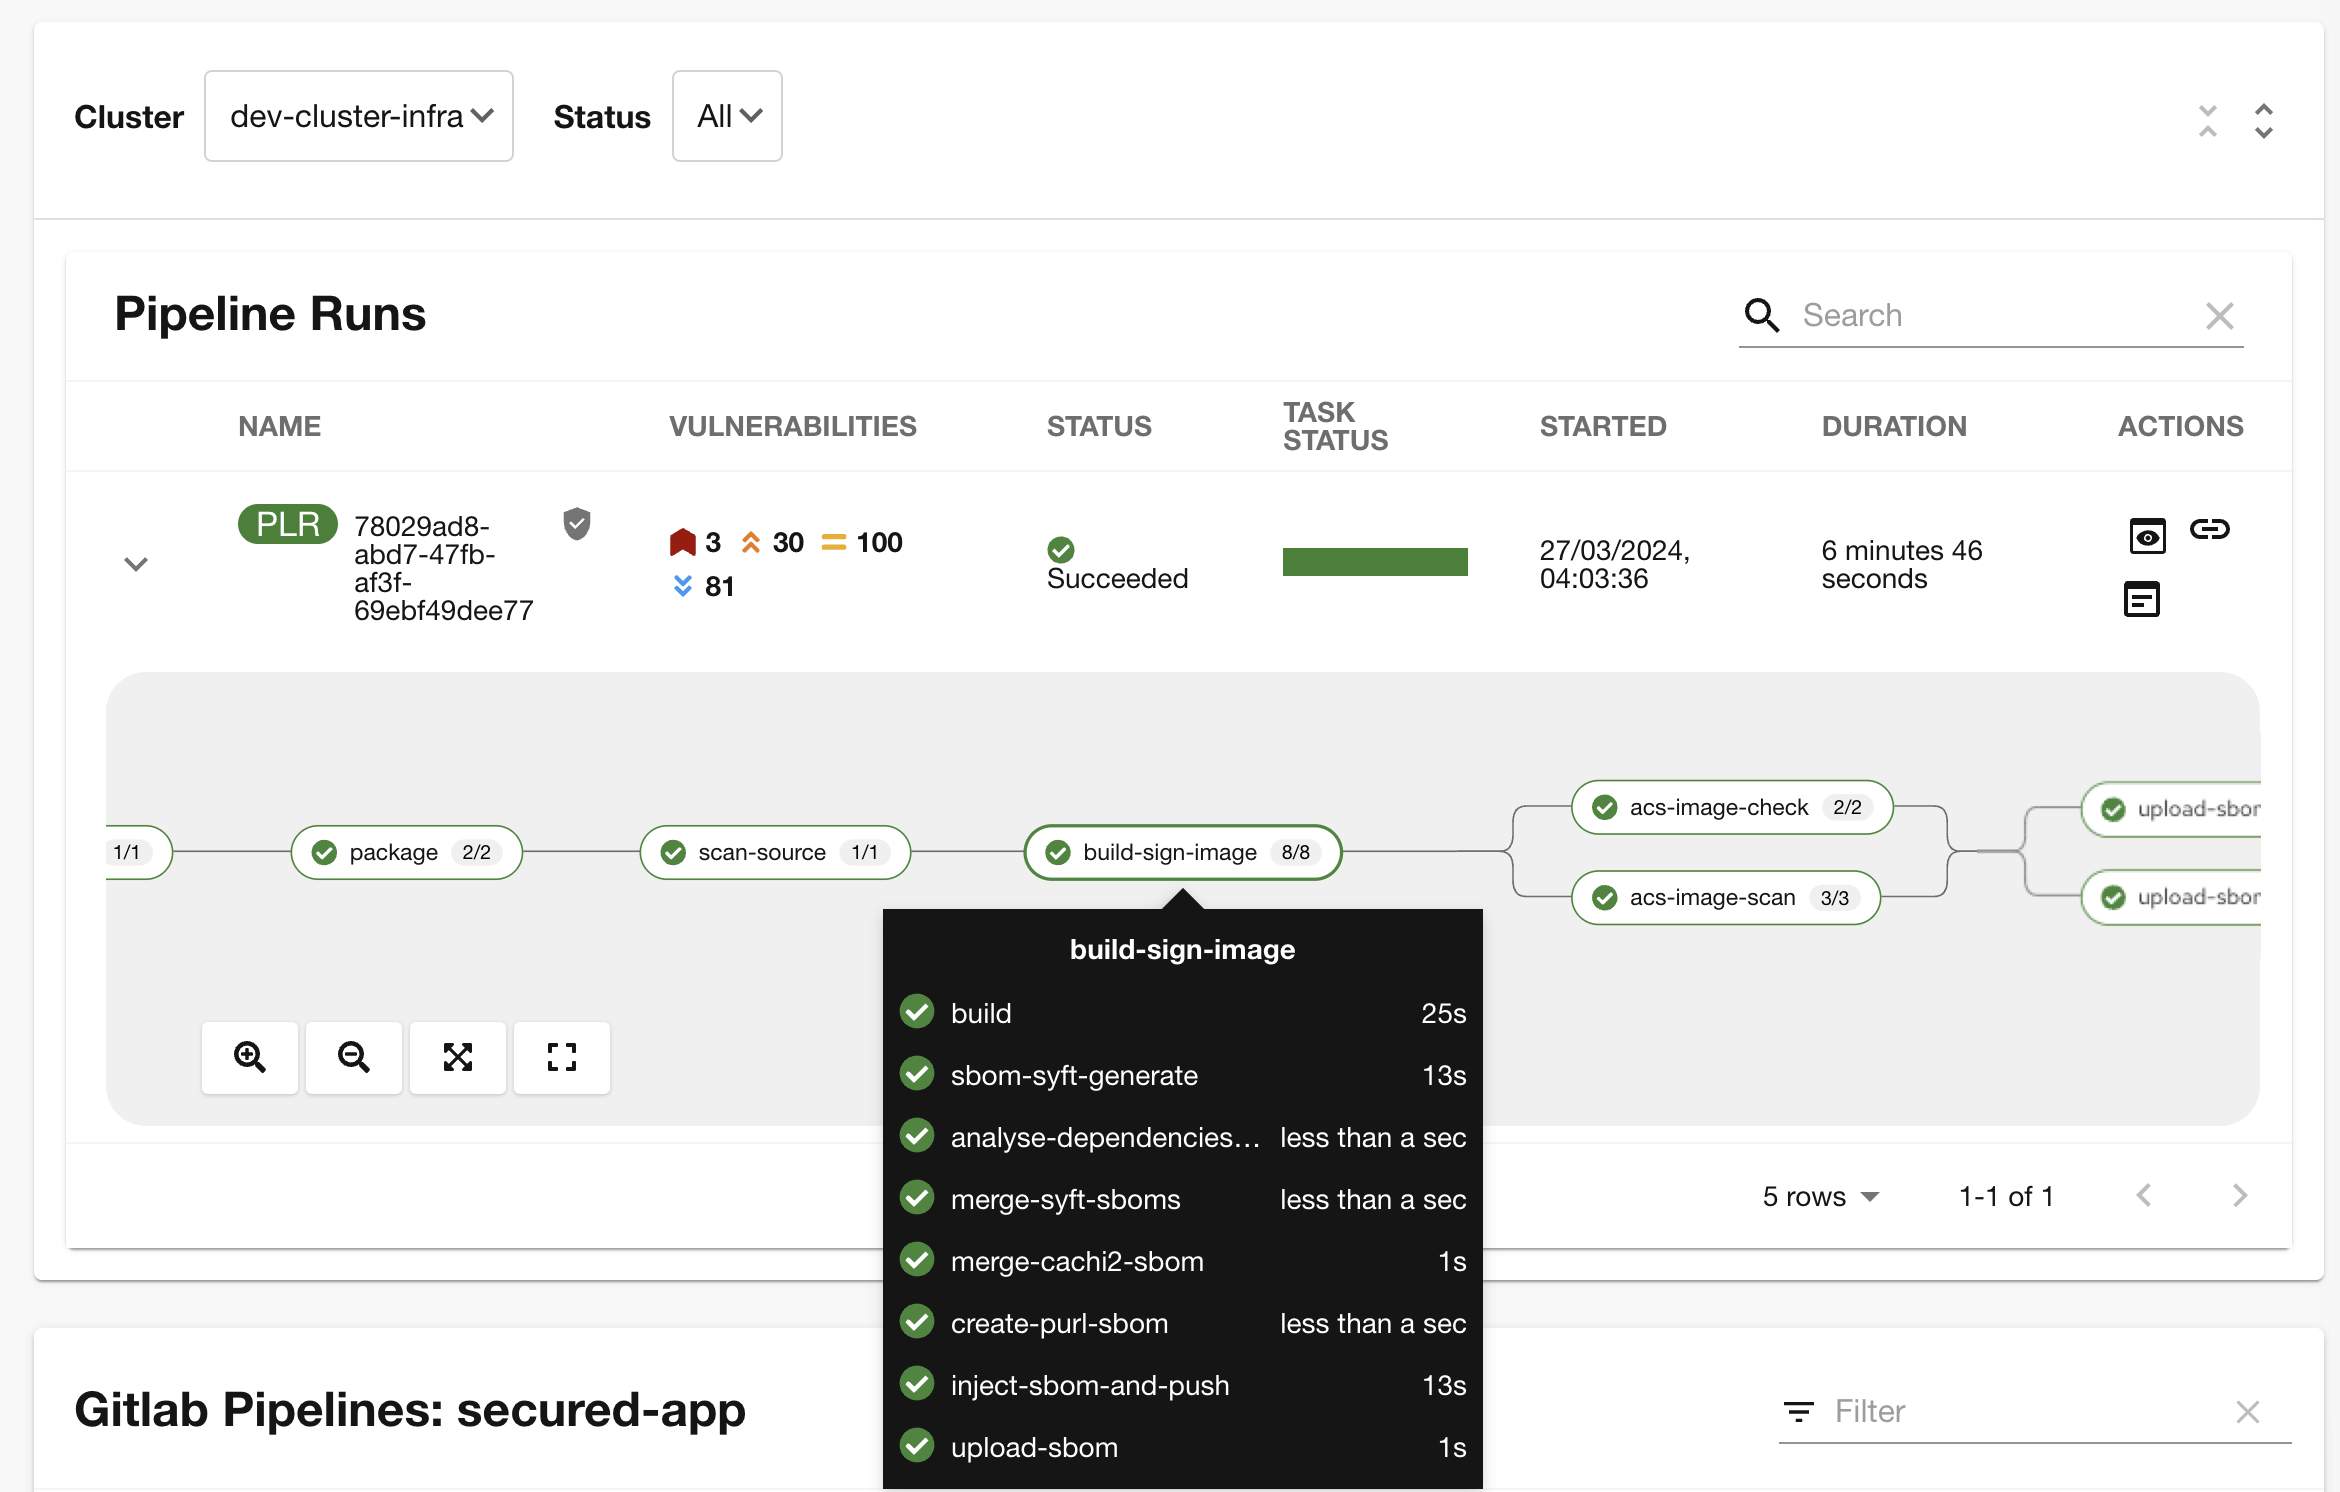
"Similar to your original pipeline, the build-sign-image task is responsible for building a container image based on your verified source code. It then generates the Software Bill of Materials (SBOM) we discussed earlier."
-
"This SBOM is then pushed to our Red Hat Quay registry upon successful completion of this task," you explain.
-
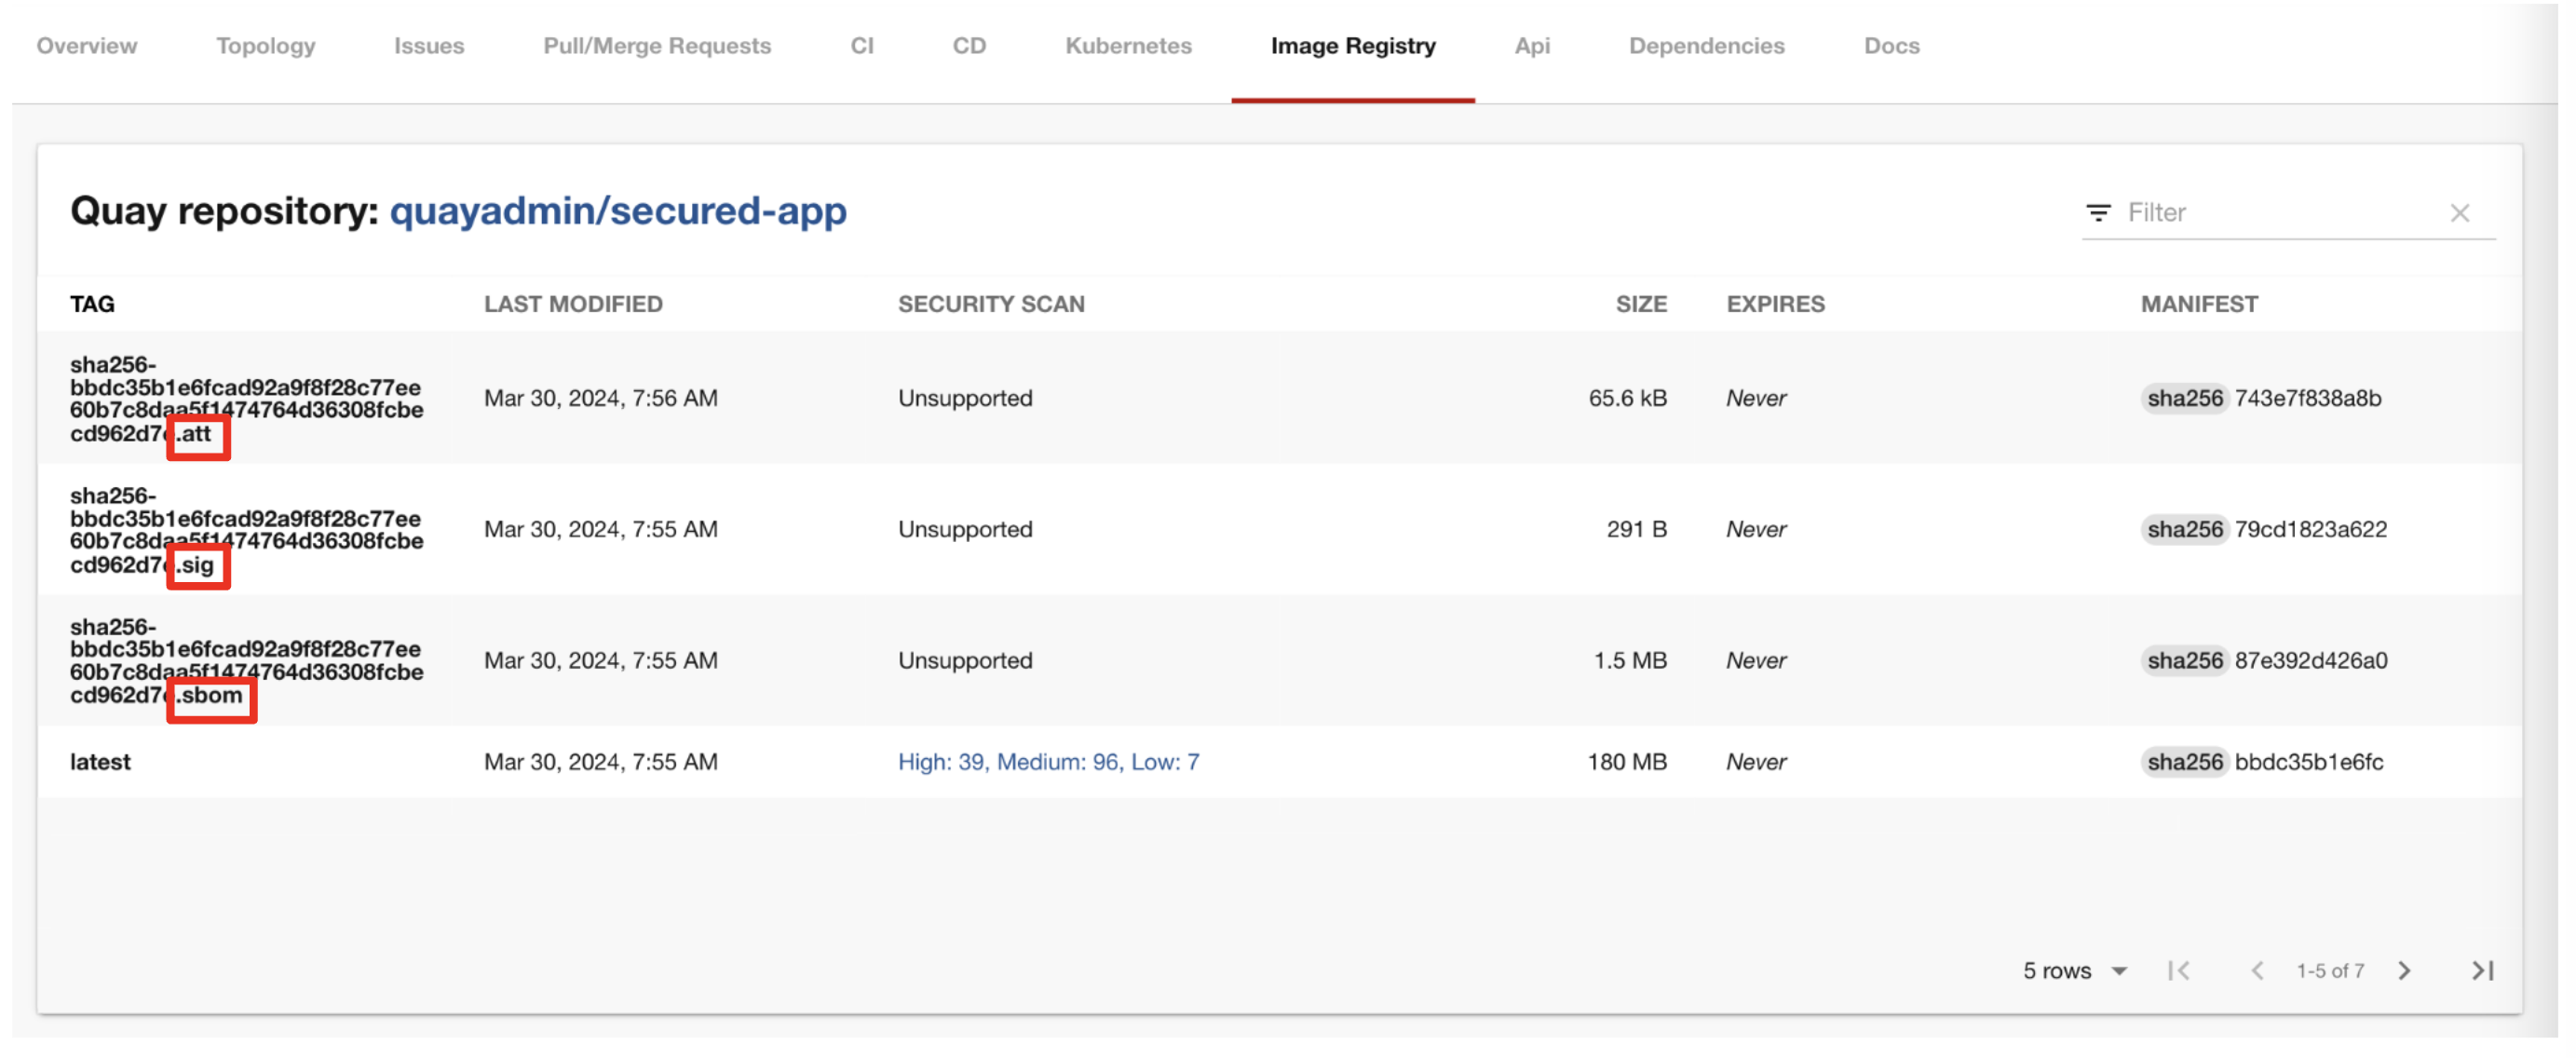
"As I explained before, we 've also configured Tekton Chains to automatically sign the container image, attest to it, and apply the SLSA Provenance to it."
-
"All of these additional artifacts are then stored in the image registry, alongside your container image.”
-
"This brings a higher degree of trust and verification to our processes, the shield you see in the pipeline view indicates that Tekton Chains has done its job and successfully signed our artifacts.” you explain.

-
You then switch to the image registry tab and point to the screen, showing that the generated attestation, signature, and SBOM files are sitting side-by-side with the resulting container image produced by the pipeline in the registry.
Task 4: Image Scan
-
"Let’s switch back to our pipeline view in RHDH, and look at the tasks performed by Red Hat Advanced Cluster Security (ACS)," you suggest.
-
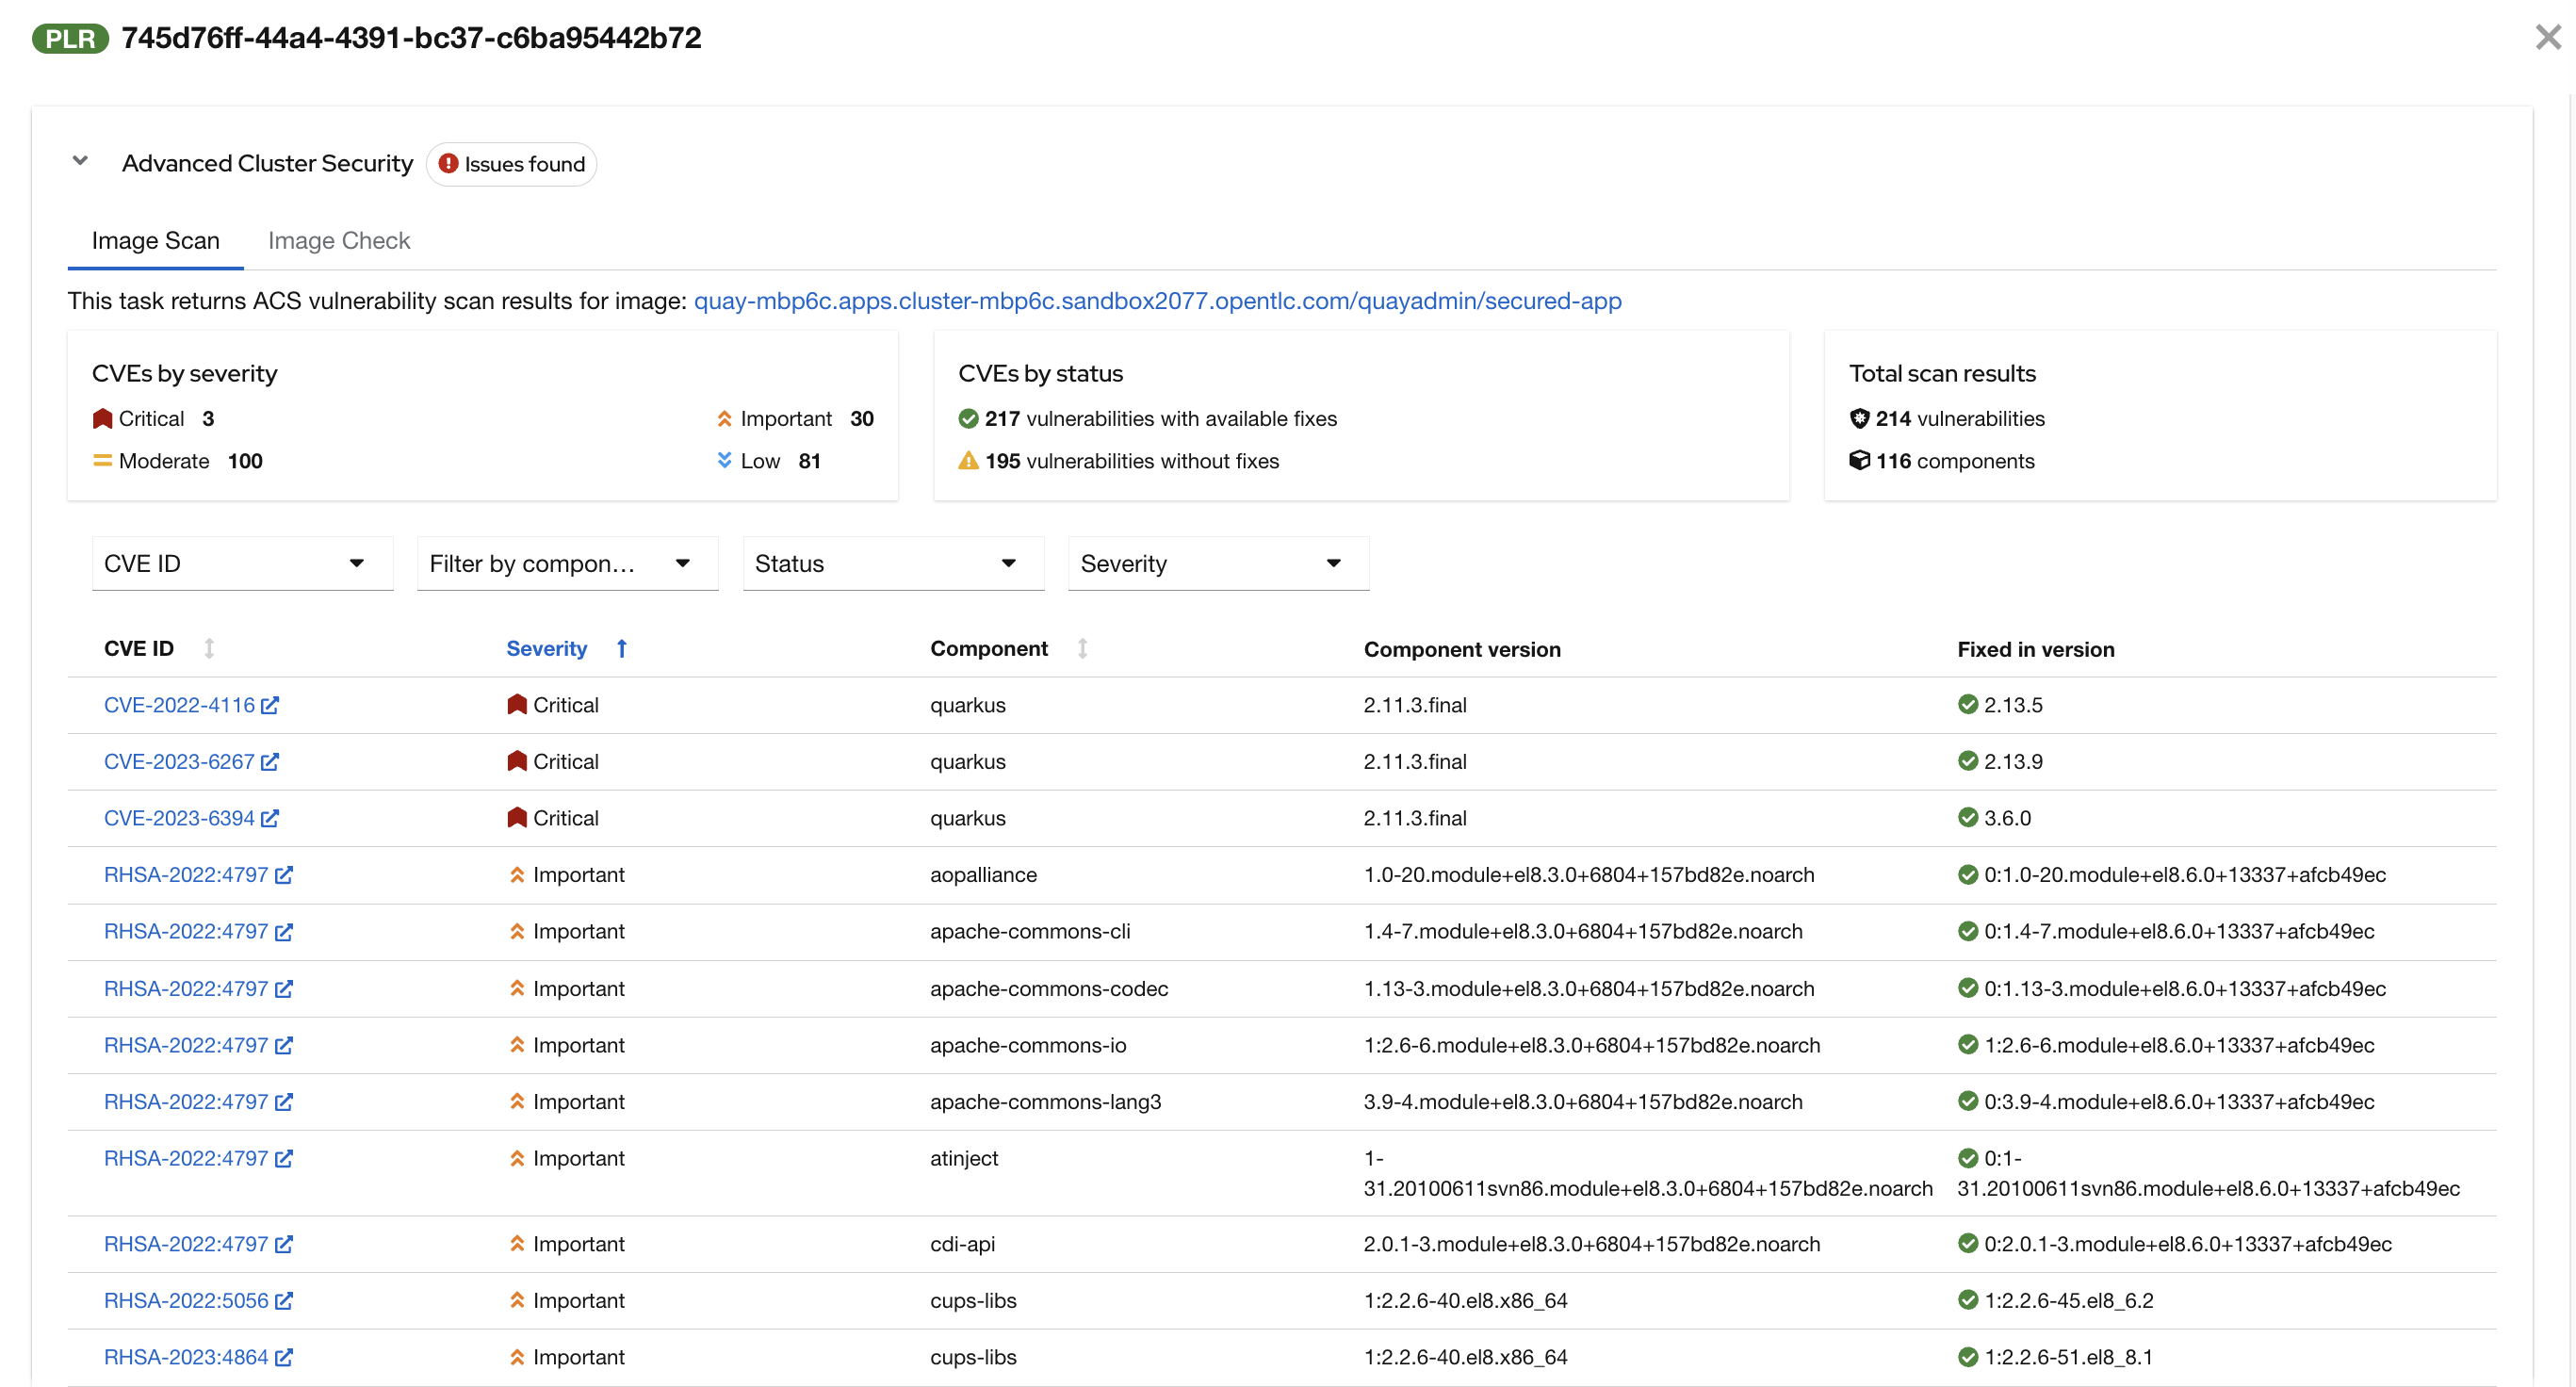
"The acs-image-scan task performs an image scan to identify known vulnerabilities within the container image. It compares the image components against known vulnerability databases, uncovering any CVEs (Common Vulnerabilities and Exposures) that might compromise the container."

-
"We can review the report generated by ACS." you note, as you click on the Output icon under ACTIONS.

-
"Here you can see that we have 3 critical vulnerabilities, but what’s great is that we also receive recommendations to upgrade to the version where those vulnerabilities are addressed."
Task 5: ACS Image Check
-
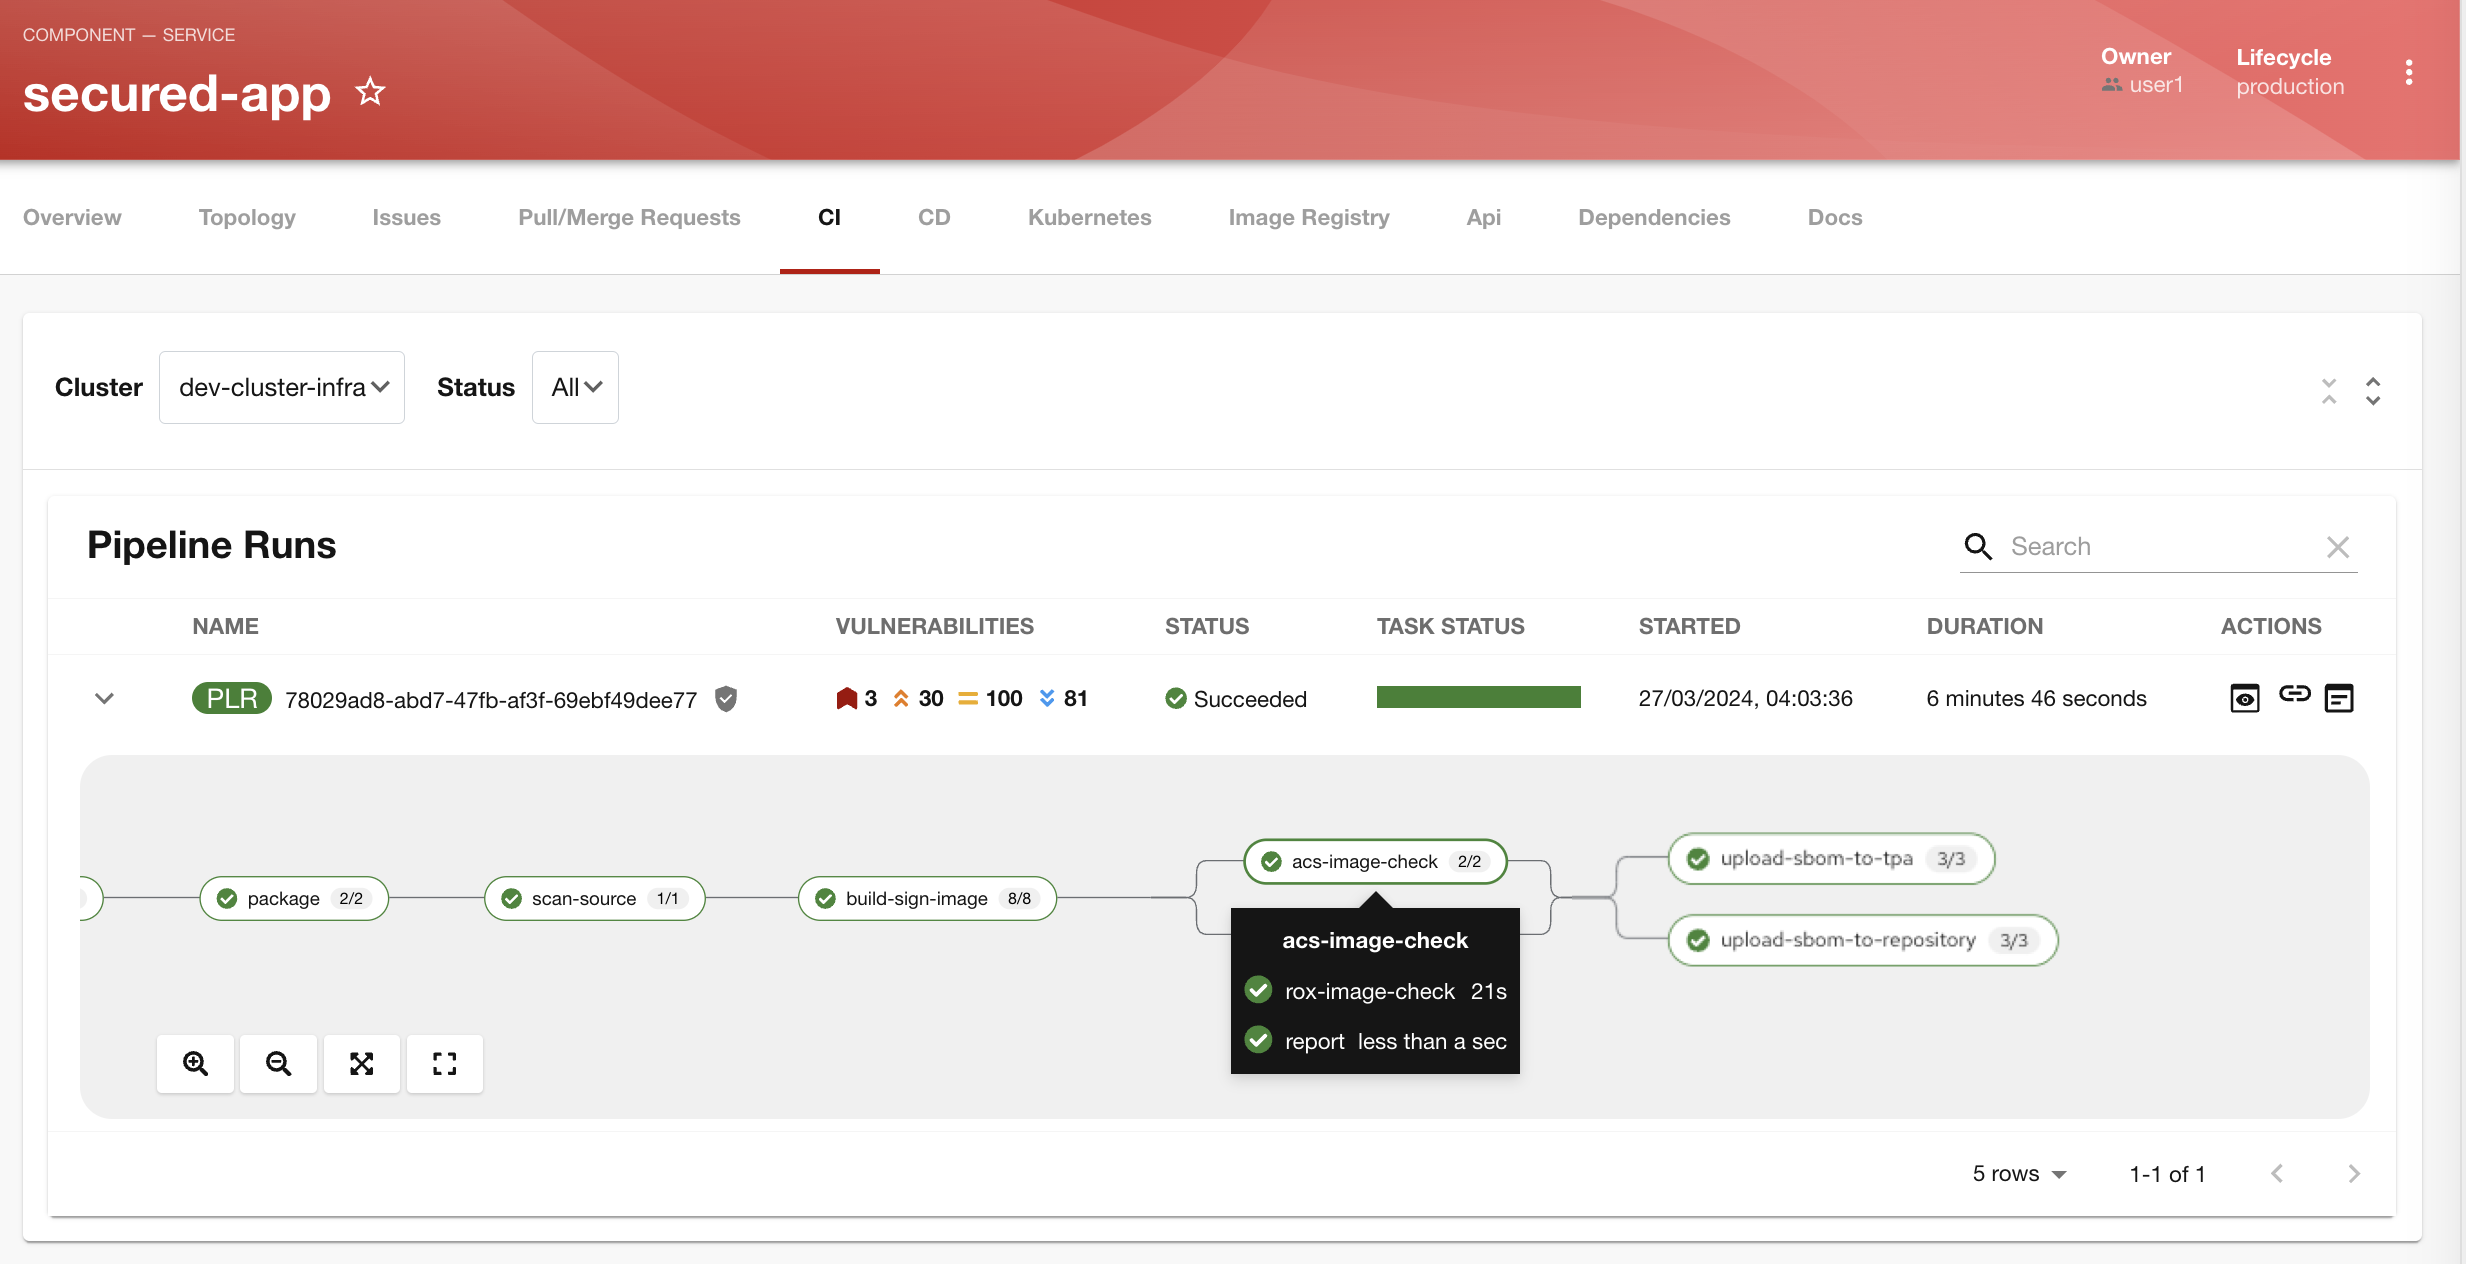
You switch back to the pipeline view as you explain: "ACS doesn’t stop at scanning; it can also assess whether the image adheres to predefined rules by performing an image check".
-
"The image-scan-check task evaluates the container image against policies and compliance standards. This includes not running as root, using approved base images, or avoiding prohibited software packages, for example."
-
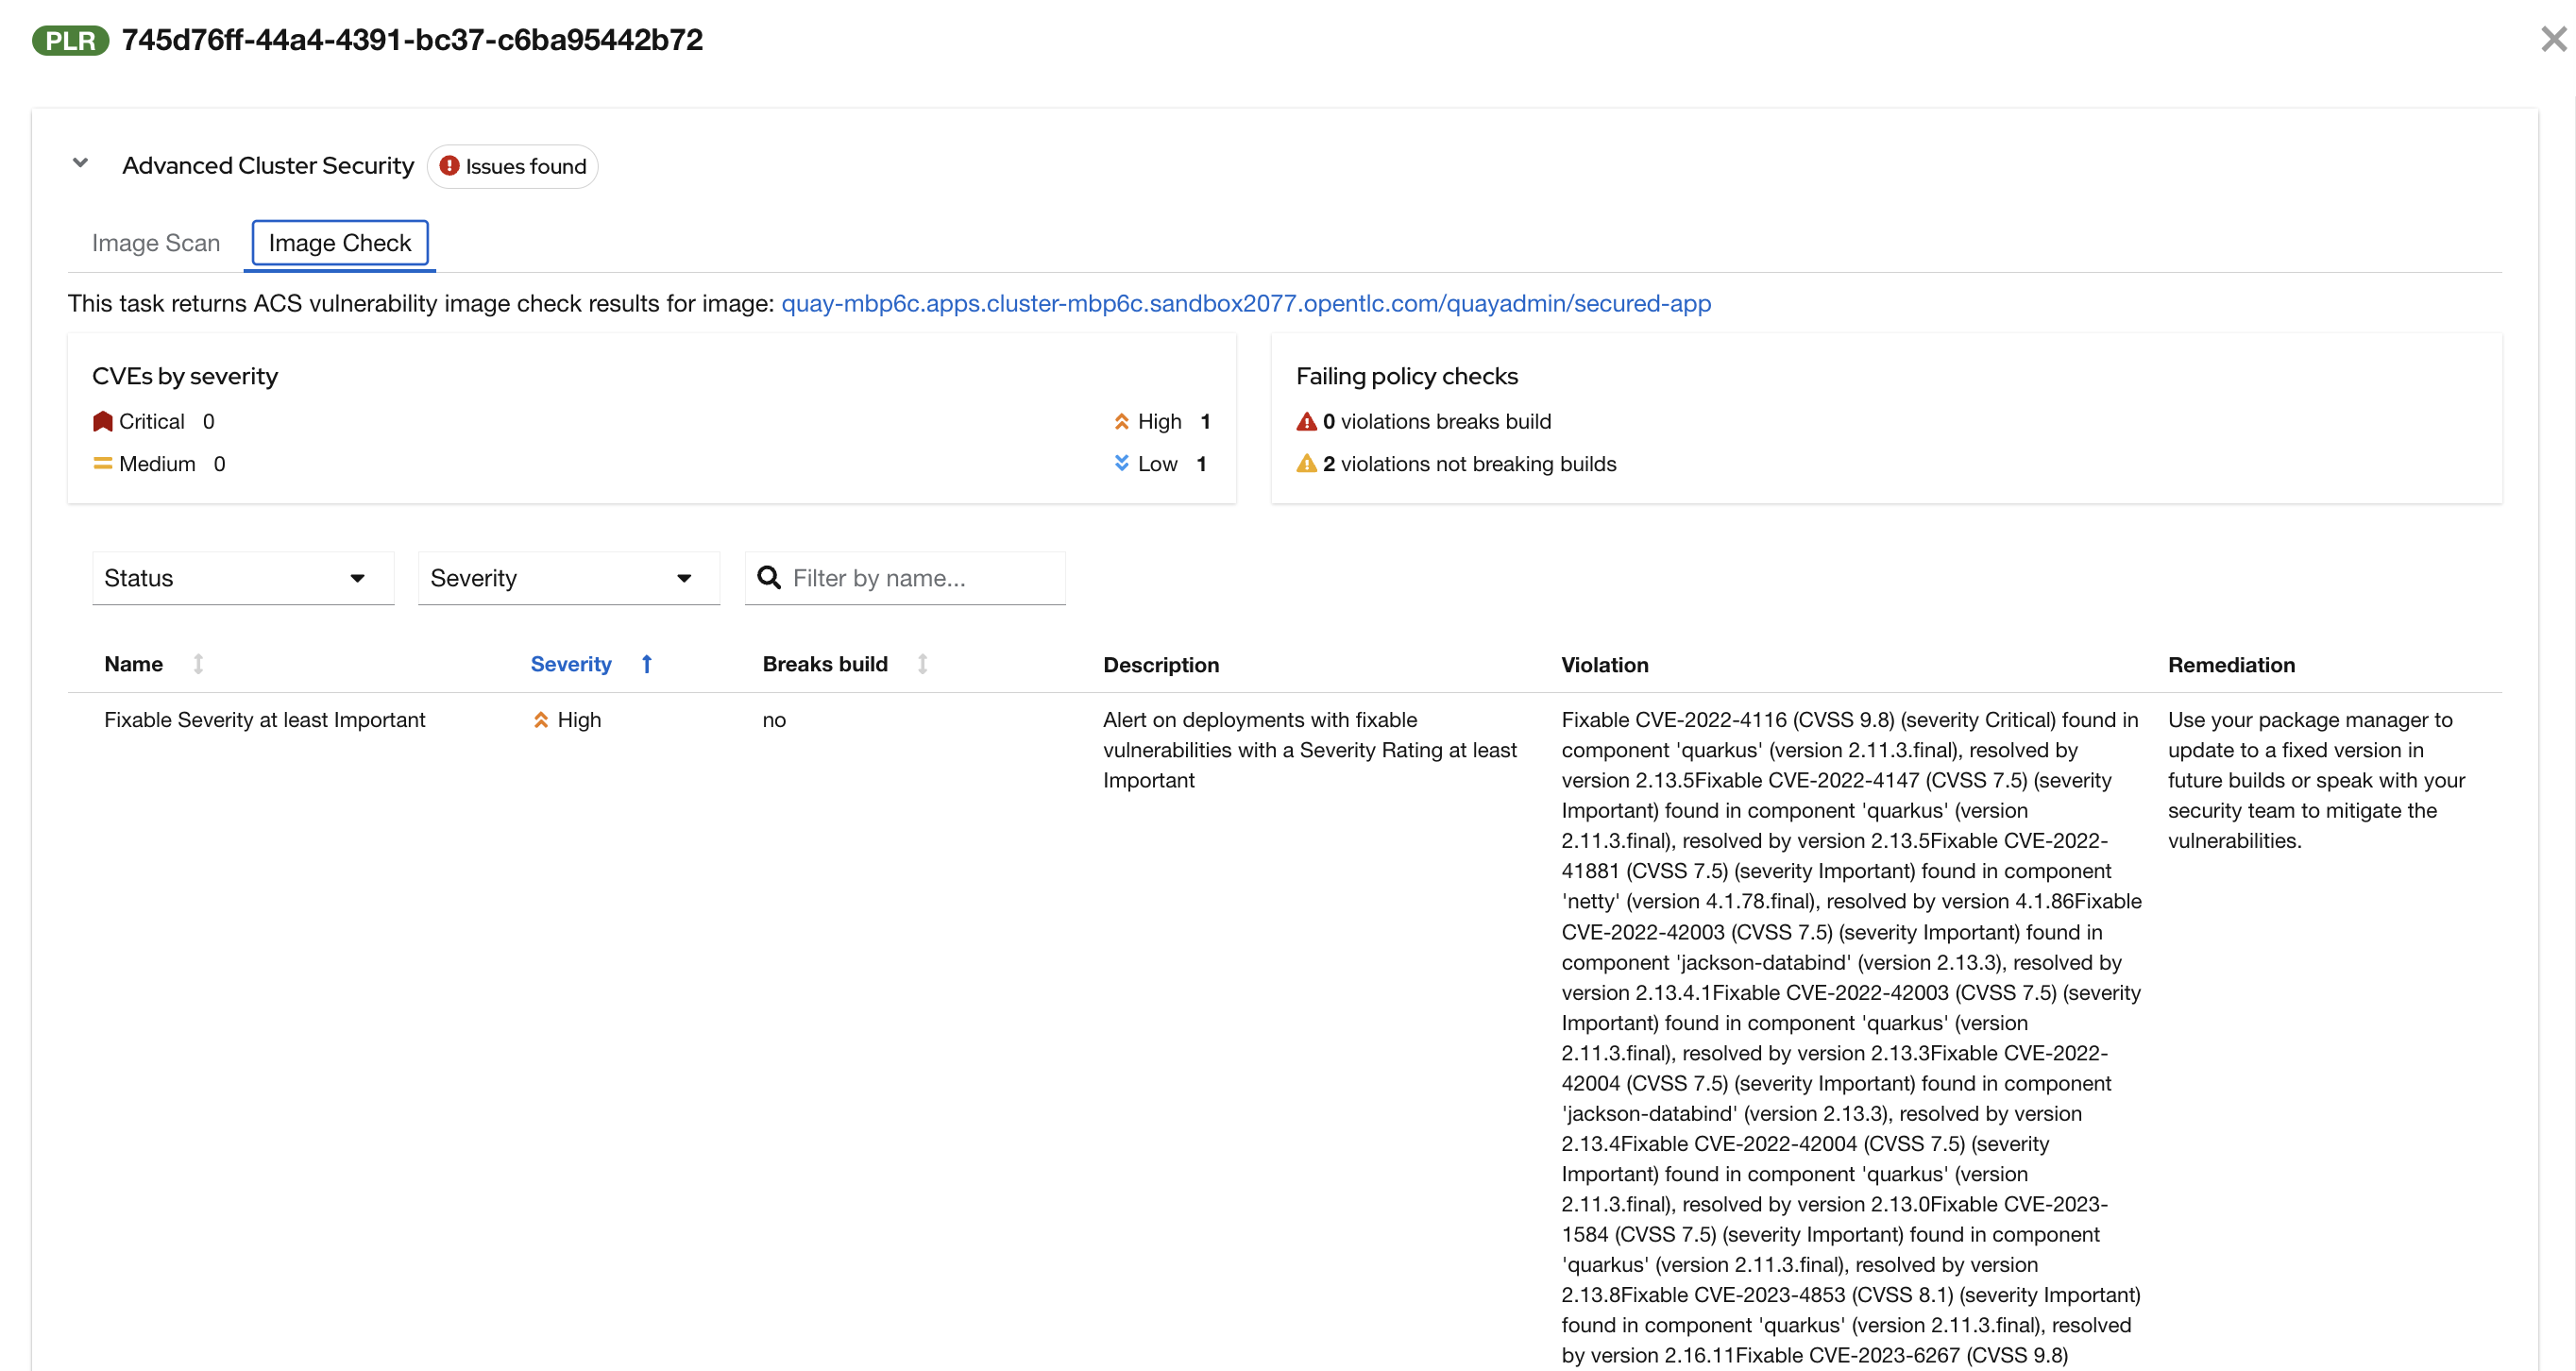
"Once again, we can view the analysis results," you say, clicking on the Output icon under ACTIONS and then selecting the Image Check tab.
-
"In this report, you can see all the violations that ACS detected and the recommended remediation actions."
Task 6: Upload SBOM to Repository

-
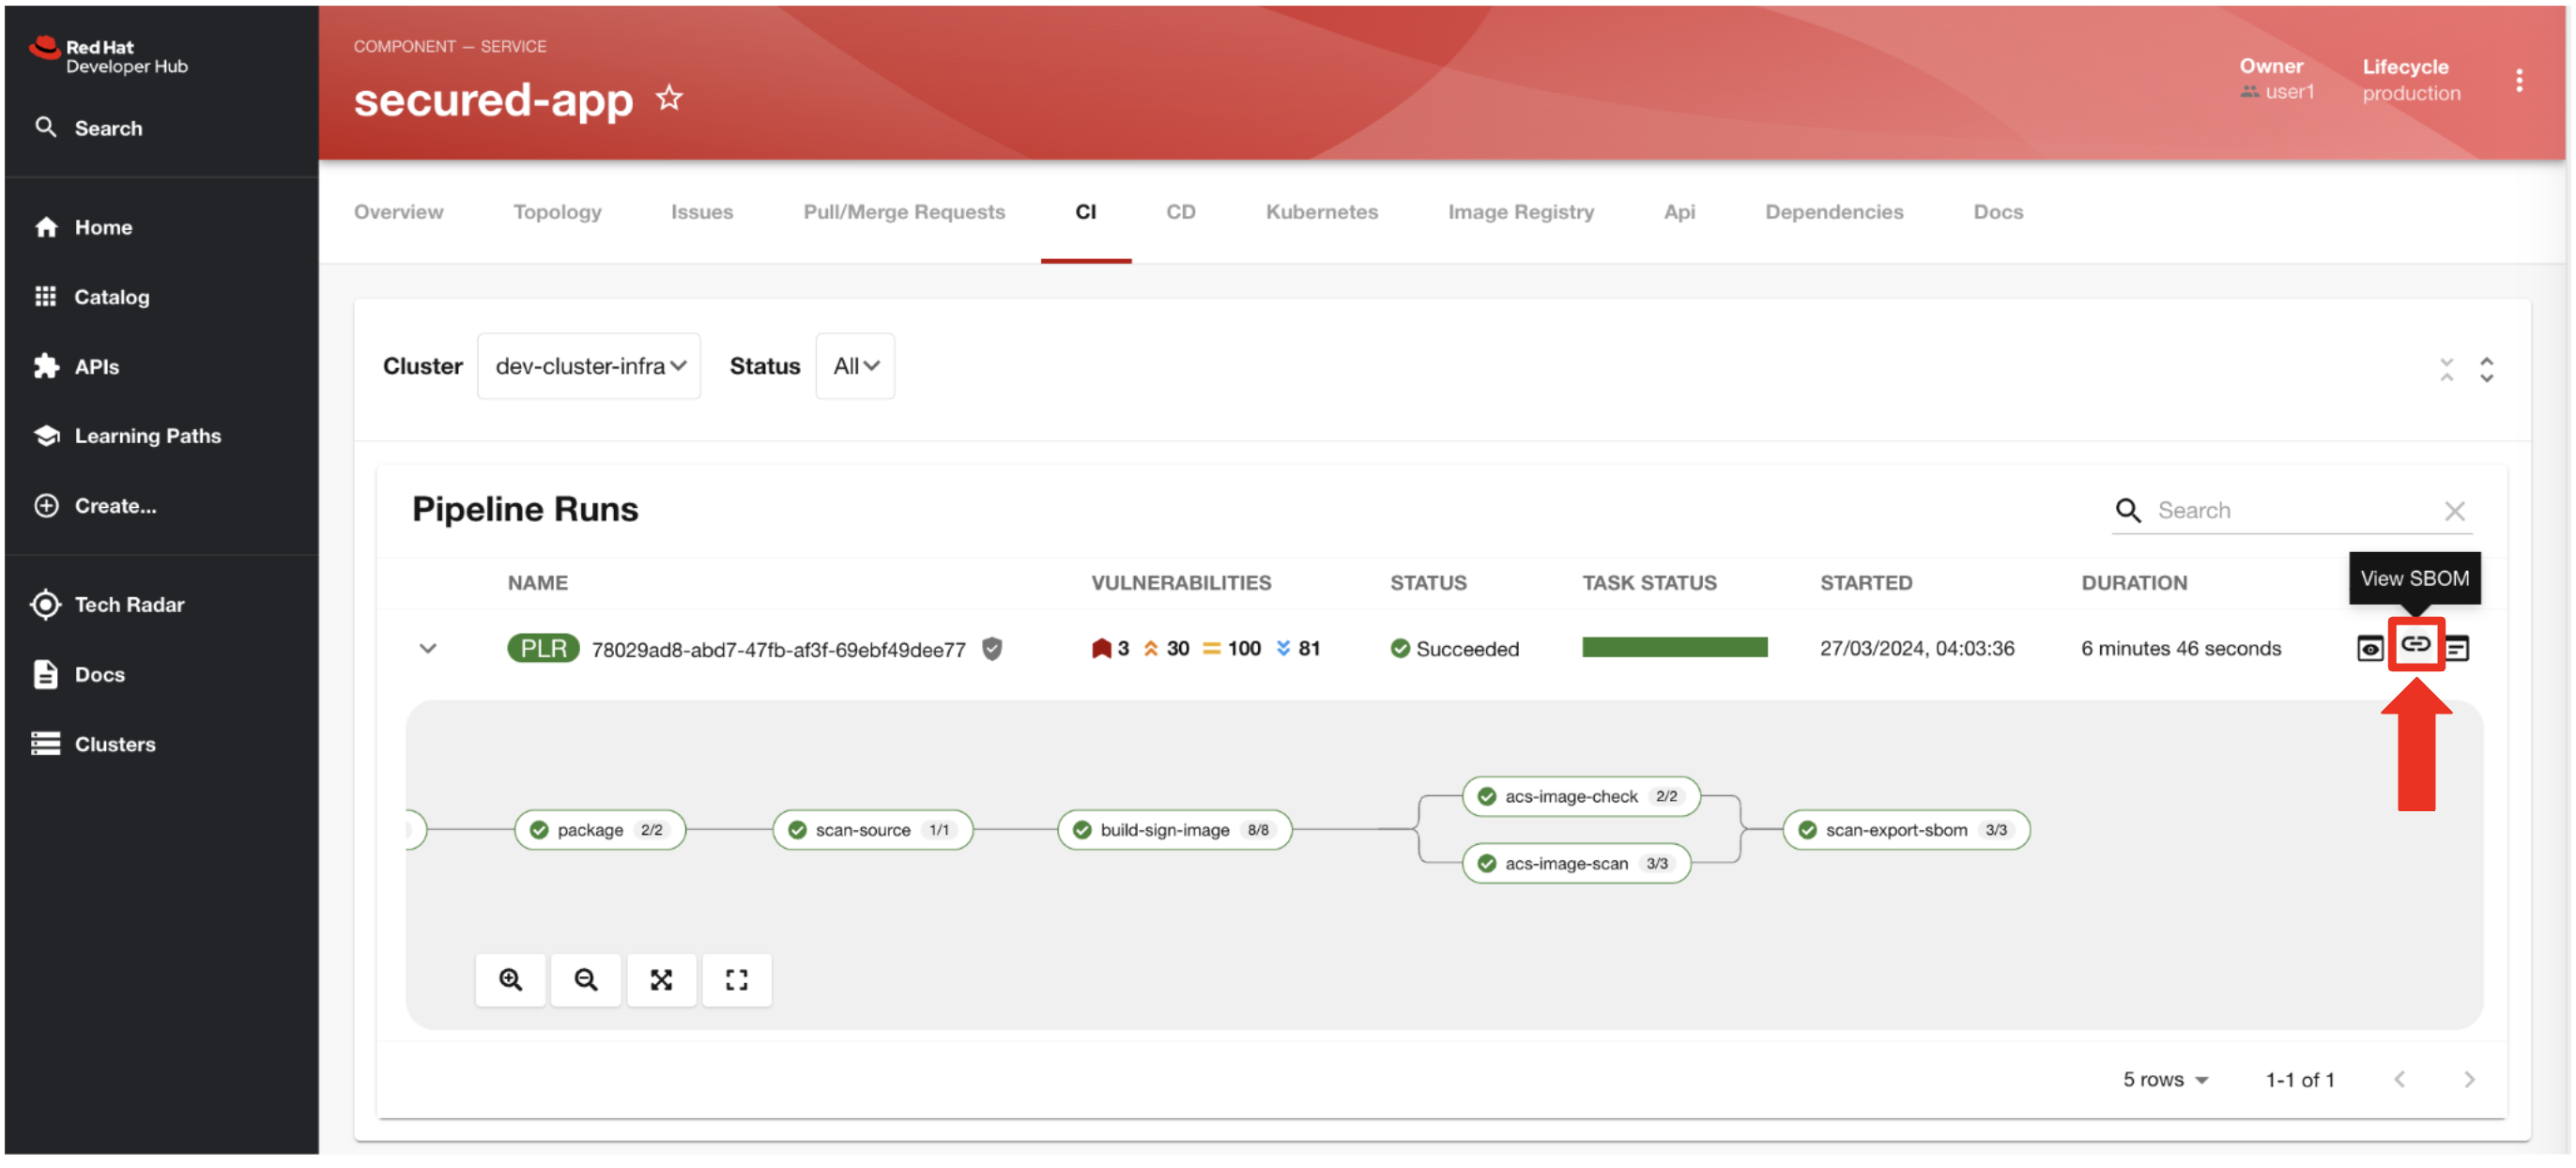
You then demonstrate how to access the generated SBOM by clicking the link that’s readily available in your pipeline view.
-
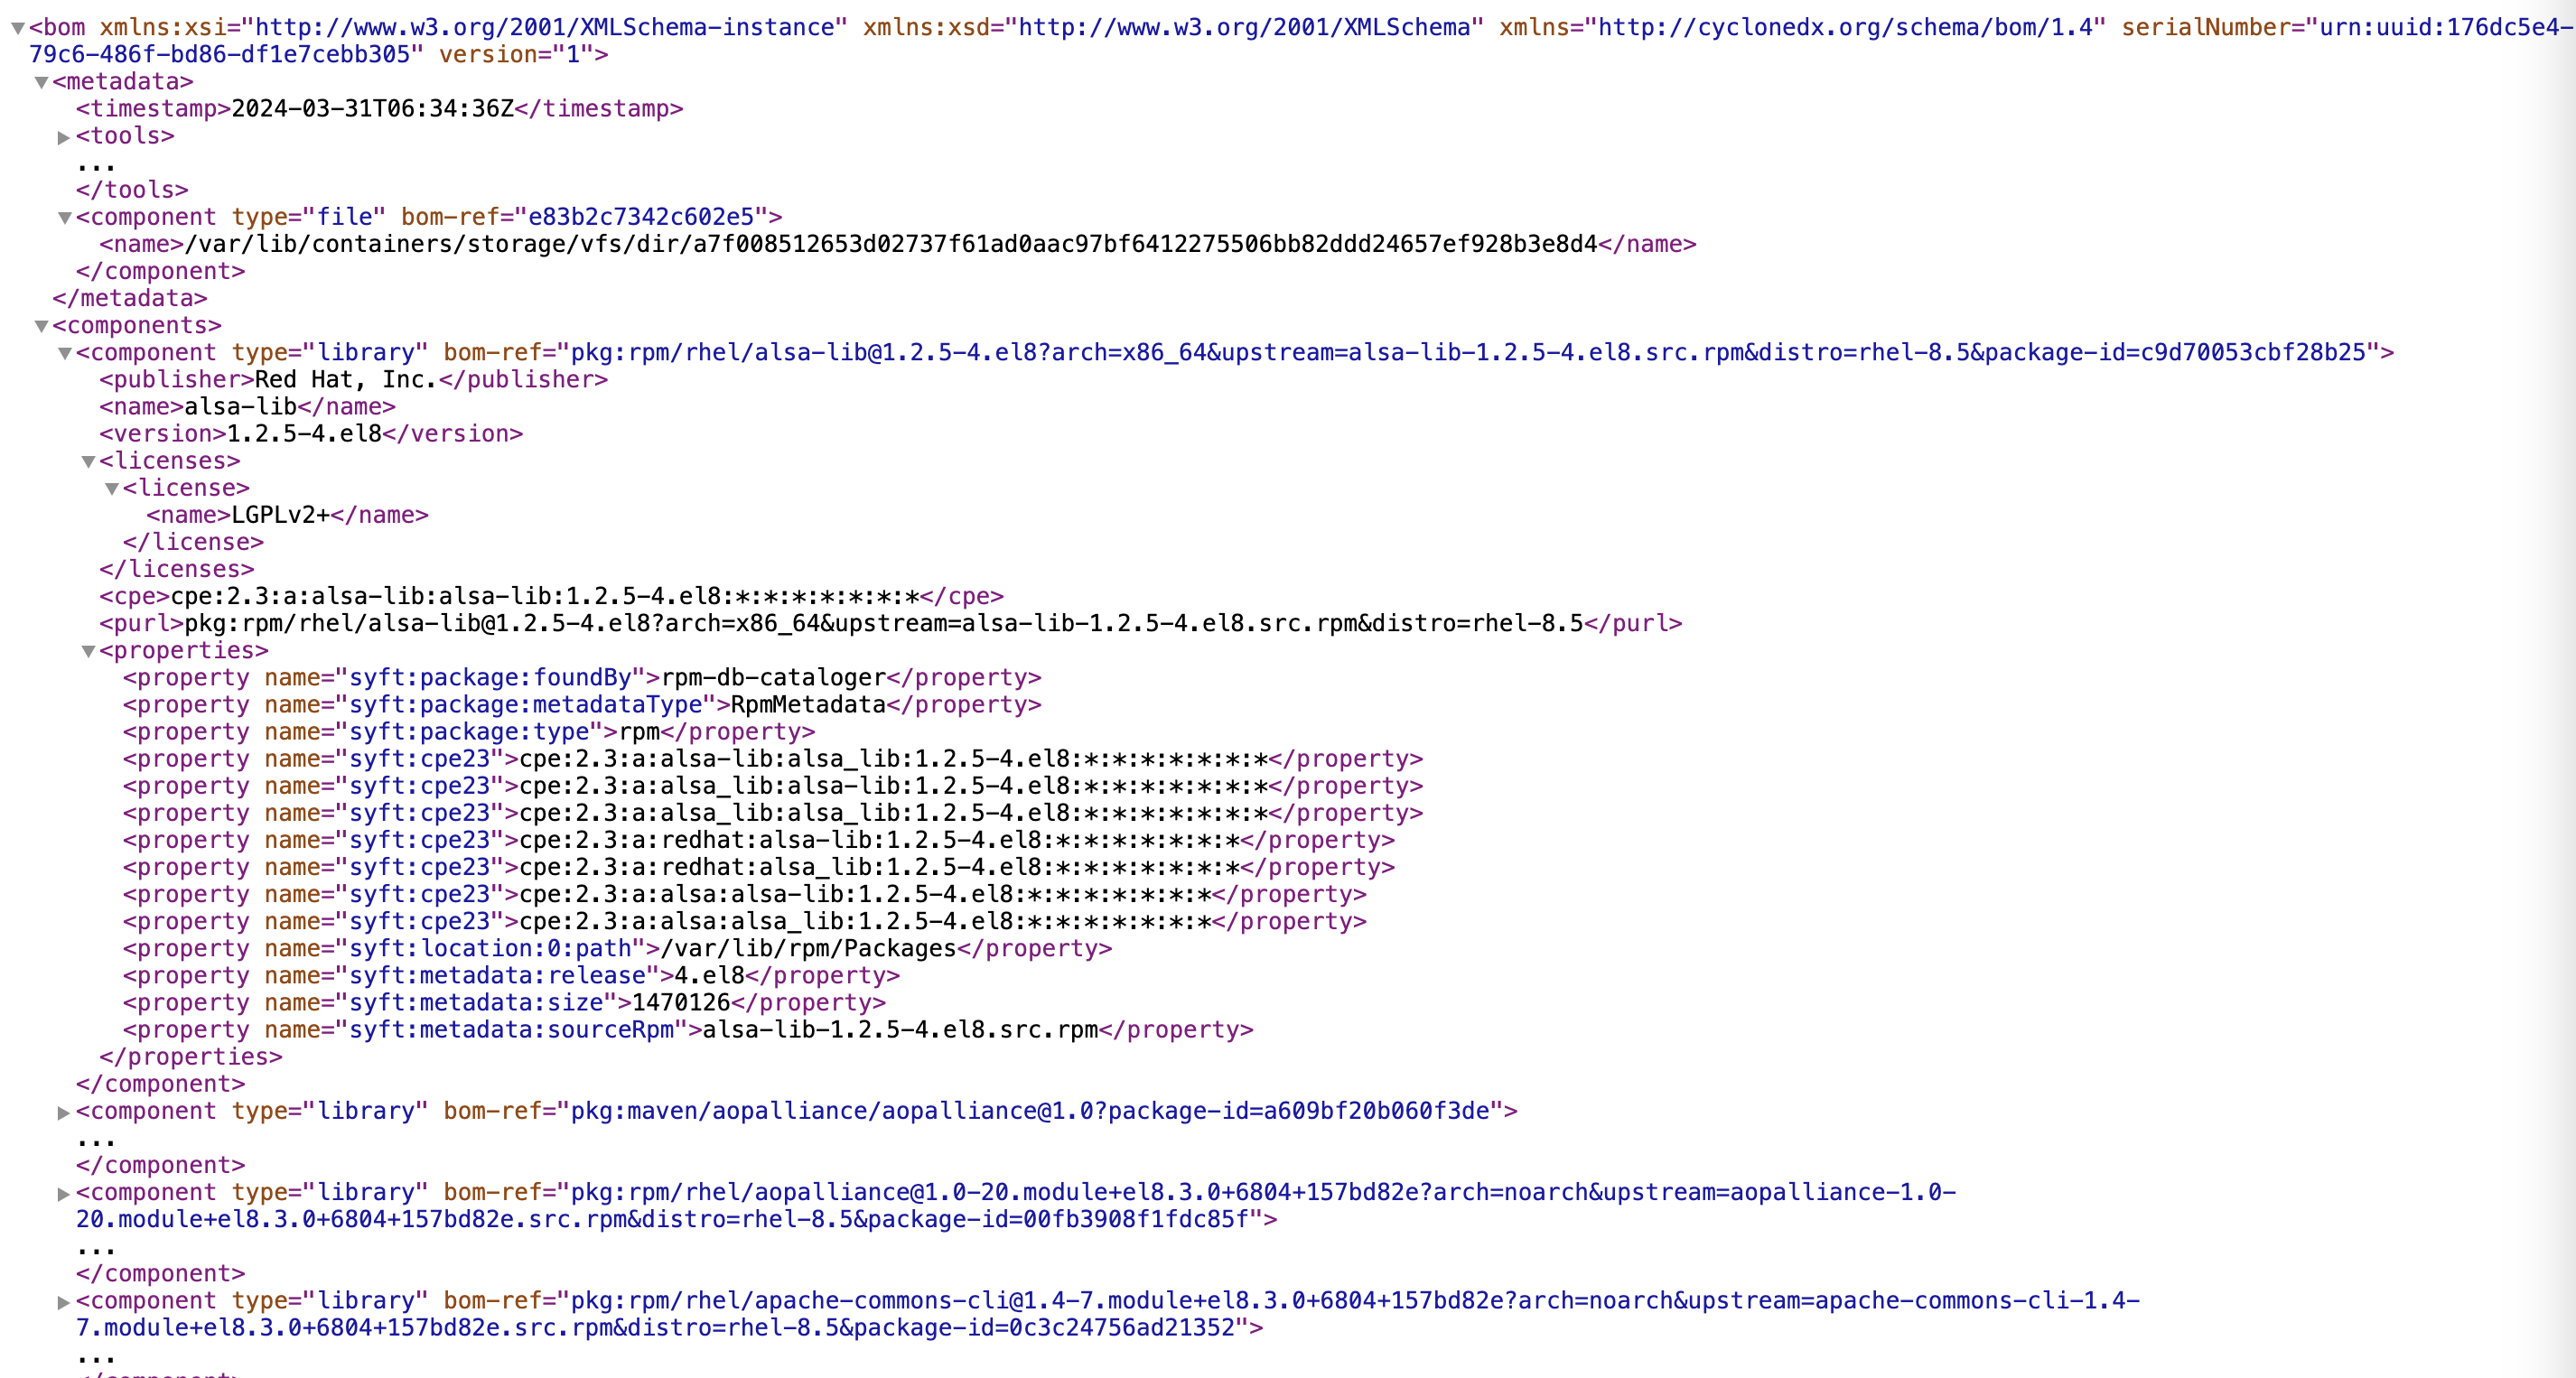
After you click you immediately see the generated SBOM.
Task 7: Upload SBOM to TPA

-
In this step, the SBOM is uploaded to Trusted Profile Analyzer. We do this to turn the raw SBOM into actionable information. For example, TPA can identify dependencies in your image that are targets of known Common Vulnerabilities and Exploits (CVEs). These CVE’s can be viewed on the Trusted Profile Analyzer console for the specific SBOM uploaded.
Demonstrating the Secure Deploy Process
-
Addressing the QA engineer, you begin, “Now, I’m going to show you how to validate that an image is signed before deploying it for testing.”
-
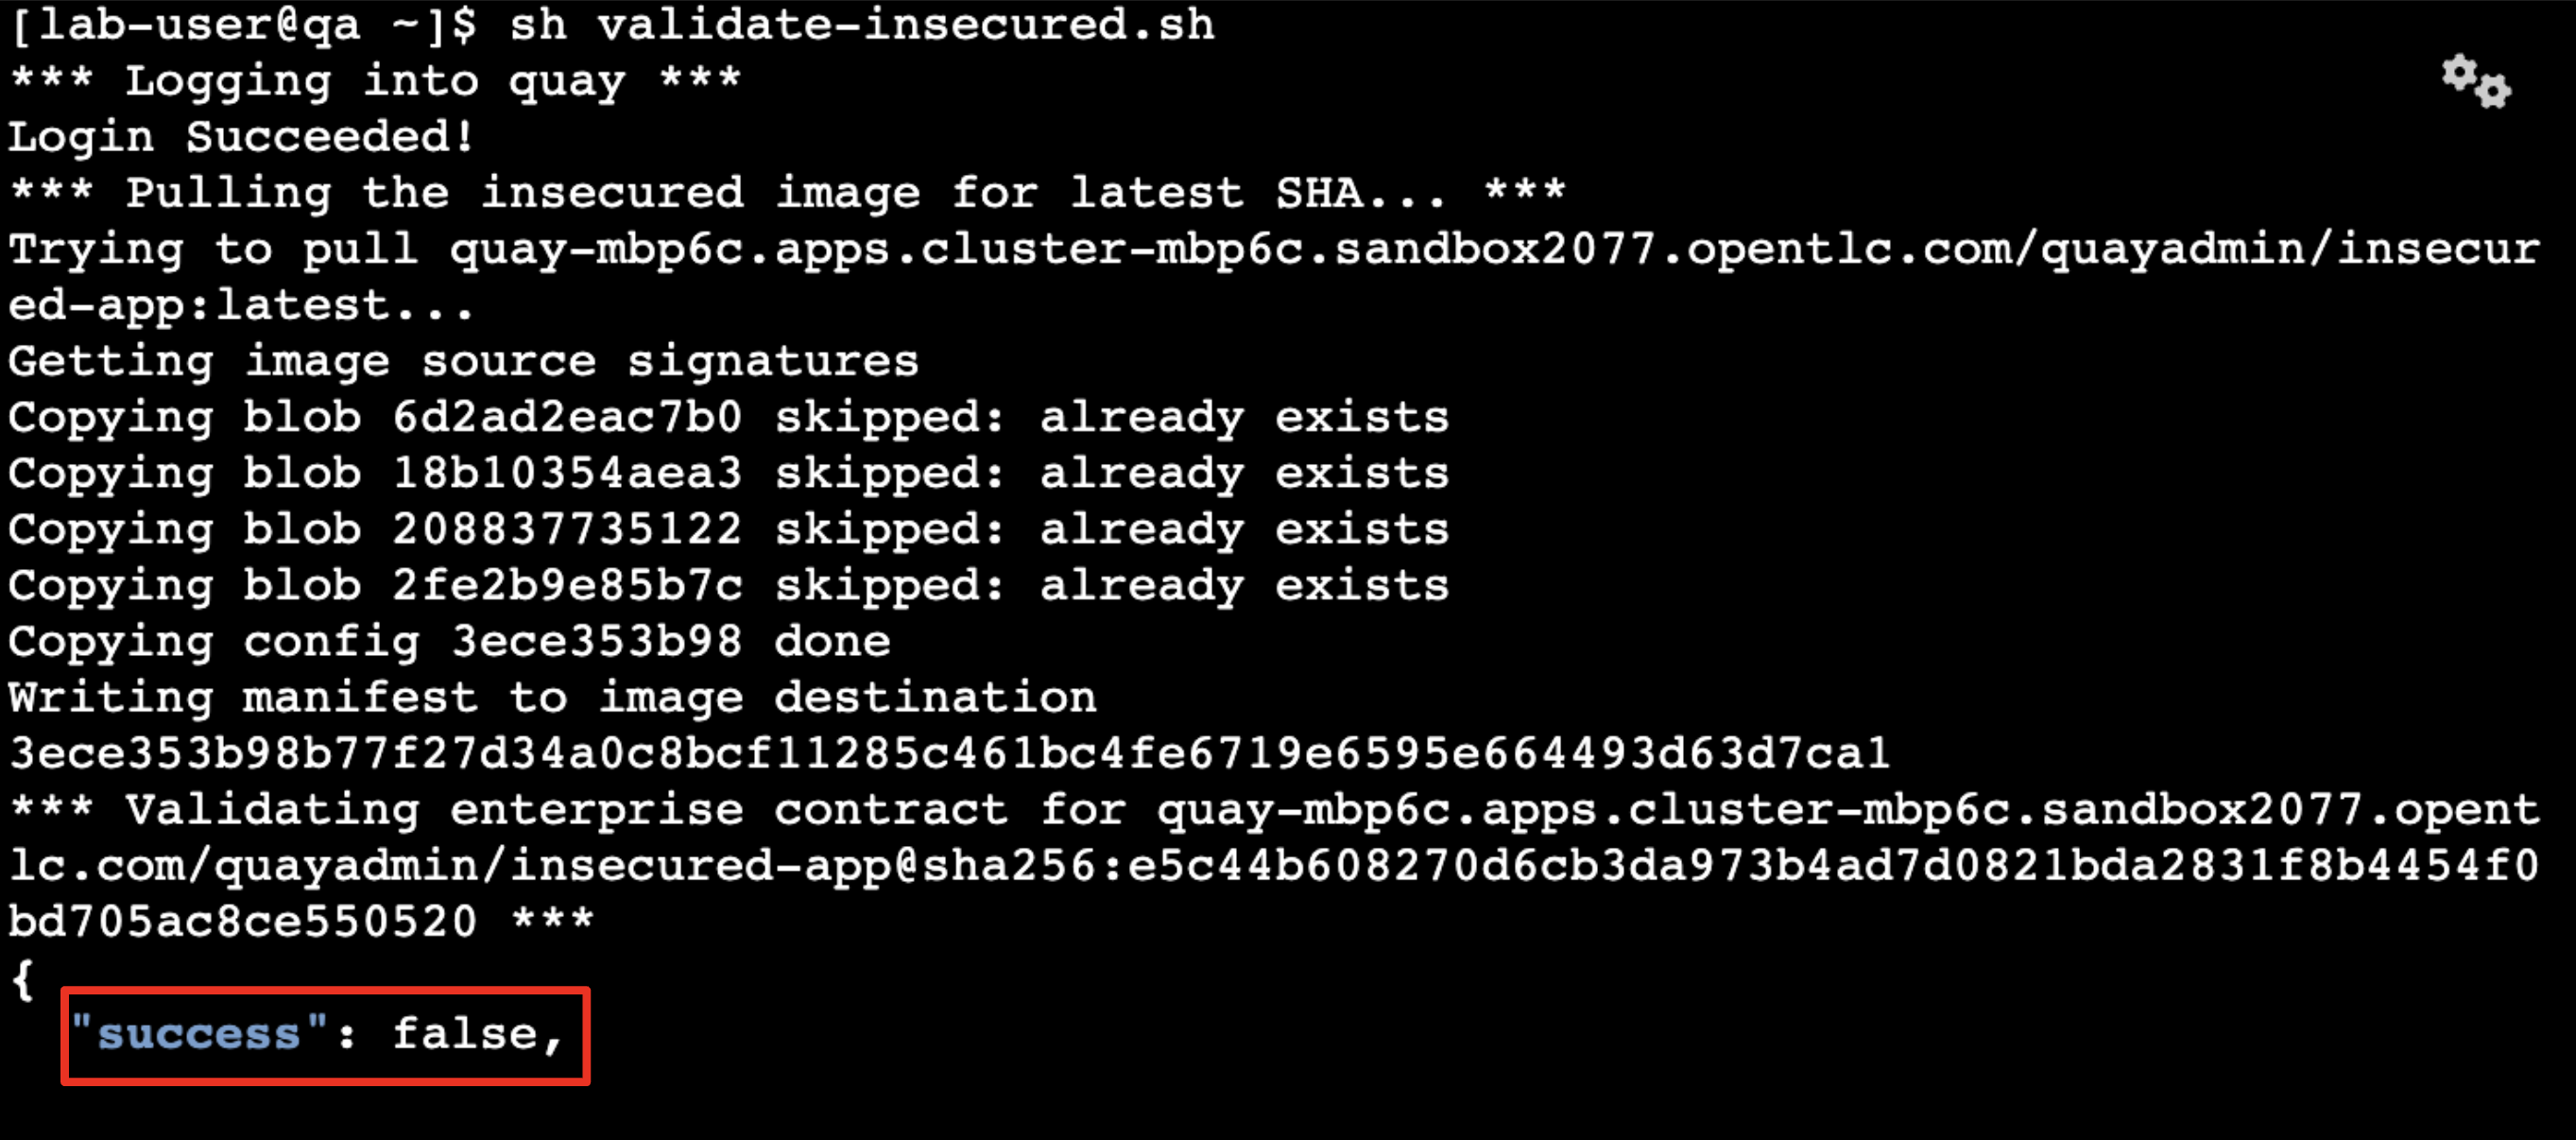
“You’ll use the Enterprise Contract CLI (ec) along with Cosign to first check the original image from the insecure application. I’ve prepared a script specifically for this purpose.”
-
You execute the command in the QA environment terminal:
sh validate-insecured.sh
-
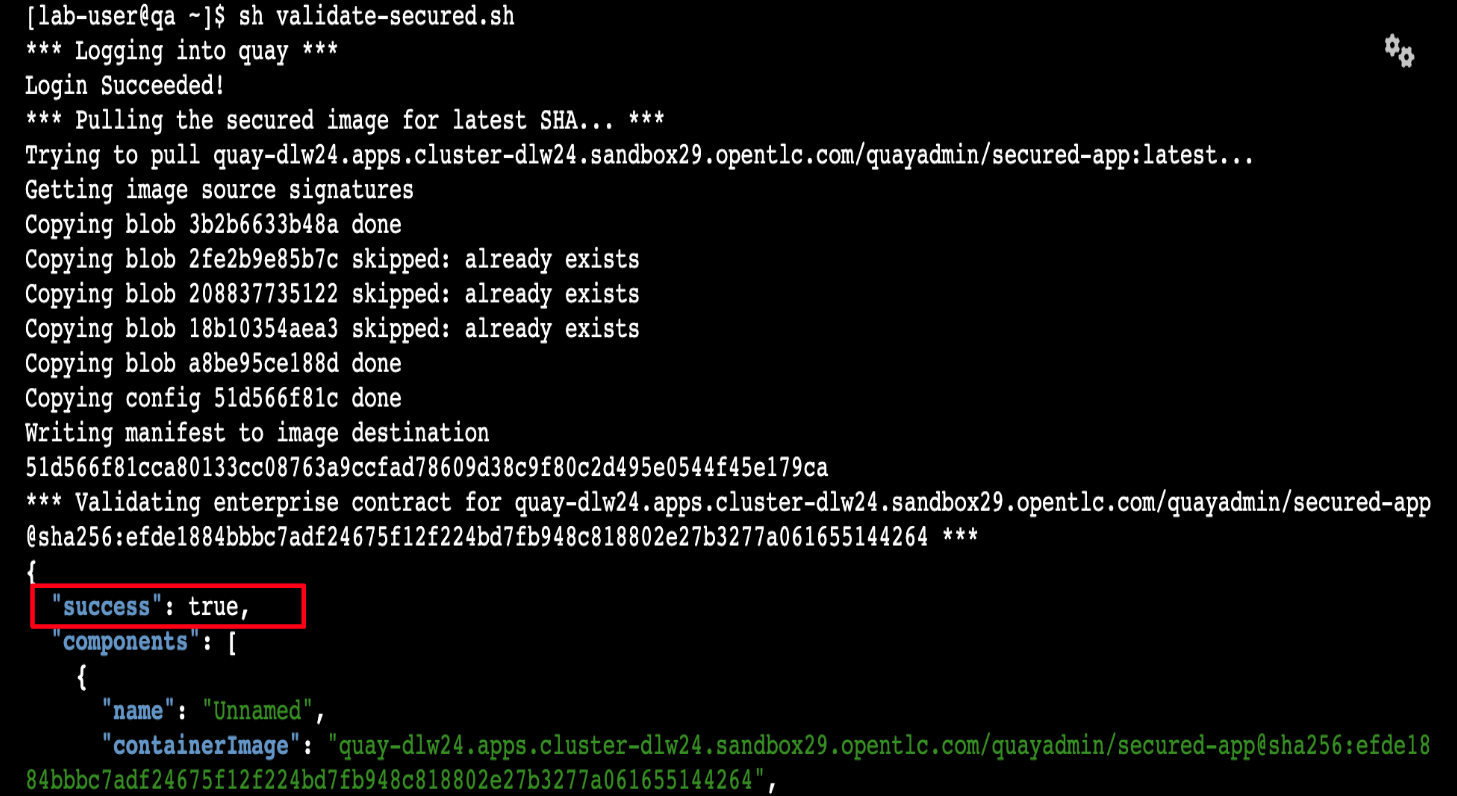
“As expected, the validation of this image failed. Now, let’s validate the secure image that we just built in the same way,” you indicate, and then you run the following command:
sh validate-secured.sh -
"Obviously, the validation is successful with the secure image.” you conclude, pointing at the success result in the terminal.
-
"We can also test our 0-Trusted Signature Policy, by deploying both images to OpenShift, first we’ll test the policy against the insecure image.
-
You execute the command to deploy the insecure image in the QA environment terminal:
sh deploy-insecured.sh -
"The policy does its job and stops us from deploying the insecure application."
-
You then execute the command to deploy the image built by the secure pipeline in the QA environment terminal:
sh deploy-secured.sh -
"This time the deployment is successful and you can proceed to test this application and promote to production with confidence.", you assure the QA Engineer.
Workshop - Summary
As we close the curtains on this workshop, it’s important to reflect on the journey we’ve embarked on together. Throughout this experience, you’ve stepped into the shoes of developers, QA engineers, and security professionals, confronting head-on the hurdles that each role faces. More importantly, you’ve seen firsthand how the Red Hat Developer Hub (RHDH) and the Red Hat Trusted Application Pipeline (RHTAP) can transform these challenges into stepping stones for innovation and a solid foundation for building applications in a Trusted Software Supply Chain. Thank you for joining us on this journey. May the knowledge you’ve gained empower you to become a beacon of innovation and security in your organization. Here’s to your success in crafting a future built on innovation and security!