Chapter 2: Tightrope Walking without a Net
-
As our story unfolds, you find yourself donning the hat of a QA engineer.
-
The moment you receive an email from the Quarkus developer announcing the completion of his task, the baton is passed to you.
-
It’s now in your hands to validate the integrity and quality of the code delivered.
Understanding the workshop terminals
-
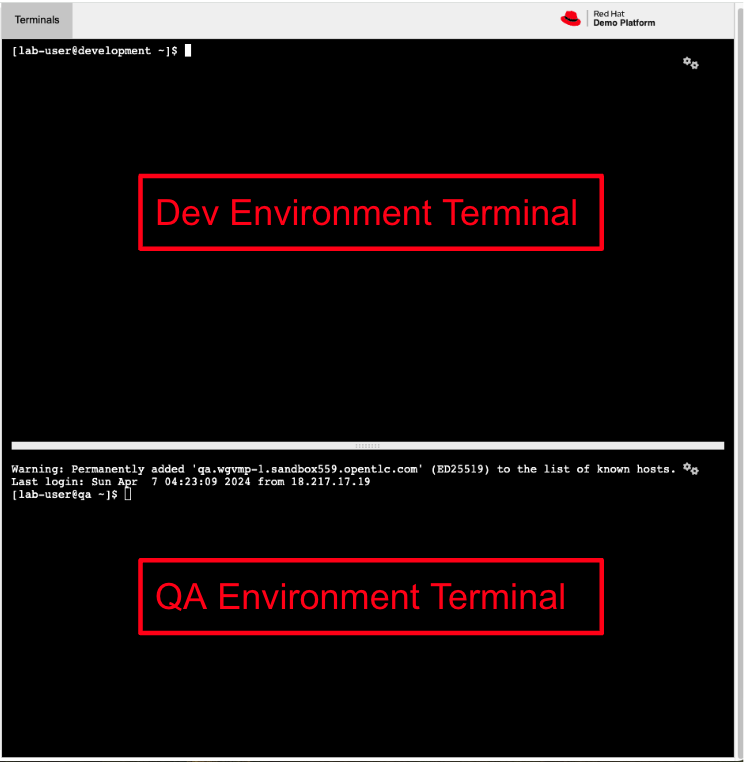
Before we start the activities for this lab, let’s familiarize ourselves with the two terminals to the right of your workshop guide.
-
Initially, both terminals are logged into the QA environment.
-
We want the top terminal to connect to your development environment .
-
In the top terminal, run the below command to login to the development environment. Use {developer_cluster_bastion_ssh_password} as your password:
ssh {developer_cluster_bastion_ssh_user_name}@{developer_cluster_bastion_public_hostname}
-
Now that we have both terminals connected to the correct environments let’s continue with our narrative.
Testing the Insecure Application
-
Your first action is to deploy the image, built by the developer, to the QA environment.
-
Your experience as a QA engineer has equipped you with a toolkit of scripts, designed to automate such tasks.
-
You open your QA terminal, and type the command:
sh deploy-insecured.sh -
As soon as the script completes its run and the application is deployed, you proceed to copy the application’s URL and paste it in your browser, eager to start testing the application.
| It may take the application a few minutes to start after the script completes. |

-
But, oh no!
-
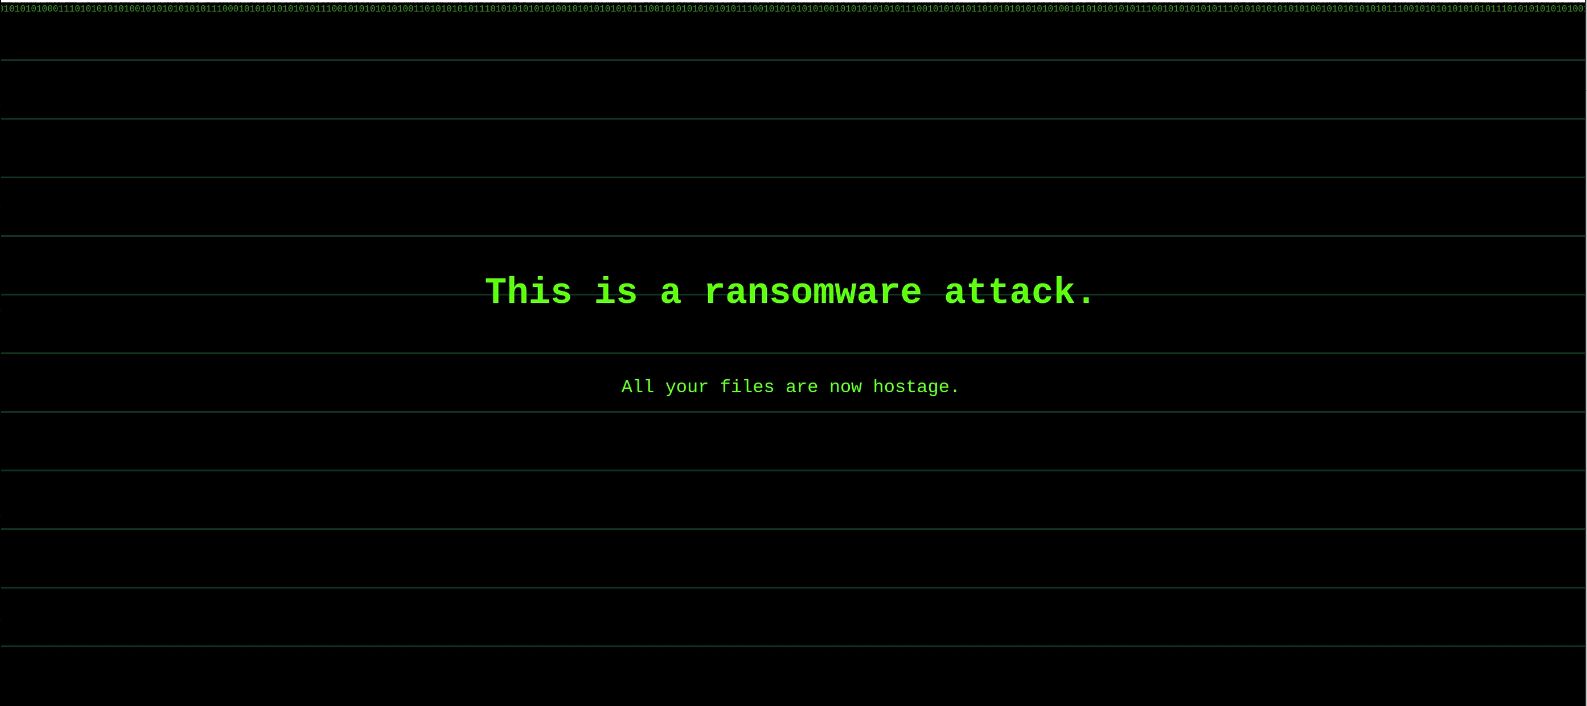
To your disbelief, the application has been compromised, now infected with a ransomware virus.
-
How could this have possibly happened?
-
Without wasting a moment, you recognize the severity of the situation and quickly report the issue to your organization’s security team, urging them to launch an investigation into this critical breach.
Installing the Guard Rails
In the wake of the sophisticated ransomware attack that exploited vulnerabilities within the organization’s software supply chain, a crucial meeting was convened. The conference room hosted the team involved in the incident, and you, a seasoned consultant from Red Hat, ready to guide the team through the crises.
Signed Commits
-
"I understand you’ve encountered a serious issue with a ransomware infection. Lets discuss the situation and how we can prevent this from happening again," you tell the team.
-
QA Engineer: (Visibly upset) Yeah, I couldn’t believe it! How could this have happened?
-
"Typically, vulnerabilities like this can happen when there’s a gap in the software supply chain security," you explain.
-
"The first step in addressing this is setting up your Git environment to sign code commits. This will allow us to verify the code’s origin and integrity before it gets integrated into your build process.", you add.
-
Security Engineer: So, you’re saying that ensuring code commits are signed can prevent tampering?
-
"Exactl!. By verifying the commit was made by an authorized individual, we can ensure that the code has not been tampered with by unauthorized individuals or compromised by malicious software, providing a strong line of defense against potential security breaches."
Signed Container Images
-
"Next, we’ll build a container image from the verified code, this too needs to be signed."
-
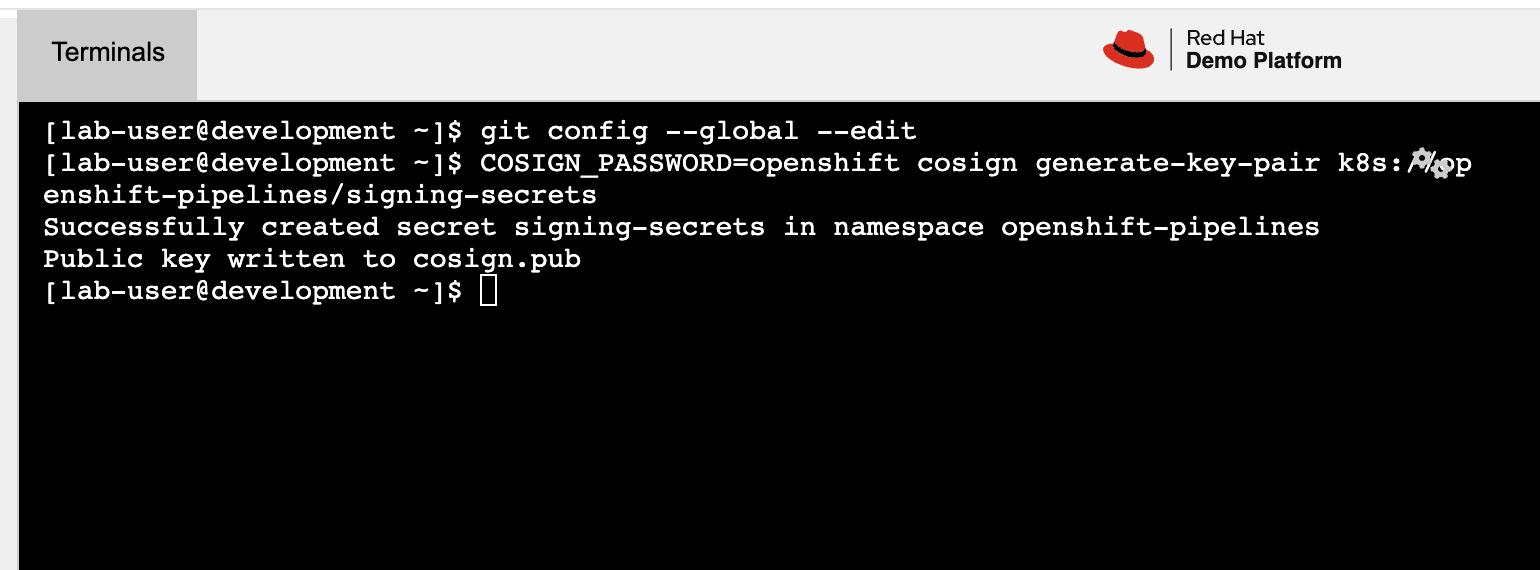
"We will use Cosign to create a signing secret", you explain as you to execute the following command in the development environment terminal:
COSIGN_PASSWORD=openshift cosign generate-key-pair k8s://openshift-pipelines/signing-secrets -
"This command," you continue, "generates a key-pair. We will configure Tekton Chains to use this key in signing the container image in our build pipeline."
-
"The public key, or cosign.pub, will be important later on for verifying the signatures of the images you deploy to the QA environment," you tell the QA Engineer.
-
"Before deploying a container image, I will show you how you can use Enterprise Contracts to verify it’s origin. This ensures that the image comes from your approved secure build system, not a random personal laptop."
-
With the Cosign signing secret in place, the next step is to configure Tekton Chains to enable image signing.
-
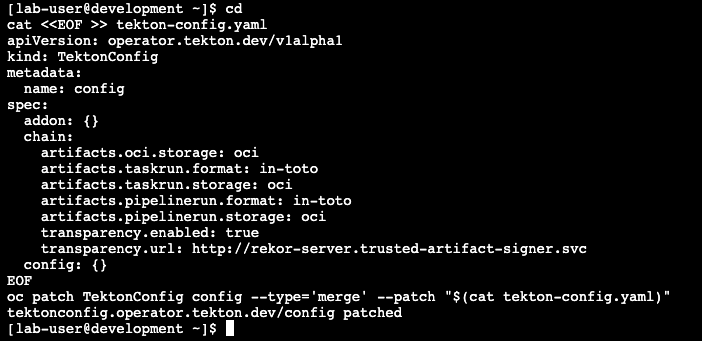
"Now, let’s configure Tekton Chains to start signing our images," you guide the team as you run the following command in the development environment terminal:
cd
cat <<EOF >> tekton-config.yaml
apiVersion: operator.tekton.dev/v1alpha1
kind: TektonConfig
metadata:
  name: config
spec:
  addon: {}
  chain:
    artifacts.oci.storage: oci
    artifacts.taskrun.format: in-toto
    artifacts.taskrun.storage: oci
    artifacts.pipelinerun.format: in-toto
    artifacts.pipelinerun.storage: oci
    transparency.enabled: true
    transparency.url: http://rekor-server.trusted-artifact-signer.svc
  config: {}
EOF
oc patch TektonConfig config --type='merge' --patch "$(cat tekton-config.yaml)"
-
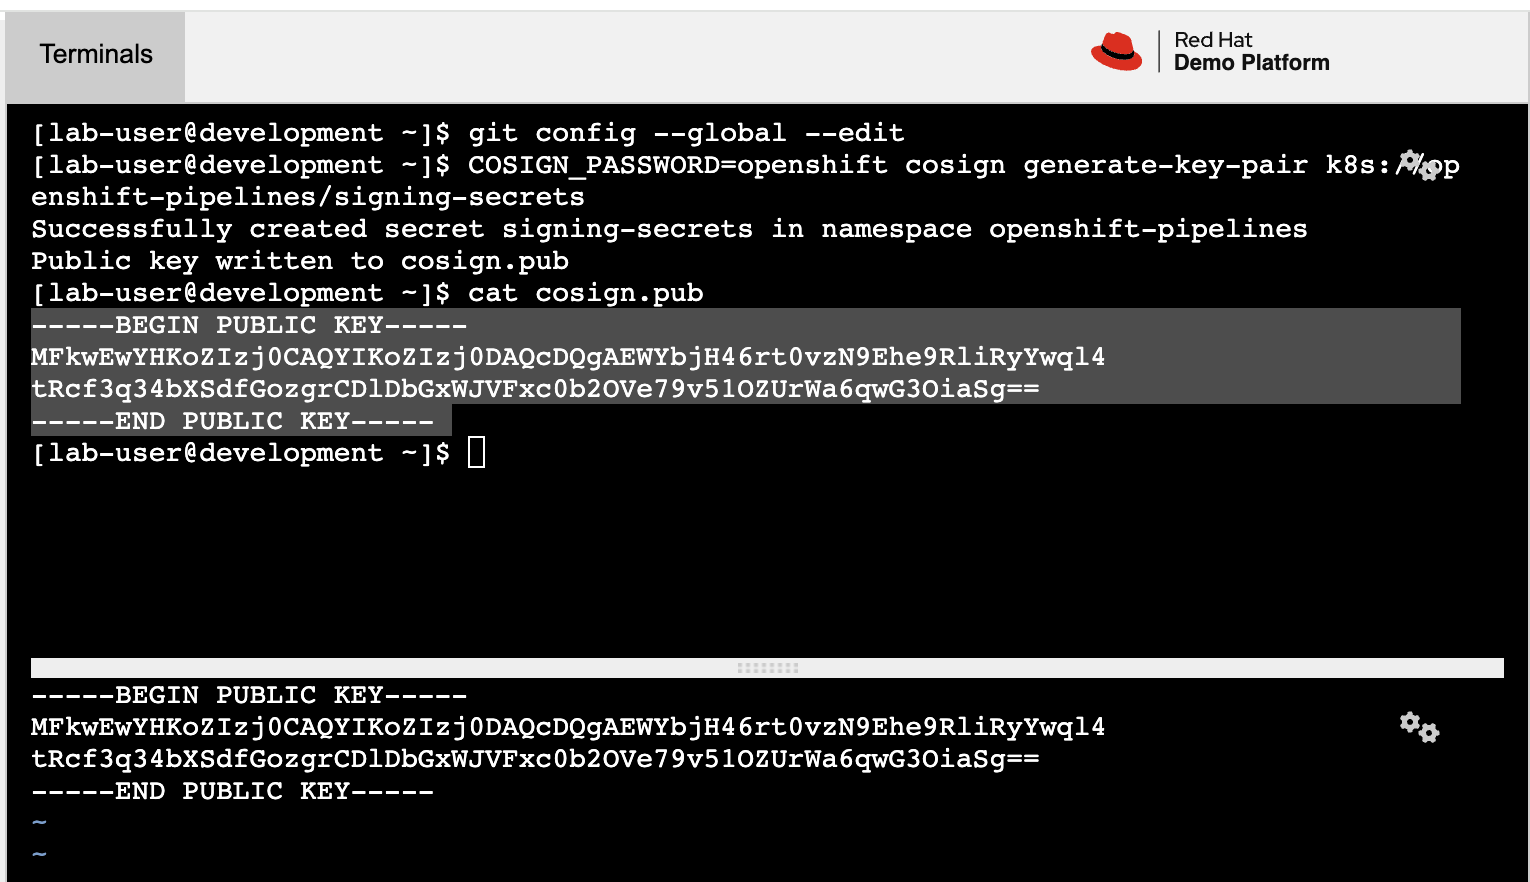
In the development environment terminal, you execute the below command and then copy the full content of the public key:
cat cosign.pub -
Next, you switch to the QA terminal and enter:
vi cosign.pub -
You type "i" to enter insert mode, then you paste the content of the public key into the file, followed by the "Esc" key to exit insert mode
-
You then save the file by typing ":wq!" followed by "return".
-
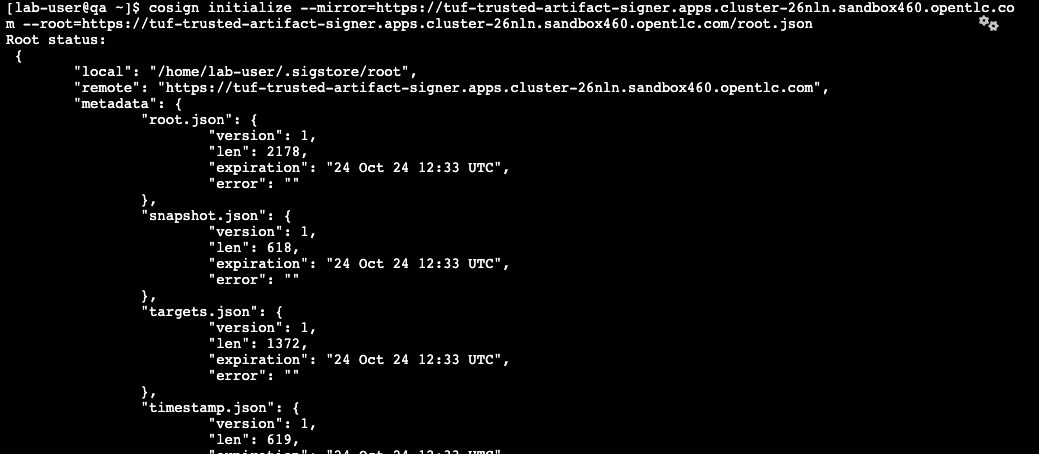
"Finally we need to setup Cosign to use our TUF mirror registry, to provide the cryptographic keys and trust information required for Cosign to sign our software artifacts," you explain as you run the following in the QA environment terminal.
cosign initialize --mirror=https://tuf-trusted-artifact-signer.{developer_cluster_openshift_cluster_ingress_domain} --root=https://tuf-trusted-artifact-signer.{developer_cluster_openshift_cluster_ingress_domain}/root.json
Generating Software Bill of Materials (SBOM)
-
"We’ll go a step further and create an attested Software Bill of Materials (SBOM)."
-
Developer: What is an SBOM?
-
"Think of an SBOM as a complete list of ingredients in your application. It details all the open-source components and dependencies used to build your software," you explain.
-
Developer: How does that help with Security?
-
"Excellent question! Having an SBOM with attestation is crucial. Let’s say a known vulnerability is discovered in one of the open-source components used in your application."
-
"With an attested SBOM, you can quickly identify which versions of your application are affected and prioritize patching. Attestation ensures the SBOM itself hasn’t been tampered with, providing confidence in its accuracy." you add.
Vulnerability Scanning and Policy Enforcement
-
Security Engineer: "Ok, but how can we enforce policies like stop the deployment of images with known malicious libraries?"
-
"Ah, yes. I remember you struggled quiet a bit with the Log4Shell vulnerability a few years back."
-
"We’ll include steps in the pipeline to perform both image scans and image checks against known CVEs and your organization’s policies. This way, we ensure that the images are clear of known vulnerabilities and that our policies are enforced during the build and deploy stages," you answer.
-
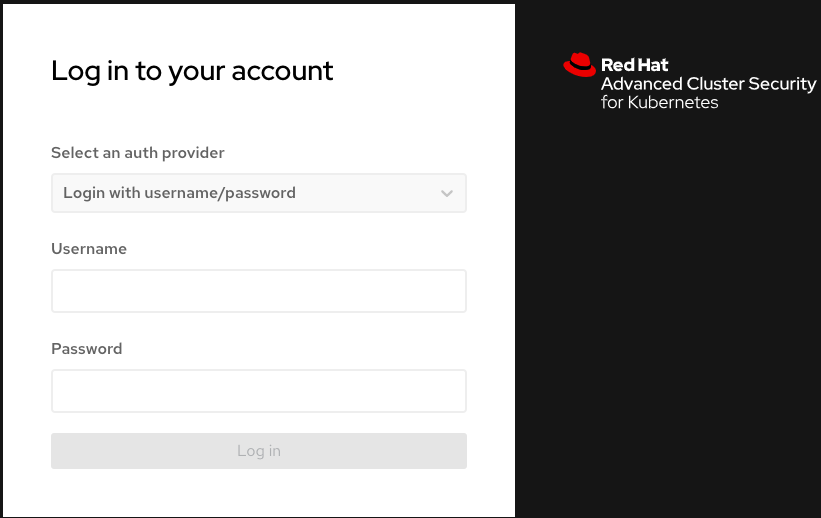
"In fact, let me login into Red Hat Advanced Cluster Security (ACS) now and show what those policies look like," you say as you open the {qa_cluster_acs_route}[RH ACS Console,window=_blank] and log in with your credentials username: {qa_cluster_acs_portal_username} and password: {qa_cluster_acs_portal_password}
| The browser will warn you of a certificate issue when you first access the RHACS console. Ignore this warning and continue to the site. |
-
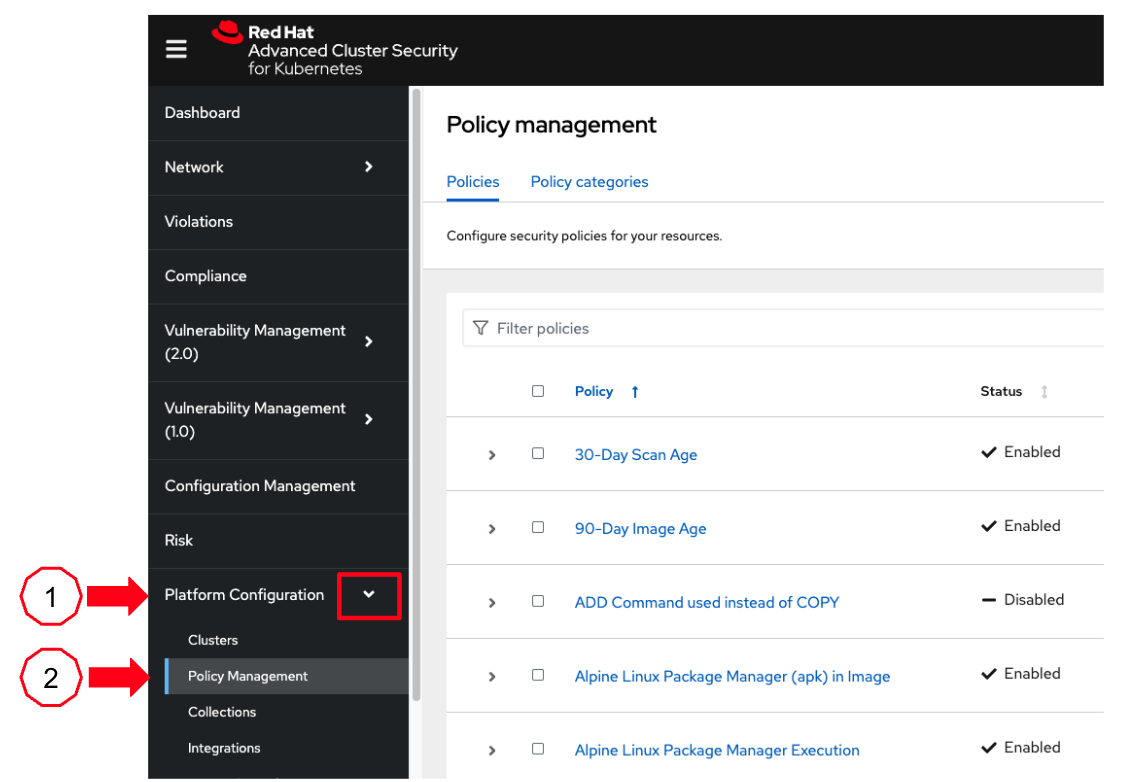
You expand the Platform Configuration list from the left menu and then click on the Policy Management link, as you say: "Here you can find the list of readily available policies you can choose from."
-
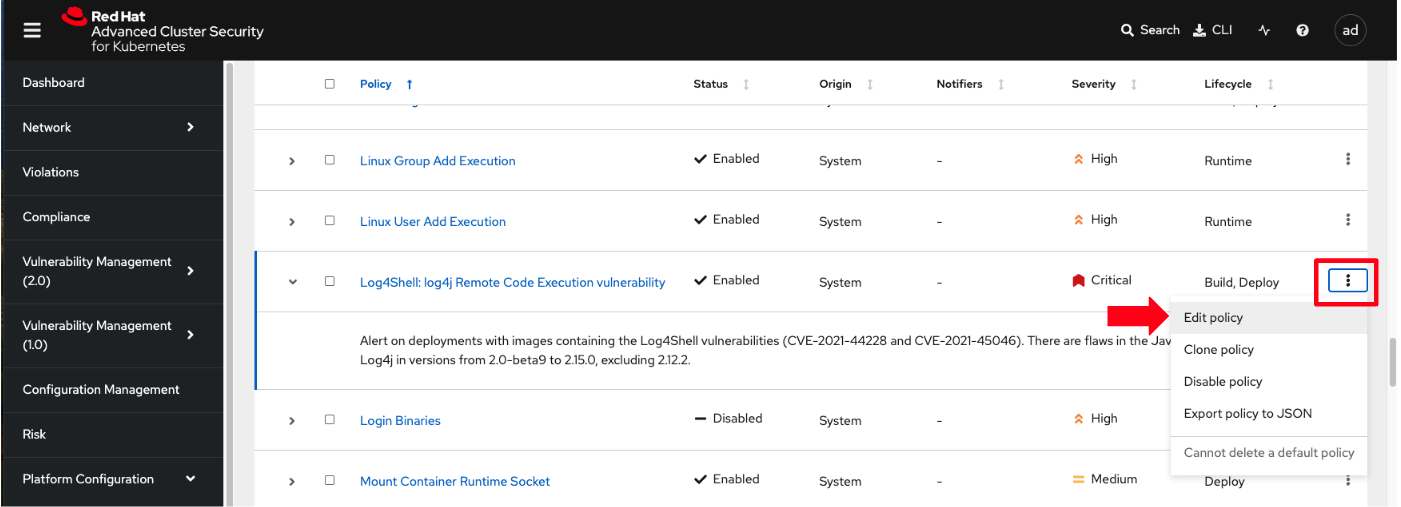
"For example, this policy over here checks if your image has the infamous Log4Shell vulnerability," you explain as you scroll down to show the Log4Shell policy.
-
You click on the Kebab menu icon next to this policy, and then click on Edit policy, continuing: "We can modify the behavior of this policy if we want."
-
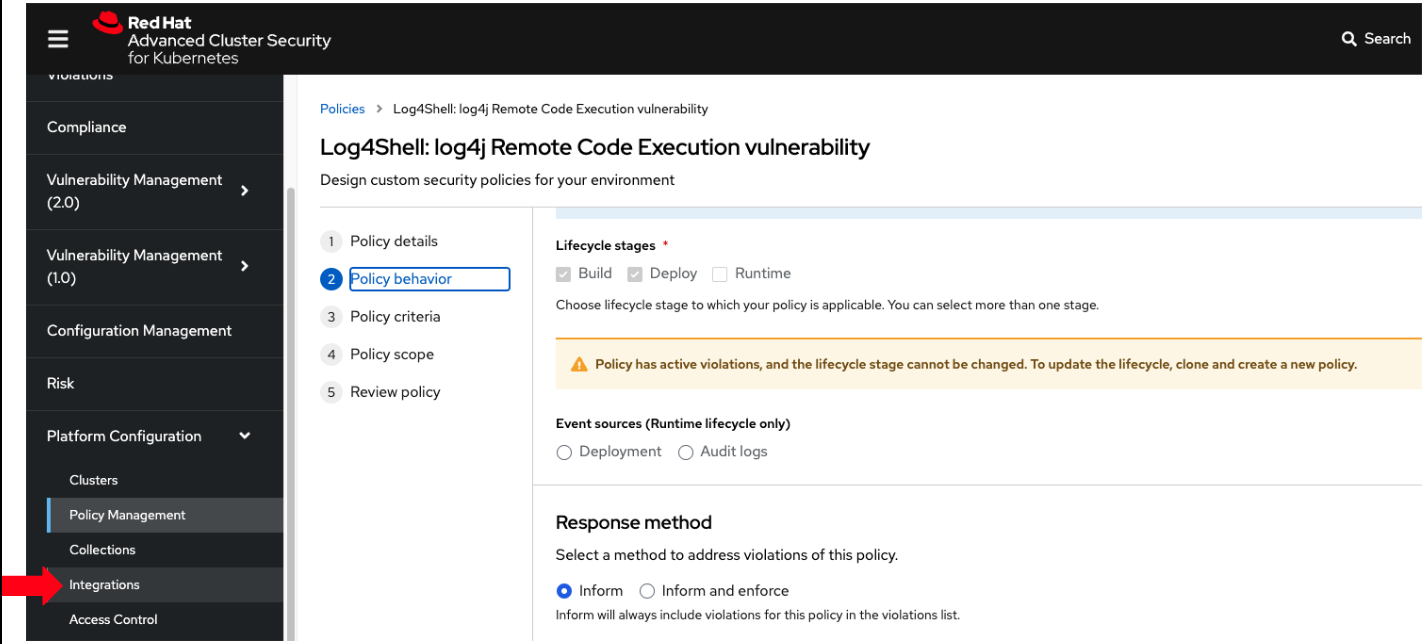
"Let’s click on Policy Behavior, and if we scroll down, one of the options we can configure is the Response Method. Here we can decide if we want ACS to block the build or the deployment if the policy is violated, or simply trigger an alert."
-
"Or we can obviously configure new policies, let’s setup a policy that verifies that our container image is signed during the build stage and whenever we try to deploy an application to OpenShift," you say as you click on the Integrations link in the left menu.
-
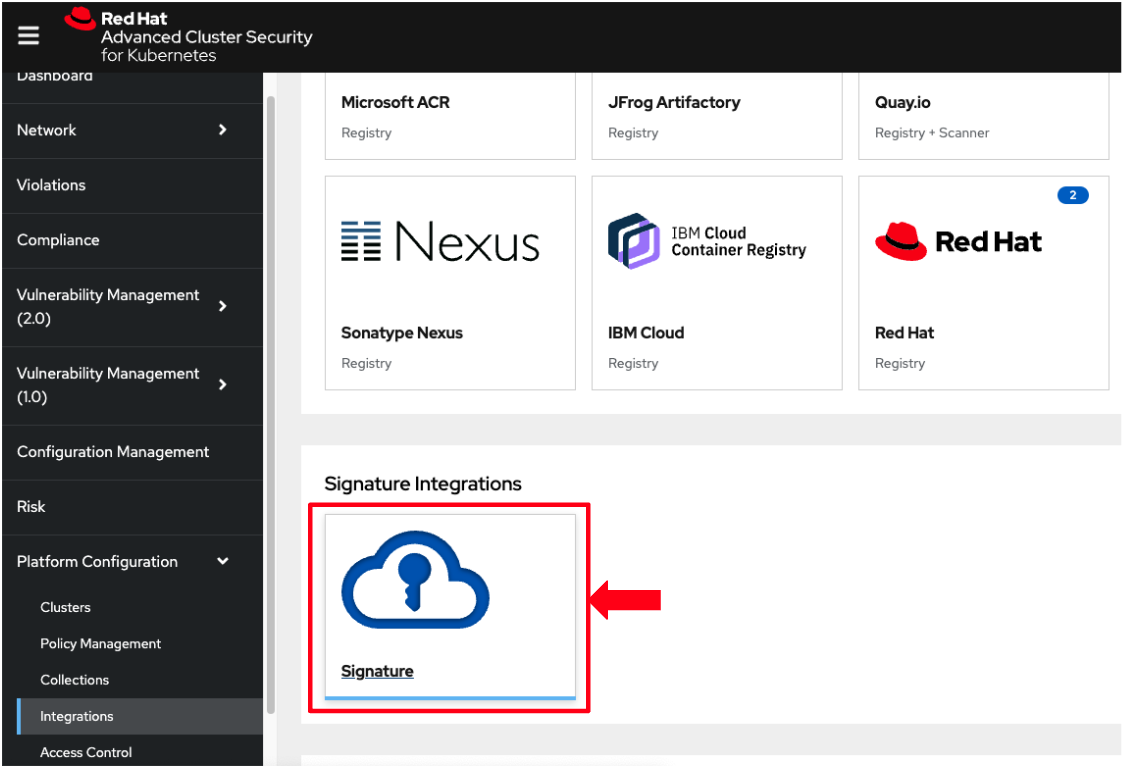
You scroll down to Signature Integrations and click on the Signature tile.
-
You click on the New Integration button as you say: "This policy requires ACS to integrate with Cosign to perform this check."

-
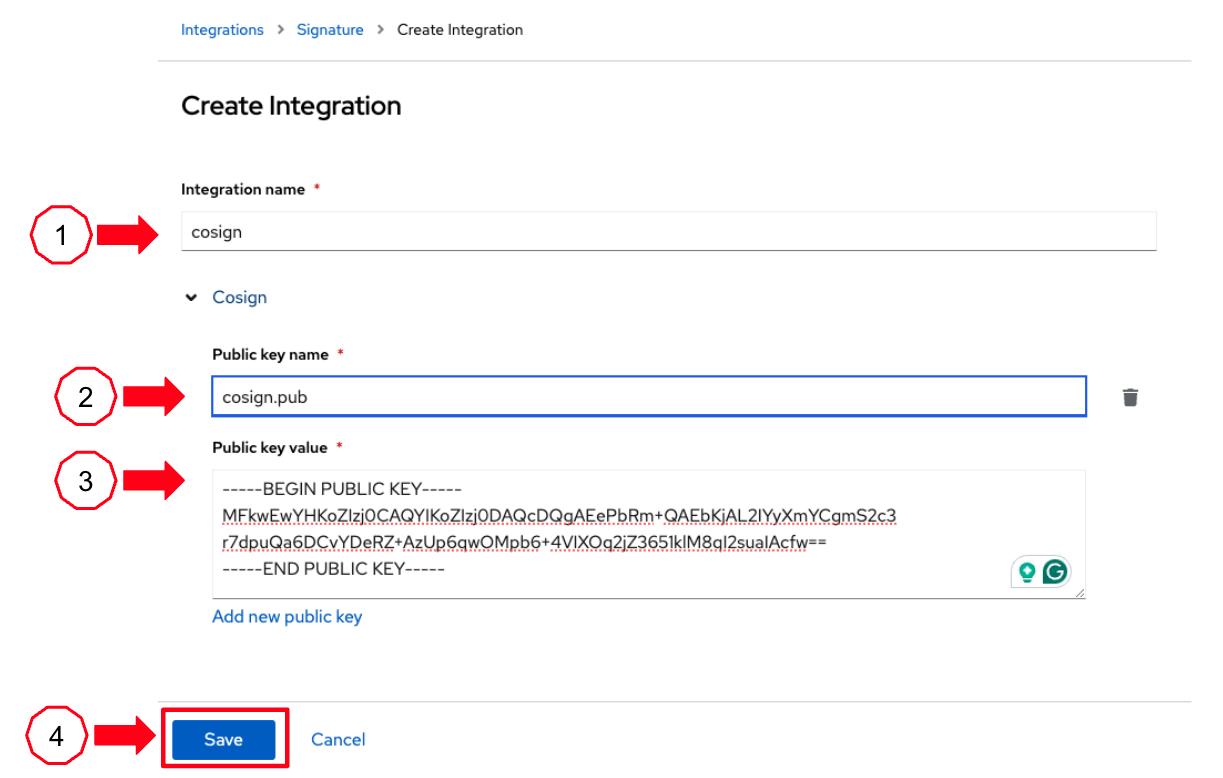
You start configuring the nw integration as follows:
-
you enter cosign for the Integration name.
-
you then expand the Cosign field and click on Add new public key.
-
you set the Public key name as cosign.pub.
-
and for the Public key value you copy the public key from the development environment terminal and paste it in this field.
-
Finally you click the Save button.
-
| For convenience, we have already set up a policy in ACS called 0-Trusted Signature Policy that checks an image for a valid signature. |
-
"All we need to do is enable this policy and configure it to use to cosign integration we just configured," you explain to the team as you enable the policy.
-
You select Policy Management from the left menu.

-
You find the policy called 0-Trusted Signature Policy at the top of the list.

-
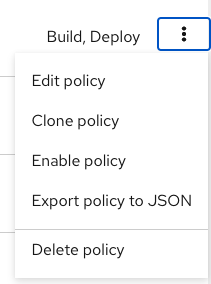
You click the Kebab menu icon next to the policy and select Edit policy.
-
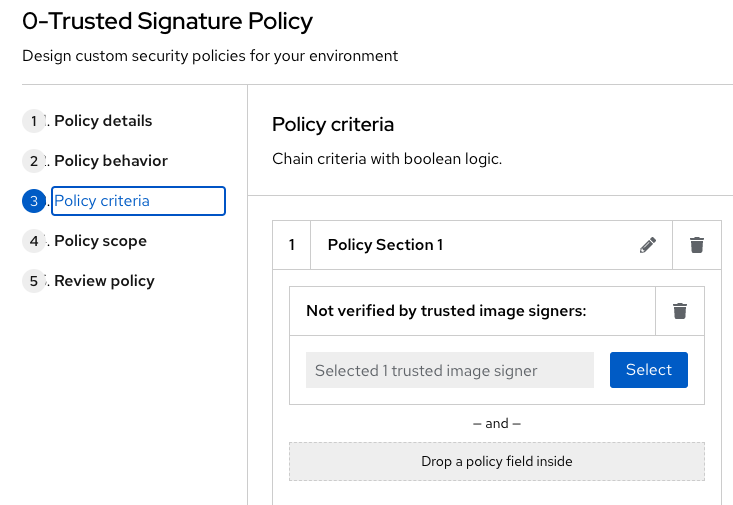
You then select Policy criteria and click the Select button.
-
"This is where we configure our policy to use the cosign integration we just created ," you explain to team as you select the cosign signature integration and click the Save button.

-
You continue clicking next at the bottom until you finally save the policy.
-
"Now that the policy is updated, we want to enable it," you say as you click the Kebab menu icon again for the same policy and select Enable policy

-
-
"All done, now ACS will enforce this policy in both the build and deploy stages of our application."
-
Security Engineer: "That sounds comprehensive. Implementing these measures would definitely strengthen our security posture."
-
"Excellent! Let me prepare the necessary setup and then I will demonstrate our solution based on Red Hat Trusted Application Pipeline (RHTAP) in action."
-
"RHTAP provides pre-built pipelines with automated security checks, aiming to achieve the highest level of security (SLSA Level 3) for built artifacts and offers the capabilities I just explained."
Chapter 2 - Summary
As the baton passed to the QA engineer for testing, the story took a dramatic turn. The deployed application, instead of showcasing the fruits of their labor, revealed a critical vulnerability, it was infected with ransomware. This revelation abruptly interrupted the testing process and cast a shadow over the software supply chain’s security, sparking concerns about vulnerability and exposure.
The next chapter of our story will showcase Red Hat Trusted Application Pipeline (RHTAP) in action. We will explore how integrating these security measures into the build pipelines and deployment process can safeguard our software supply chain against the ever-present specter of cyber threats.