ACCELERATE APPLICATION DEVELOPMENT LAB GUIDE
STANDARDIZED CI/CD
Allowing greater developer freedom does not mean loosening security or ignoring disciplines of operational processes. On the contrary, in modern application development, providing built-in guardrails that are seamlessly embedded within the tools and platforms being used, can limit friction between teams and remove a number of barriers that inhibit their effective collaboration.
Today, modern environments are more complex than ever. Applications are being deployed across multiple clusters, regions, and clouds. To address the need to release often, with quicker-than-ever times to market, a standardized continuous integration and continuous delivery (CI/CD) process is crucial, where developers can quickly build, test, and get it shipped. Once released we can configure, package, and orchestrate the deployment in a software-defined, highly automated and secure manner.
OpenShift Pipelines is Kubernetes-native, meaning all of its building blocks are targeted to manage, build, deploy, and configure resources on the platform. It even includes catalogs of reusable components for building out the pipeline. This allows the DevOps team to standardize on the automation of a CI/CD lifecycle. Furthermore, the developer team can focus on delivering code to the repository and once the automation kicks off, it takes care of the rest!
-
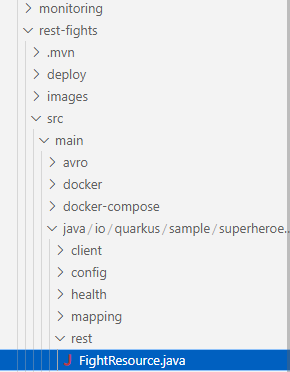
To begin, go to Dev Spaces and open the rest-fights folder. (If you don’t have it open, click here.)
rest-fights/src/main/java/io/quarkus/sample/superheroes/fight/rest/FightResource.java
Note: The FightResource is a different location from the VillainResource that we were in for the previous module.
-
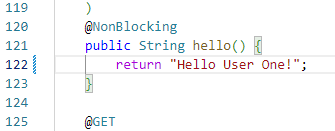
Make some changes to the code, ie. change the output of the hello endpoint to your name.
-
Scroll down to the public String hello() method at line 122
-
Replace "Hello Fight Resource" with "Hello <yourname>”
-
-
The menu bar on the lef hand side of the screen will show that there are pending changes, click on the icon and then on the
+sign to stage the changes
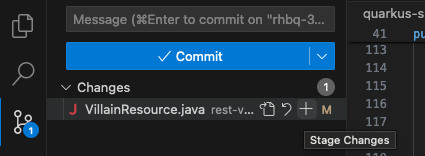
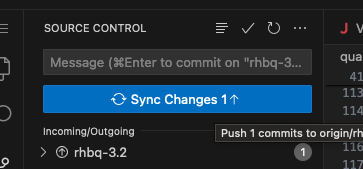
Then write a messgae for the commit and click Commit
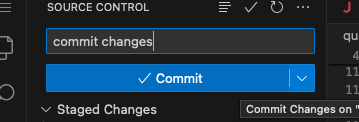
And finally click Sync Changes
A pop-up will appear to enter the Gitea user and password (gitea_user/gitea_password)


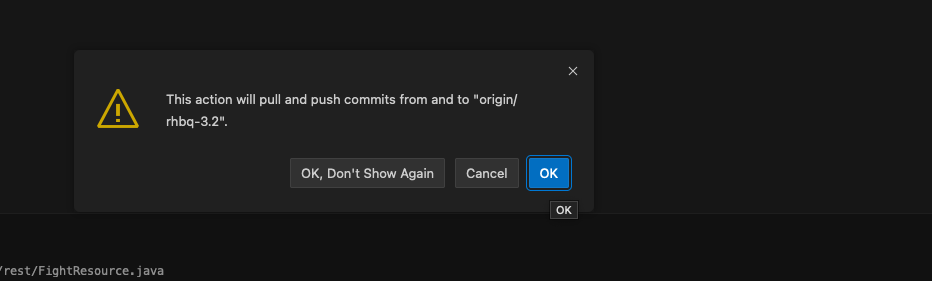
Click OK on the confirm pop-up
-
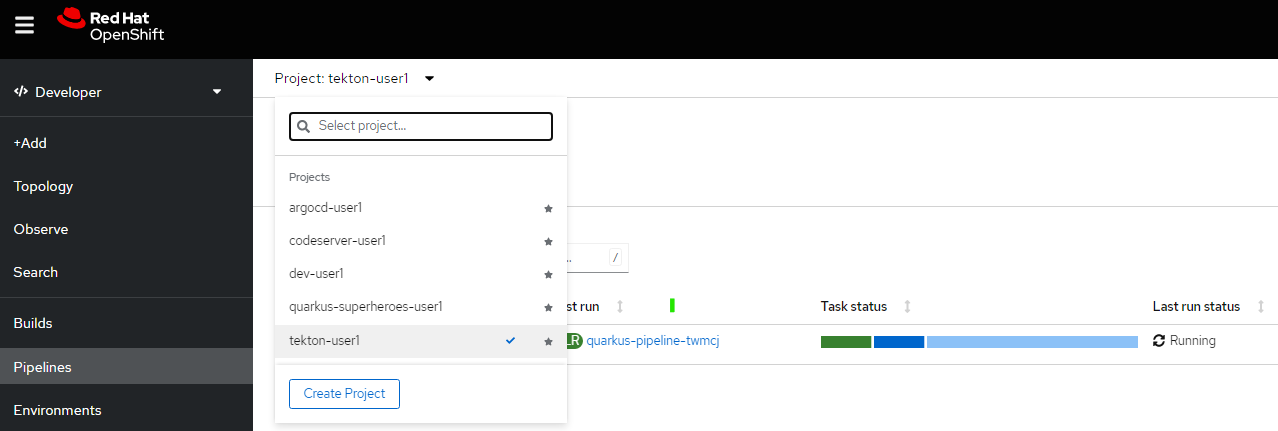
This will trigger the pipeline to start. Return back to the OpenShift console and switch to the Project tekton-
heroes_user. Then navigate to [Pipelines] → [quarkus-pipeline] to see the pipeline starts the build process
-
You can review the status in PipelineRuns tab, and watch the build logs progress under the Logs tab.
-
As this progresses, on the Details tab, you’ll be able to watch the pipeline stage through the build.
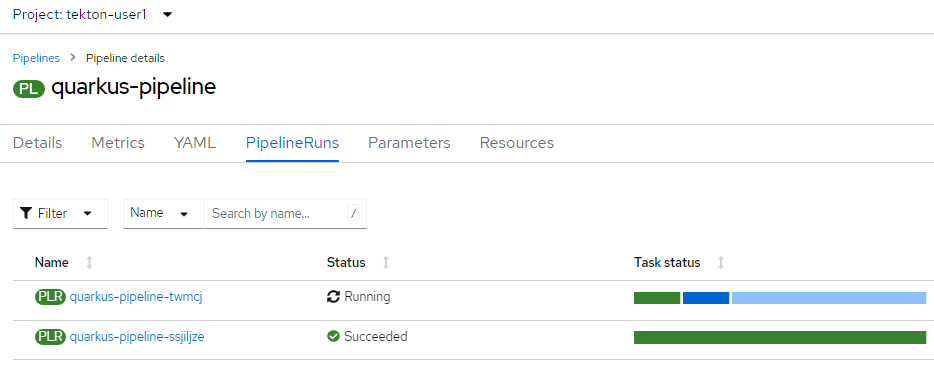
-
Wait until the process completes and confirm the successful status.
Note: it can take a few minutes for the pipeline run to finish and another minute or two for ArgoCD to deploy the new app version.
-
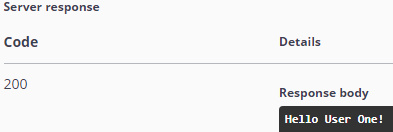
Verify your changes have been deployed by heroes_fights_swagger_ui/#/hello/get_api_fights_hello[calling the hello endpoint with the Swagger UI,window=_blank]:
Note: if unable to access the application immediately upon pipeline completion, this may take an additional minute - try refreshing the page after another minute or two.
-
Click Try it out in the top right corner.

-
Click Execute and see your update in the Response body.
-
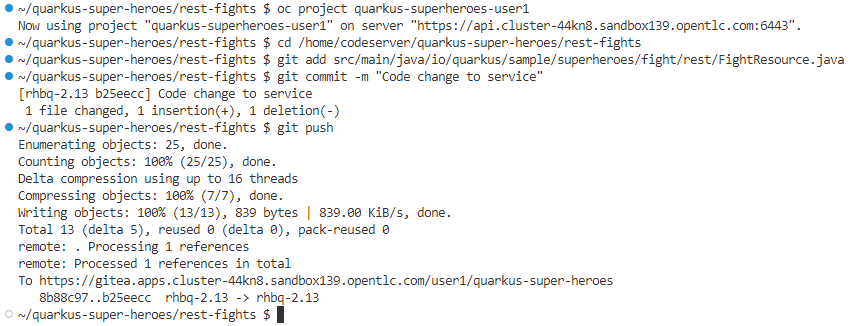
An alternative is to call the endpoint directly from your terminal:
]$ curl `{heroes_fights_data_ui}/api/fights/hello`
Here we ran through an example of a pipeline. You can note that once the developer checks-in the code, the pipeline kicks off and starts the building process, and you can then view the progress of the pipeline.
To put it simply, we made the pipeline do three things - build, test, and deploy.
The pipeline clones the source code from the git repo. It then builds the application with the standard set of libraries and runtime versions before packaging and pushing a secured container image into the registry. Finally, it updates the GitOps repository monitored by the ArgoCD instance in charge of the deployment.
The benefit of running everything in the single platform is that you can now reuse resources such as configurations, secrets (for credentials), etc., all centrally managed on the same platform.
MONITORING
Note: This section is shortened since admin rights are restricted in this lab instance. When administrating your own environment, you’ll have access to more dashboards featuring much more in-depth monitoring details.
-
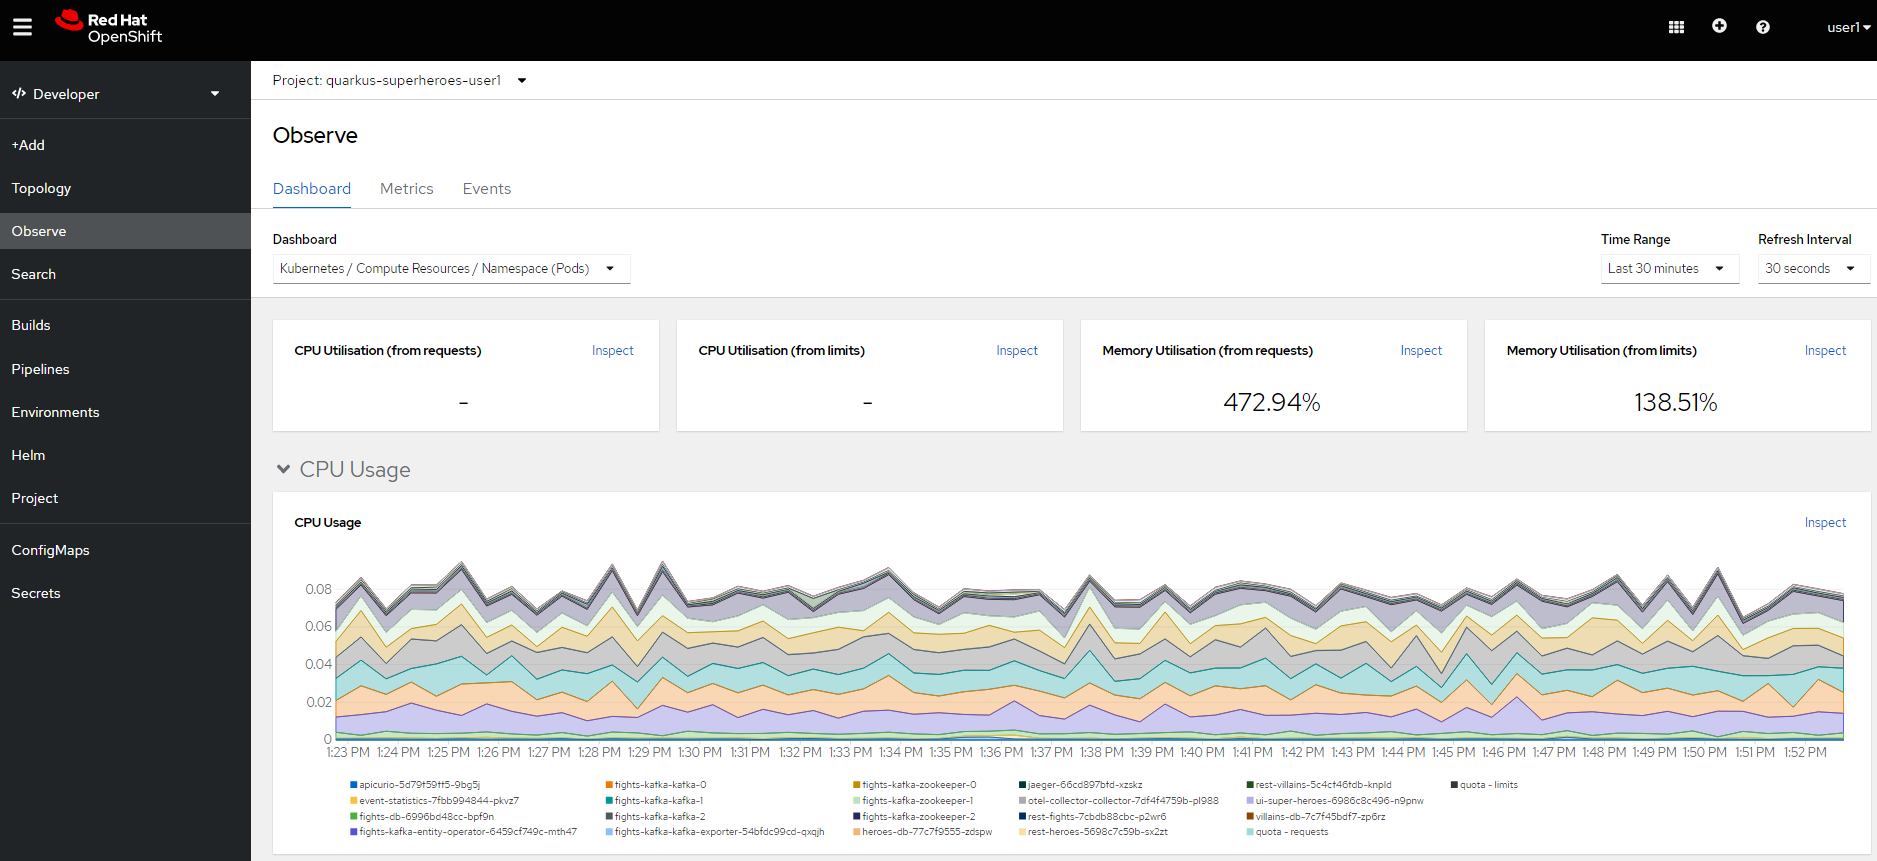
In the OpenShift console and select the Project quarkus-superheroes-heroes_user
-
Take some time to review the details available to you in the Dashboard data
-
Select [Observe] → [Dashboard]
-
In an organization, there may be multiple types of applications catering to different needs. For example, managing libraries, patching, and configuration can be highly complex, often becoming a nightmare, even for skilled operators.
By containerizing these workloads, they become consistent and portable. Having this platform helps the DevOps team(s) orchestrate a large number of containers together while setting up the Ops team for ultimate agility with resources like load-balancing, scaling, networking policies and storage, all while the machines and nodes are set up in a declarative way.
CONFIGURATION DRIFT
As we start to manage more complex environments that may span across multiple cloud providers, it becomes increasingly important that we learn how to manage these systems consistently. One of the most important tasks is keeping these systems configurations from slowly (or rapidly) drifting apart.
-
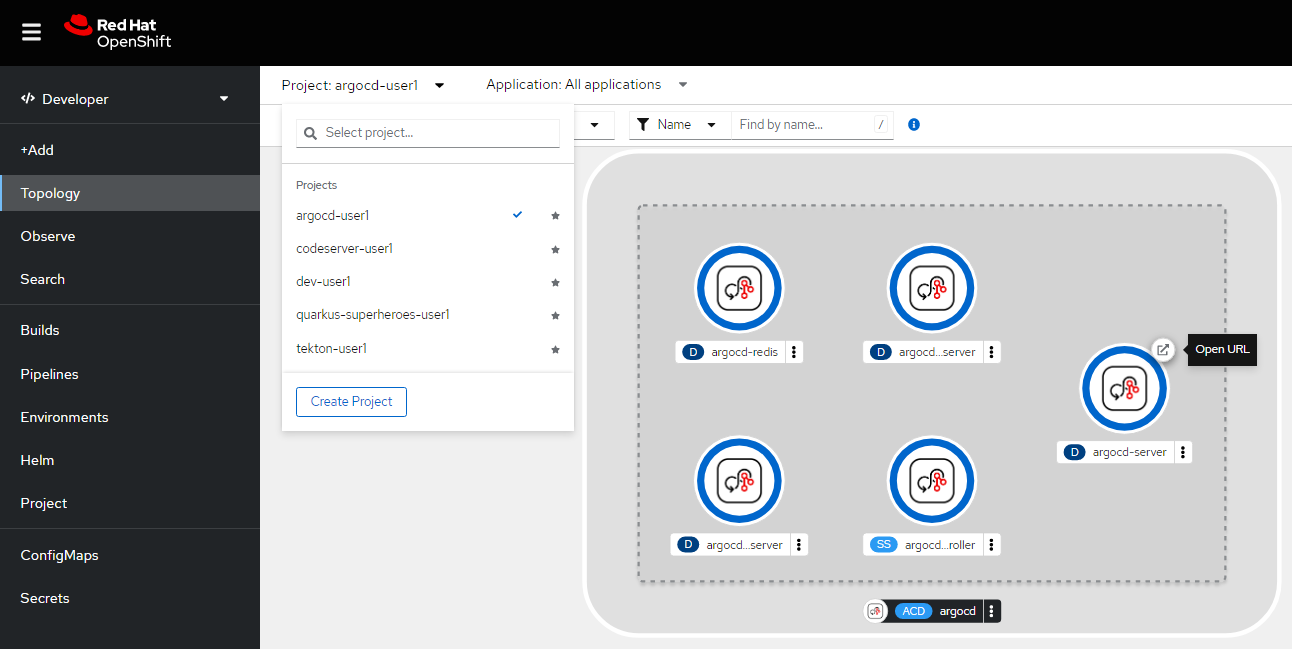
Go to GitOps console [ArgoCD], review all of the monitored resources, and map it back to the Topology in the OpenShift console:
-
Navigate to the Project argocd-
heroes_userand flip to the Topology view. Select the OpenURL link in the top right-hand corner of the argocd-server icon.
-
-
Click here for direct access to your ArgoCD instance.
-
When the ArgoCD login screen comes up, click [Log In Via OpenShift] button at the top, and use the same UserID and password that you logged into OpenShift earlier (
heroes_user/heroes_password).
Note: You may need to authorize read-only access to your user information. Click Allow Permissions if so.
-
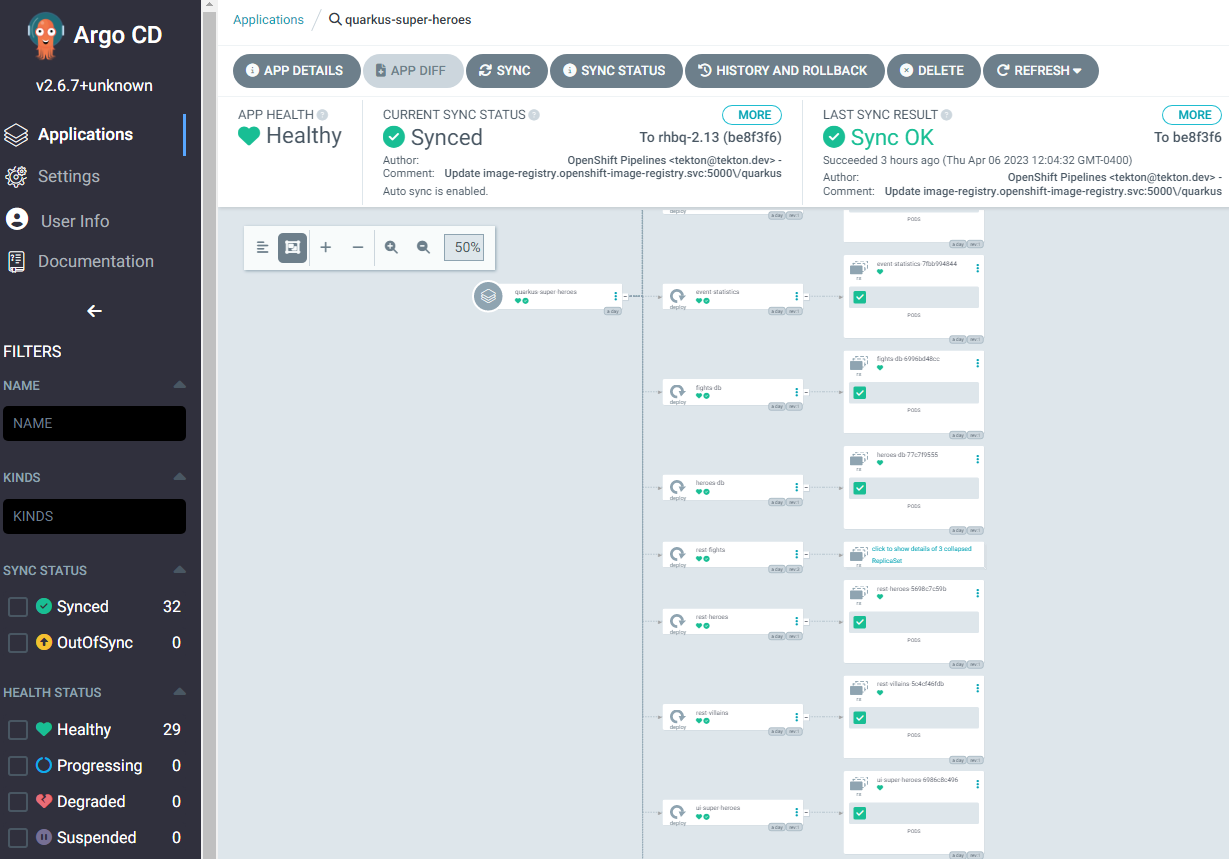
Click into the quarkus-superheroes application and you will see all of the resources also mapped out in the OpenShift console.
-
Go to Gitea and review the deployment configs:
-
Gitea is available in this link.
-
Once on the Gitea homepage, click Sign In on the top right.
-
Credentials are the same as you’ve been using (
gitea_user/gitea_password). -
Click the link to the repository
gitea_user/quarkus-super-heroes-deploy.
-

-
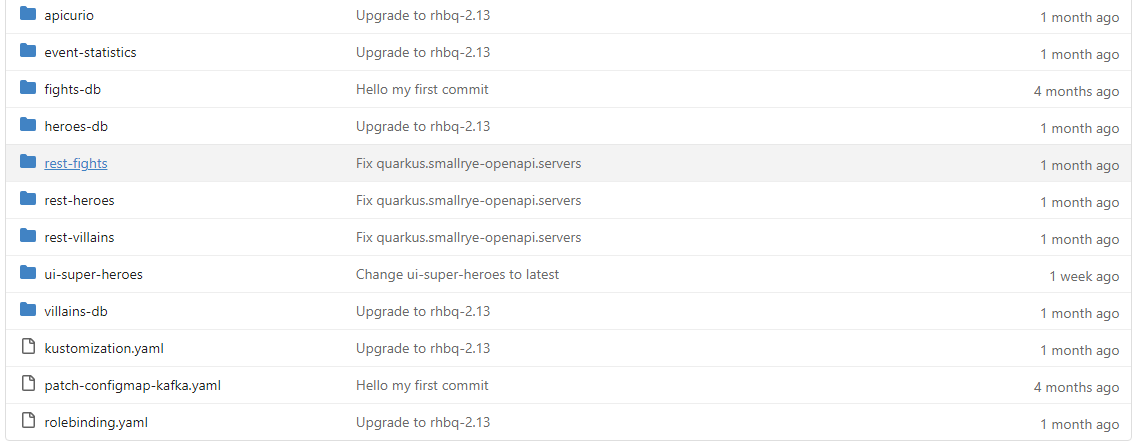
Select the kustomize directory.

-
Here you have the ability to dig into the deployment code for each service like where we’ve been working in rest-villains or rest-fights.
-
Back In the OpenShift Console, under Developer perspective, go to the Topology, within the Project quarkus-superheroes-
heroes_user. -
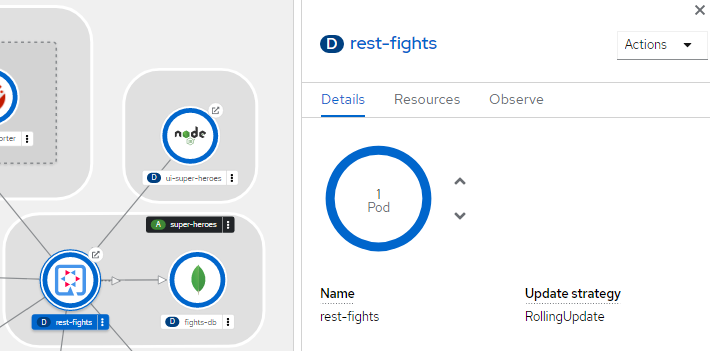
Locate the rest-fights service.
-
Click the icon and the right panel will appear - select the Details tab.
-
Increase the number of running Pod to 3 by clicking ^ next to the pod count chart

-
Return to GitOps console [ArgoCD], see the status now becomes out of sync

-
Click on sync at the top of the next window that appears, and click Synchronize at the top.

-
Return to the Topology. Notice the pod scales back to 1, as set in the git repo.
Note: An alternative is you can choose to commit the replica to 2-3 and see the pod increase.
Ultimately, with the introduction of GitOps you can avoid configuration drift, and it’s easier than ever to move between clouds & clusters. ArgoCD will ensure that any manual changes made on the cluster can be manually or automatically reverted to some known state, forcing a proper GitOps approach.