Templates
In this chapter, you will use the Backstage Software Catalog to deploy a frontend and gateway component for the Points of Interest (POI) Map application.
Launch the Frontend template
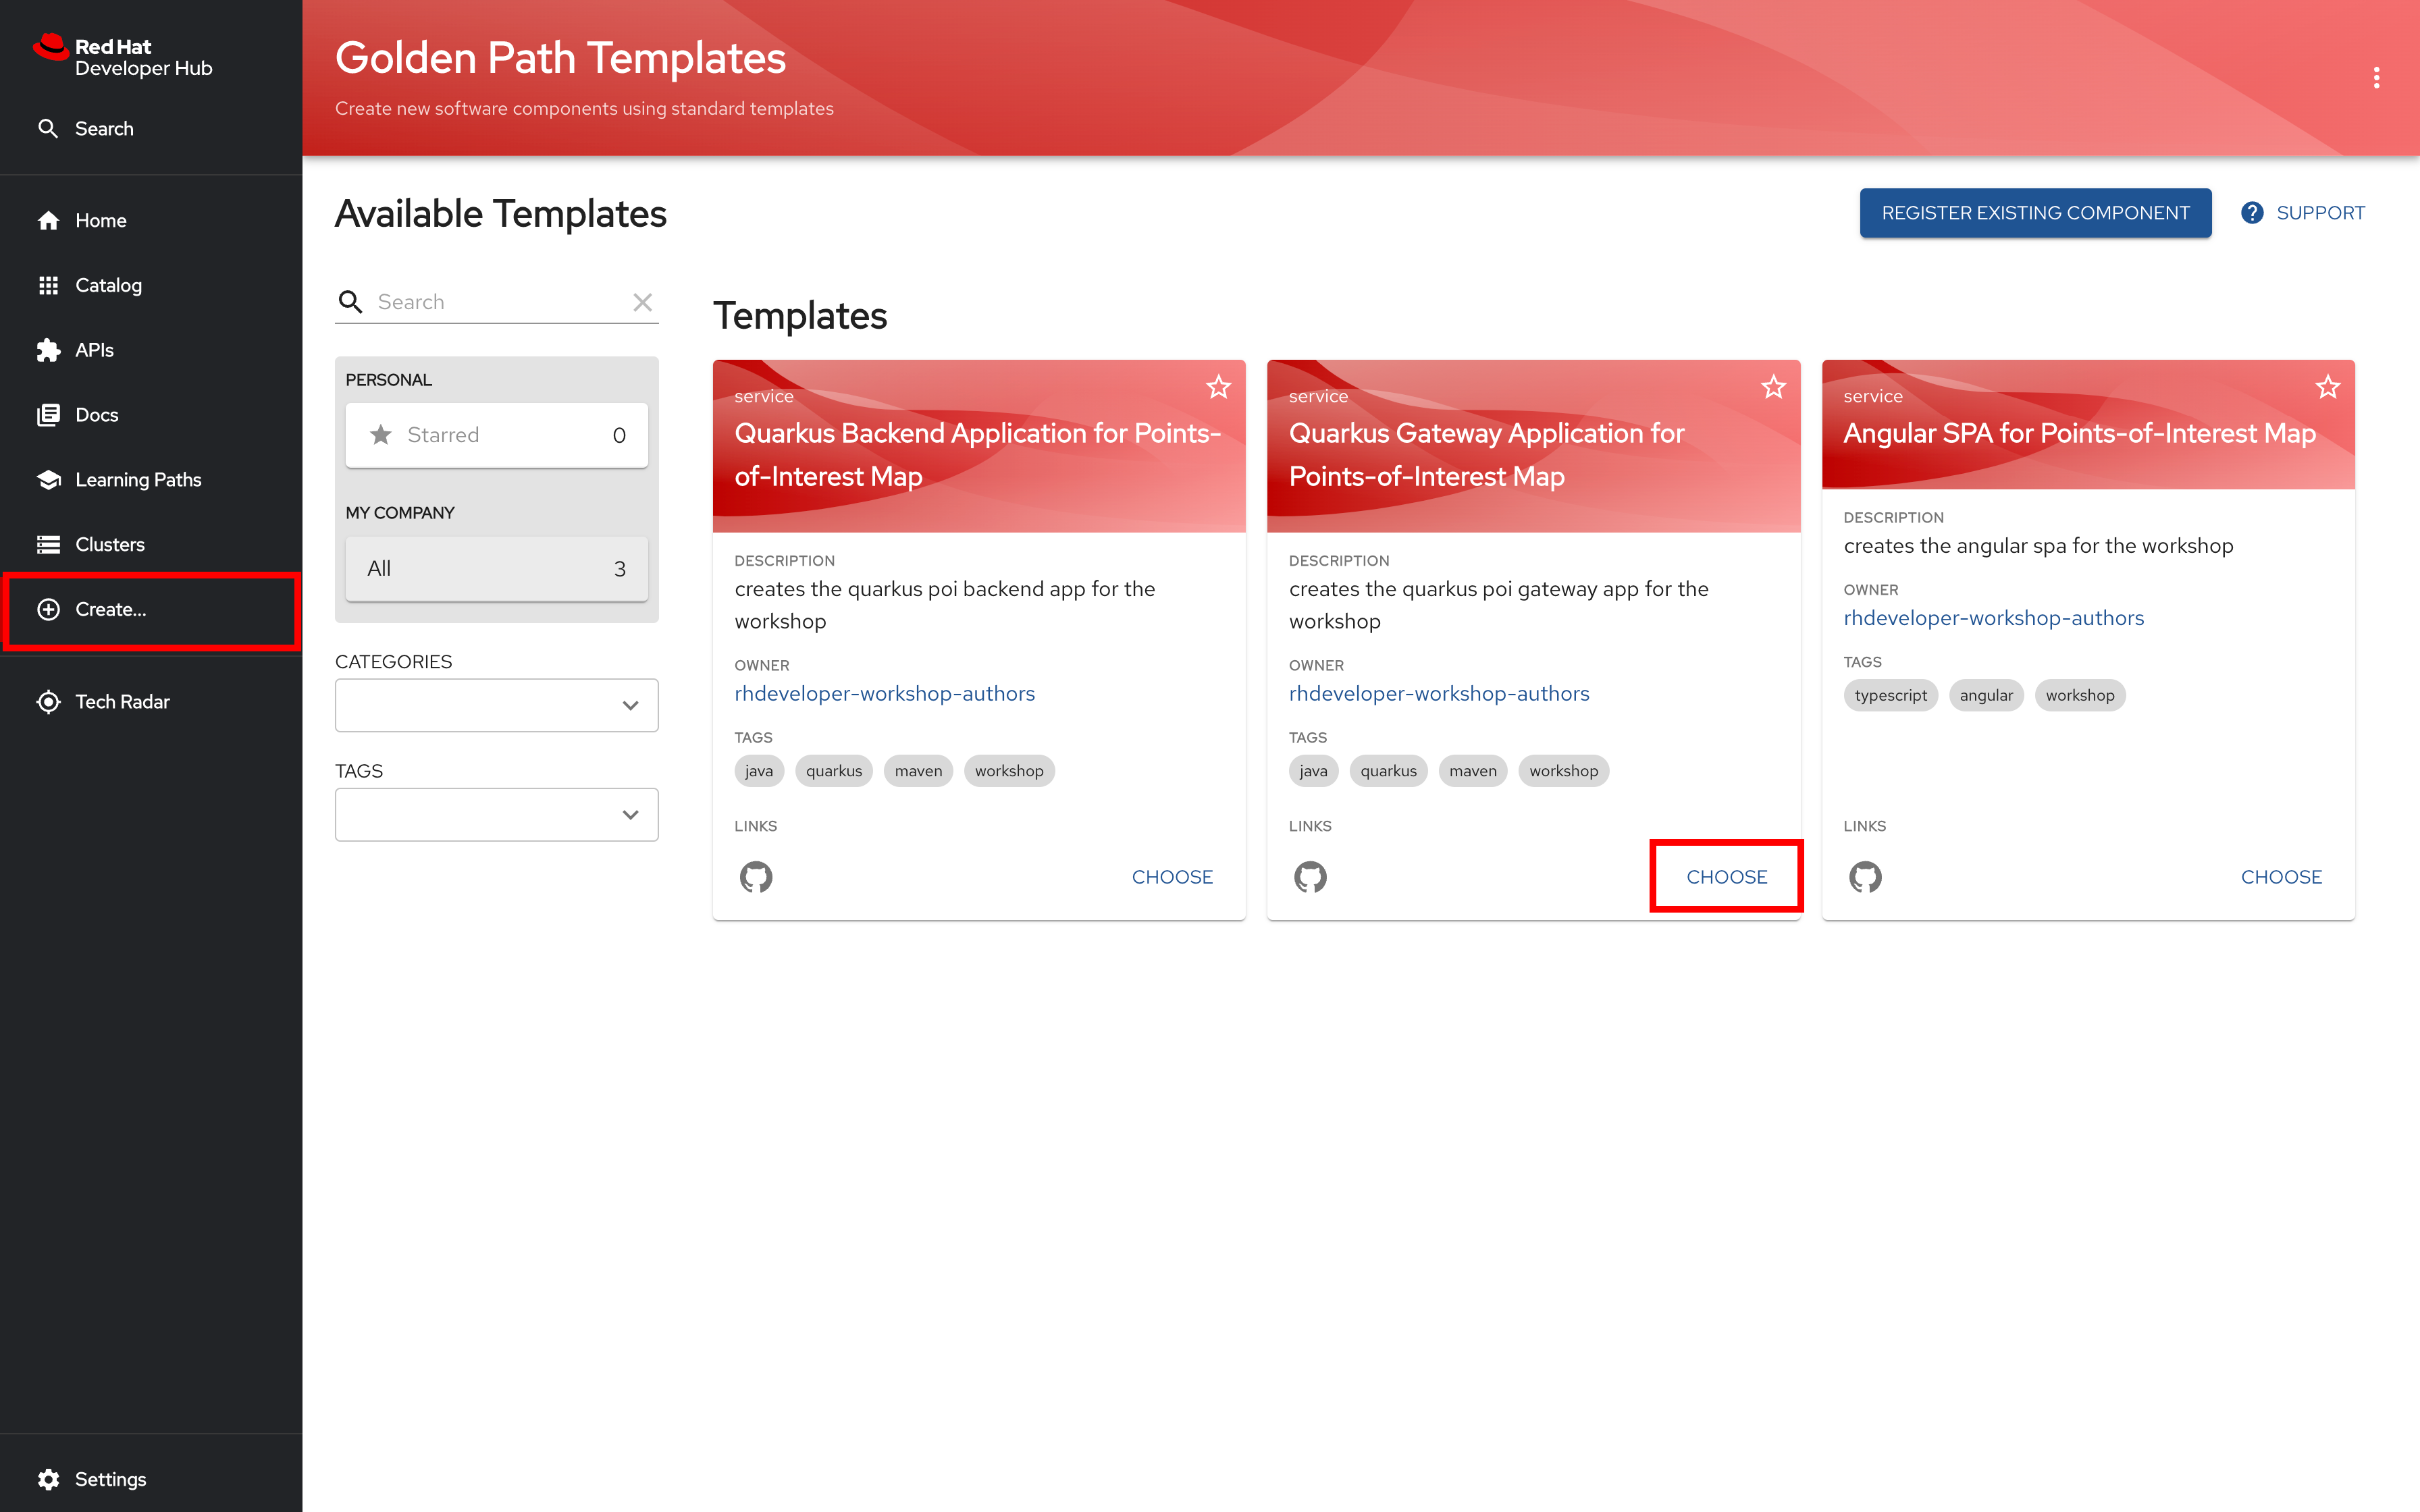
Click on Create… in the sidebar menu. CHOOSE the Angular Single Page Application (SPA) for Points of Interest (POI) Map template.

Keep default values in the first section and click NEXT STEP to continue

In the second section of the template create form, type or paste your Project/namespace name into the Namespace field. In the Owner input, enter "user:USERNAME" where "USERNAME" is your own github username. The result should be something like "user:ryanj".
Recall from chapter 1 that some Backstage forms refer to a Namespace that is equivalent to your OpenShift Project.
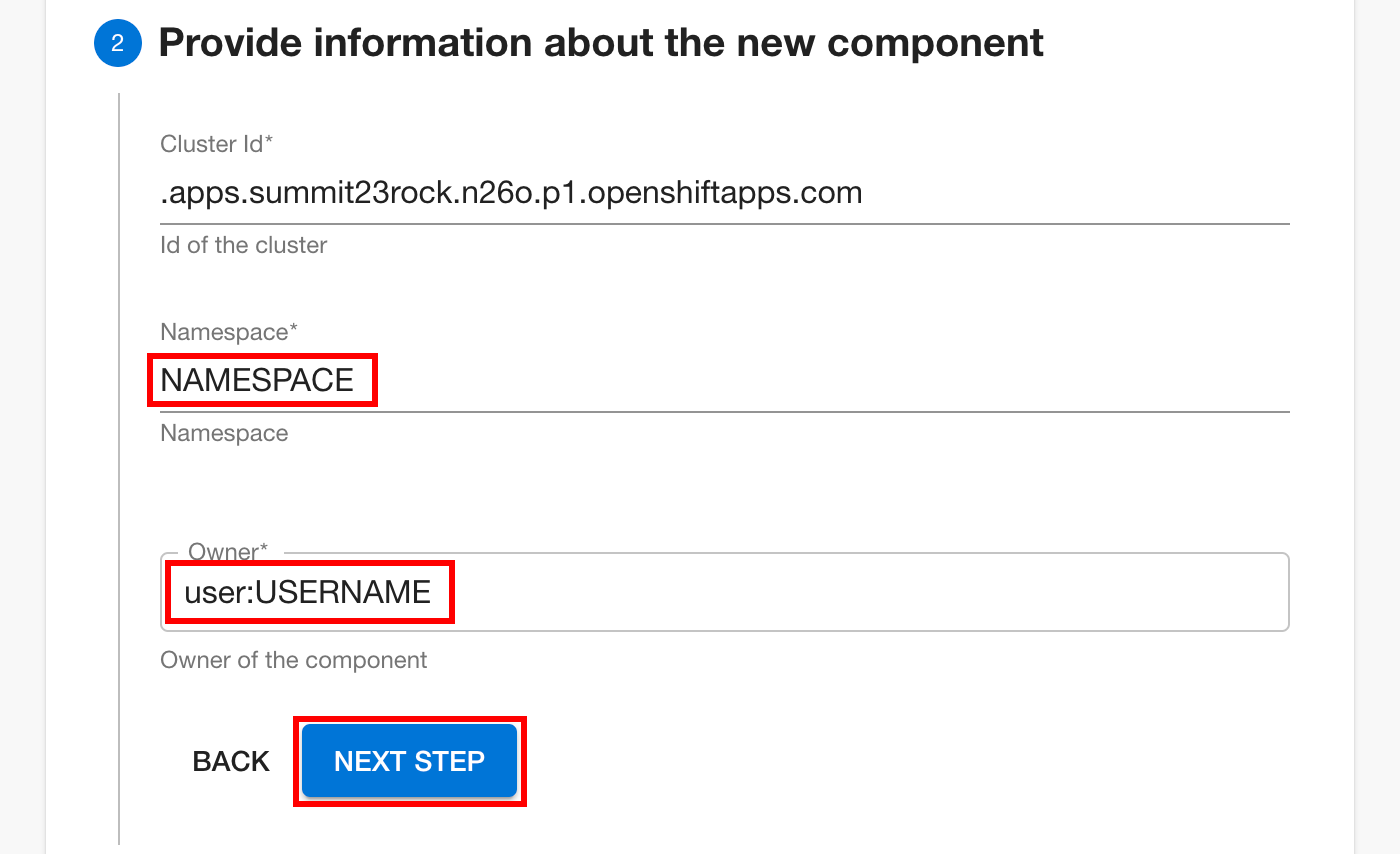
Click NEXT STEP to review the configuration you’ve set in the frontend template.
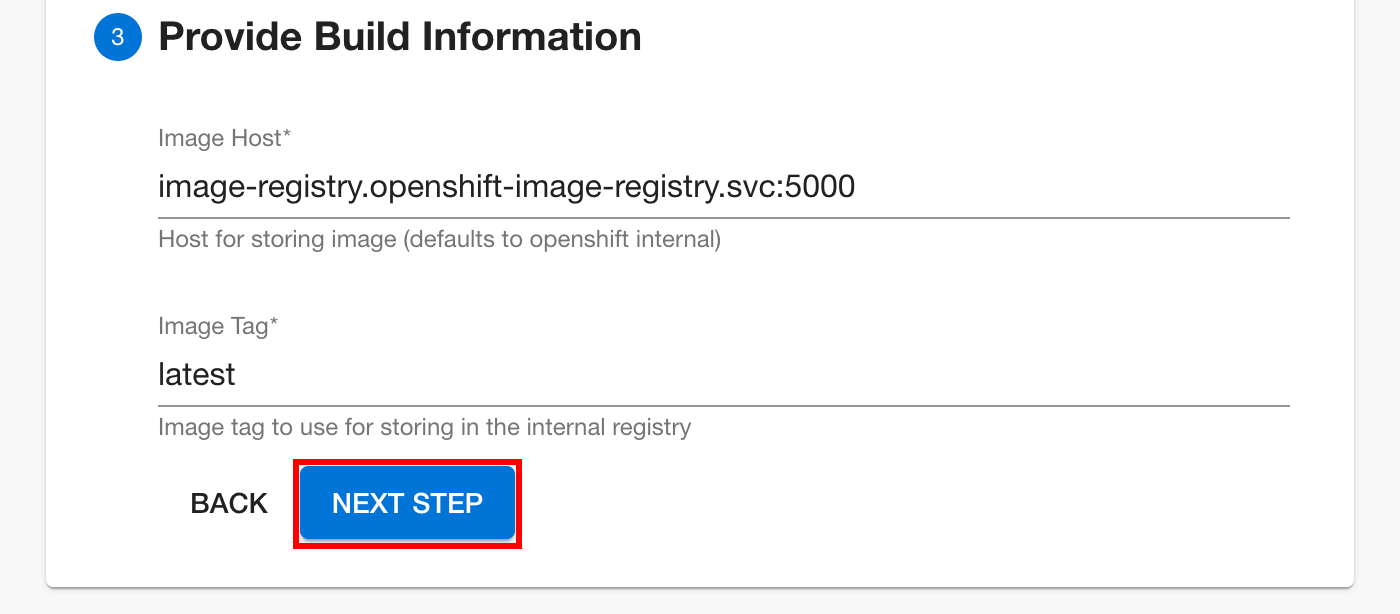
Review your configuration, making sure that your own Project name is listed. Note that the Owner name may include a default prefix in the summary, like user:default/projectname. This represents Backstage’s default user grouping. Click CREATE to deploy your frontend component.

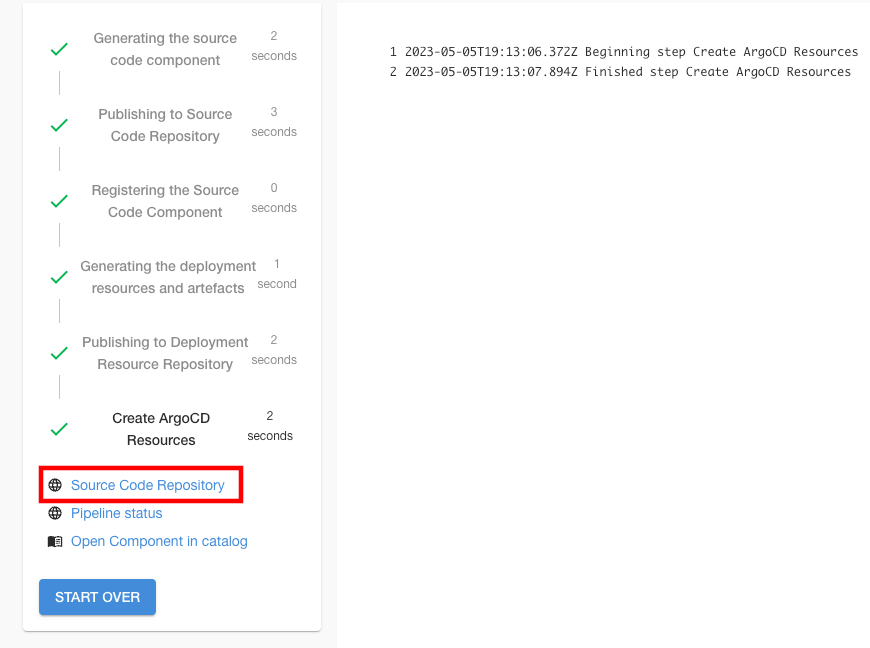
Review the scaffolding process and template output. Click on the Source Code Repository link to view the scaffolded frontend source code repository.
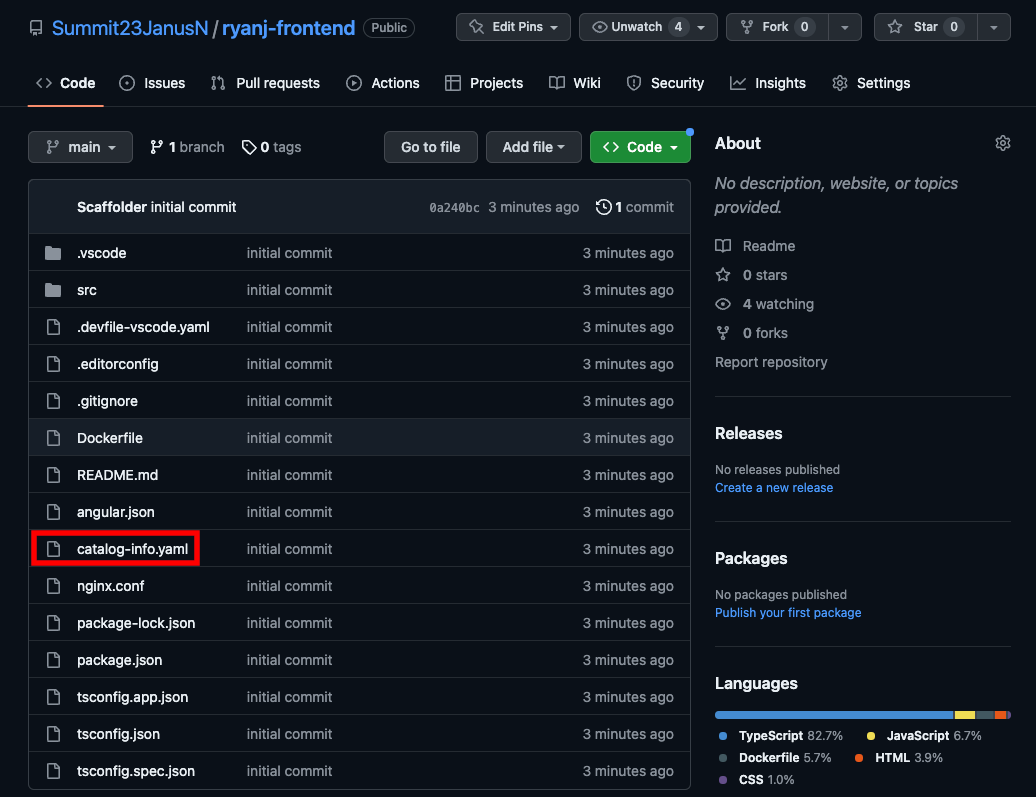
View the source
Explore the repository Backstage created for you with the frontend component source code. Each scaffolded repo is part of the GitHub Org used in this workshop. Each one is prefixed with your Project/namespace name, giving your frontend component’s source code repository a qualified name like github.com/rhdh23-lab/NAMESPACE-frontend.
Launch the Gateway Template
Return to backstage to invoke the Gateway template.
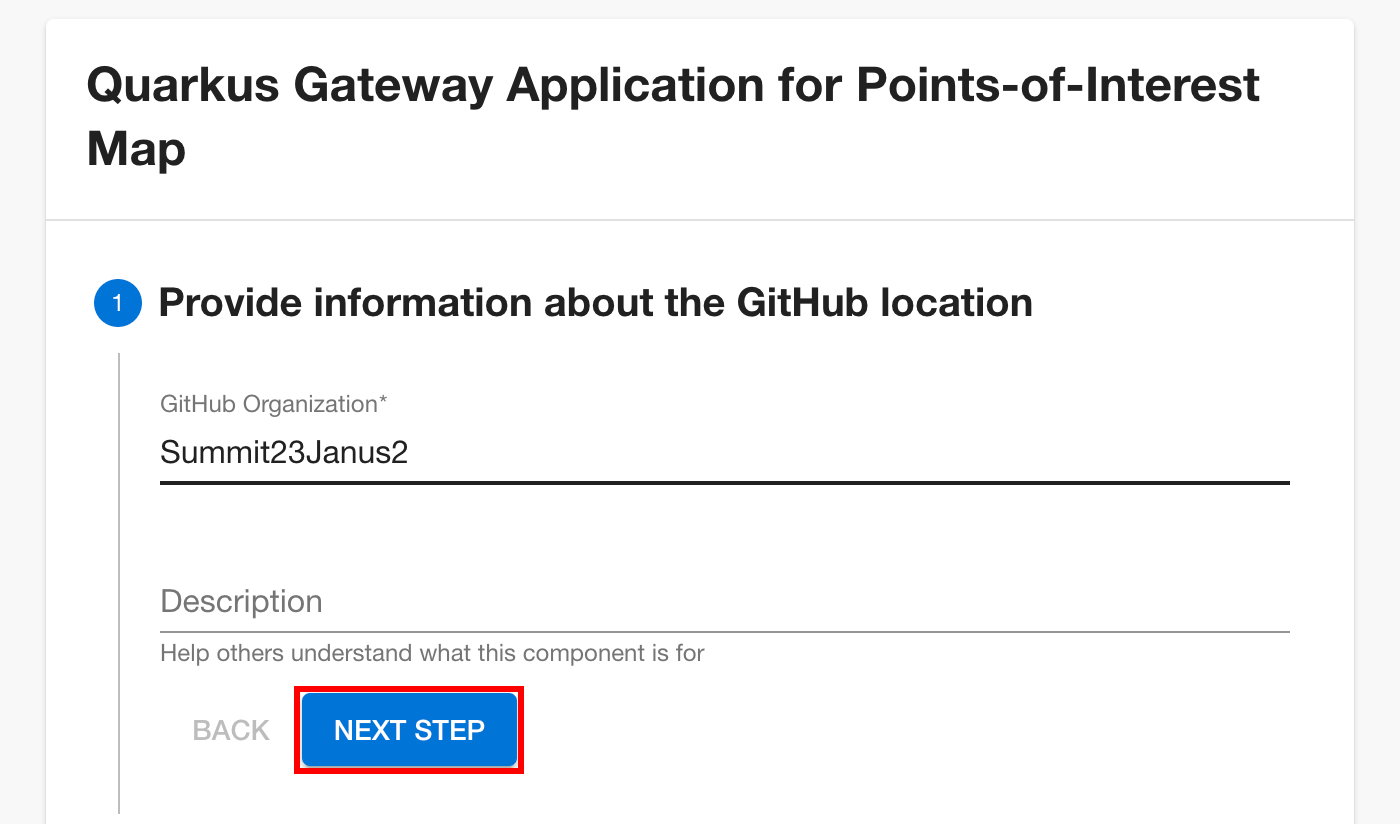
Click on Create… in the sidebar menu, then choose the "Quarkus Gateway Application" component from the template list.
Click NEXT STEP to proceed.
Insert your NAMESPACE value and Owner info (user:USERNAME), then click NEXT STEP to proceed.
Click NEXT STEP to proceed.
Review the input selections, click CREATE when ready.
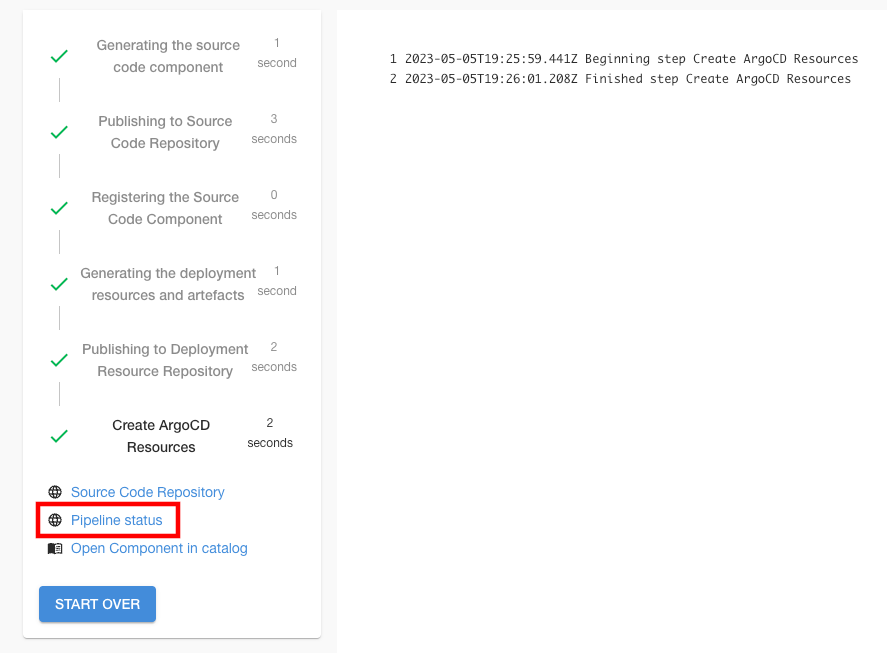
Review the template output. Click on Pipeline status to view the build pipelines for the app.
Tekton Pipelines
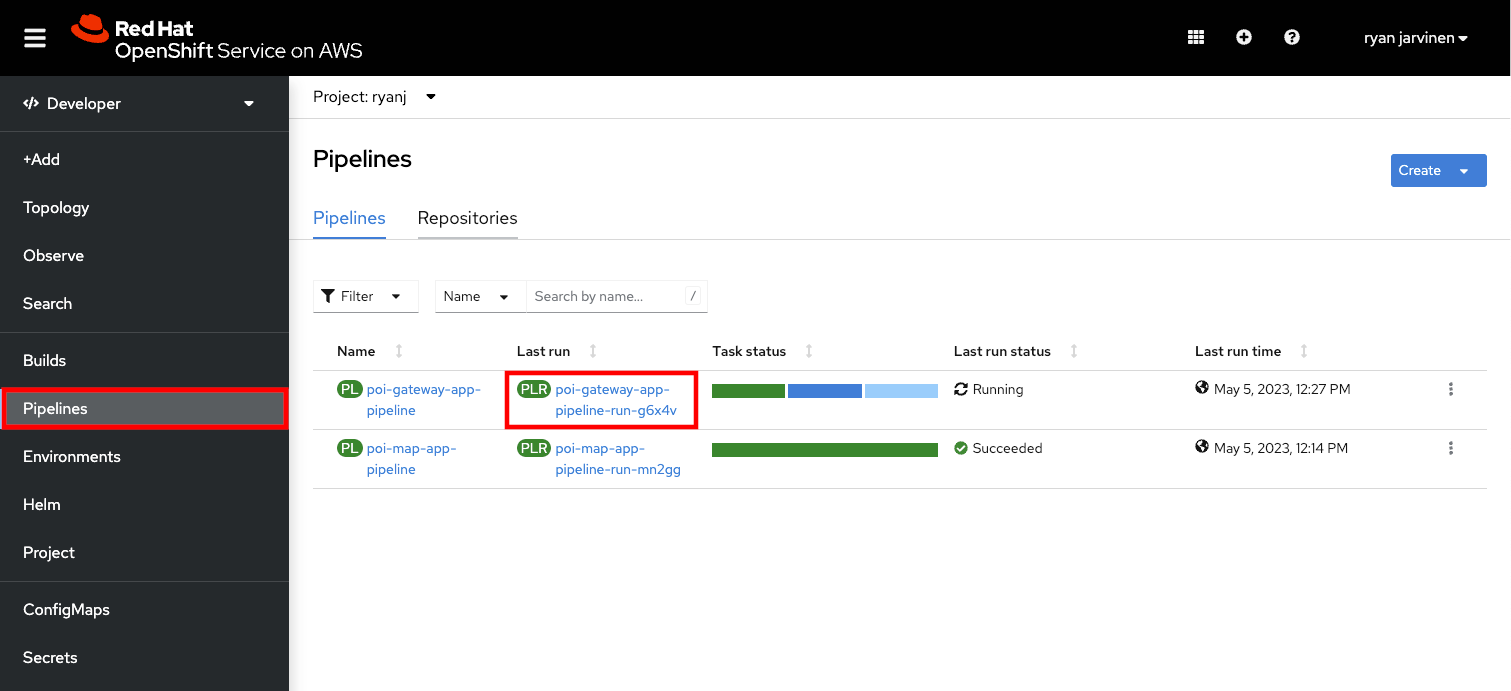
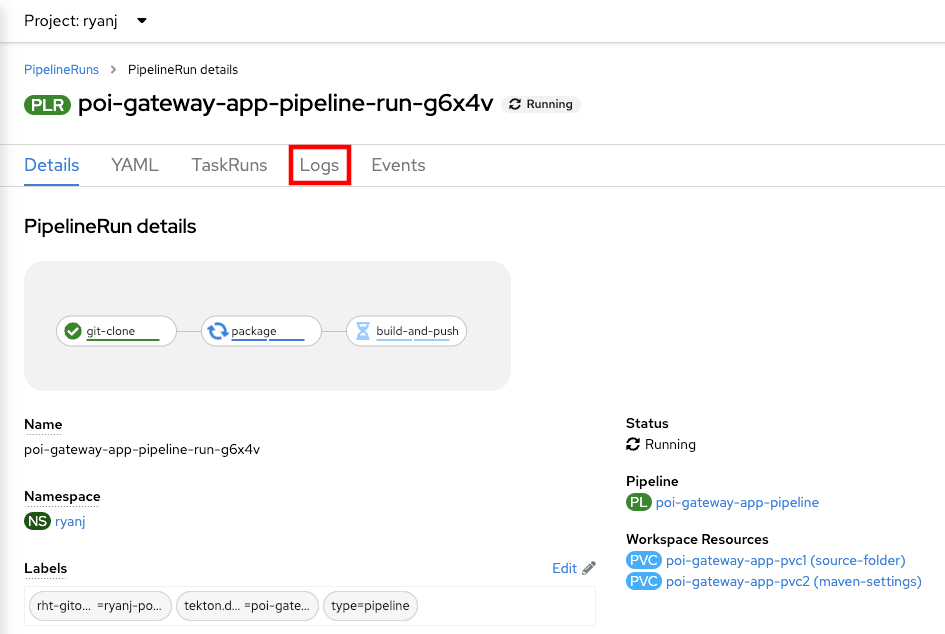
Check the status of your Builds using Tekton Pipelines. Select one of your pipeline runs, preferrably one that is still active.
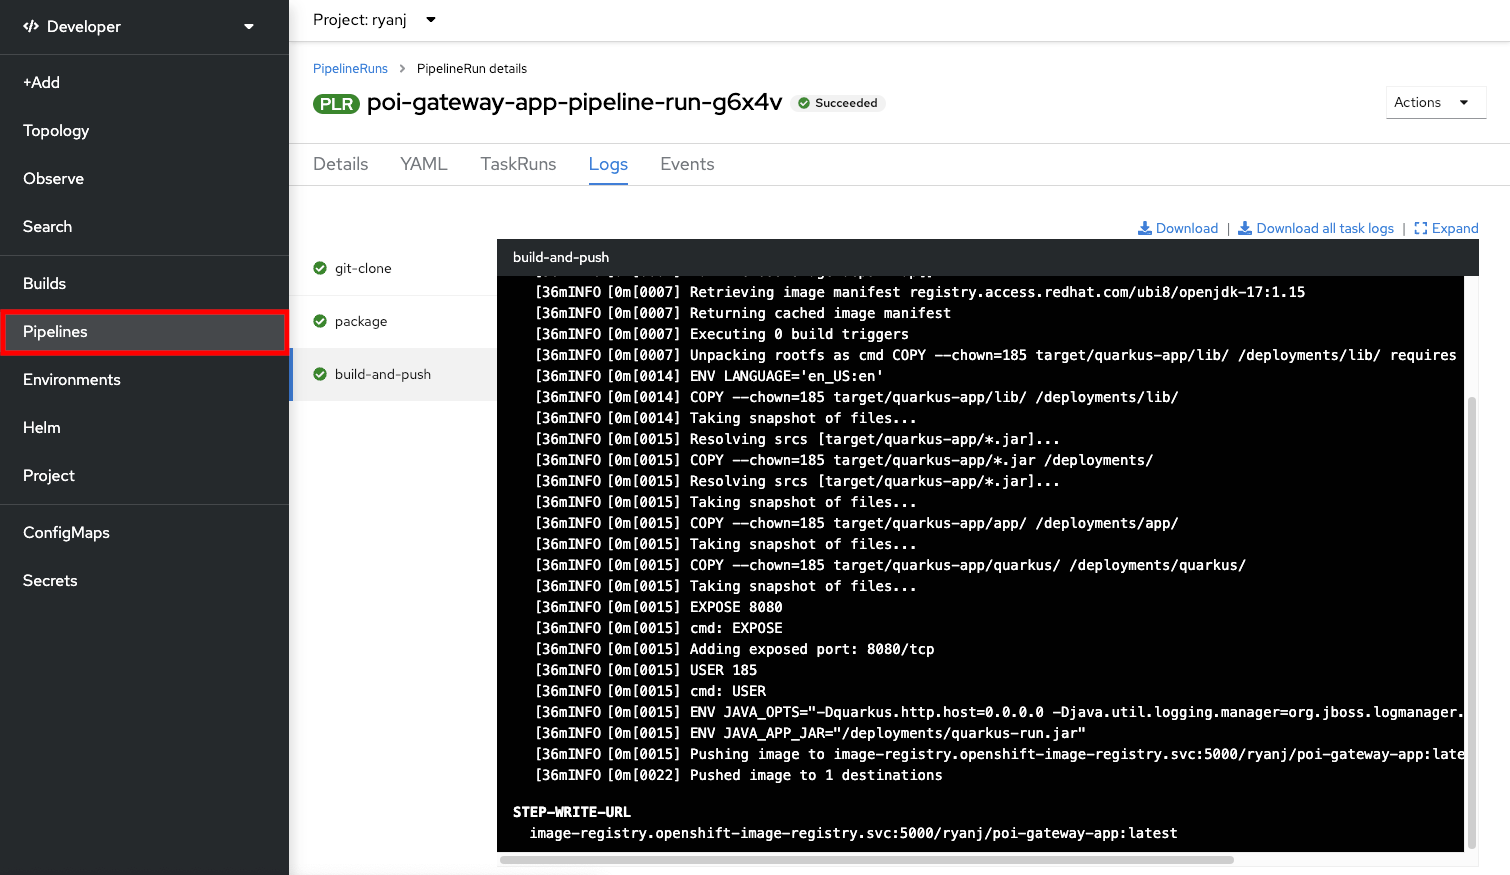
Select Logs to watch the build process
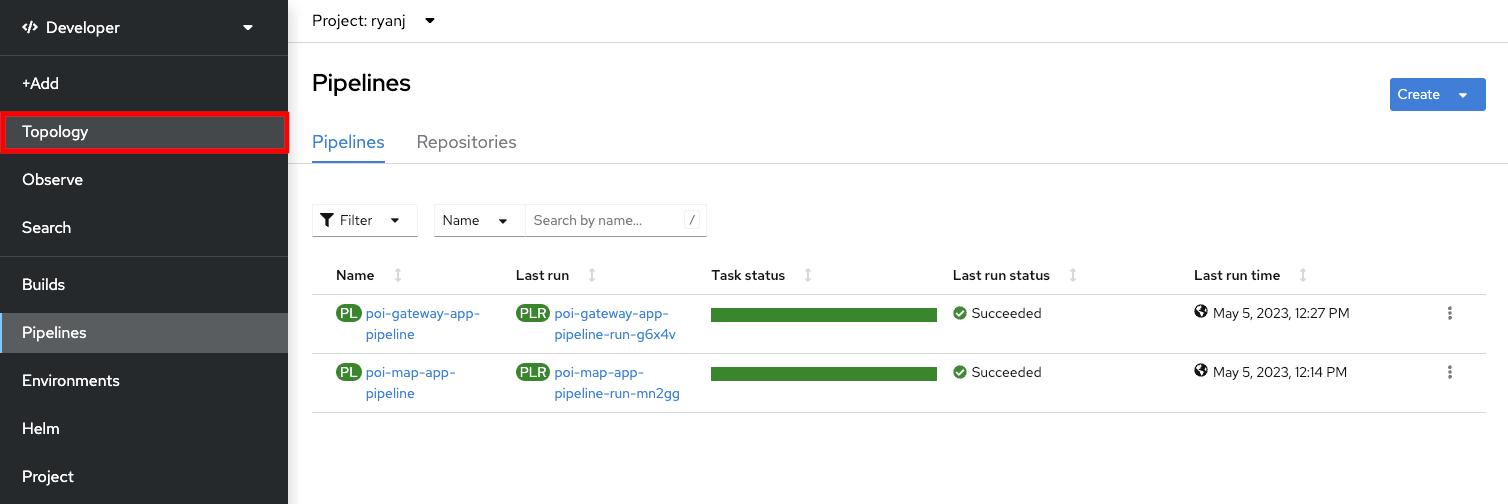
Monitor the build output. When the build has completed, select Pipelines from the side menu to check the status of the other pipeline run.
When both builds have finished successfully, proceed to the Topology view.
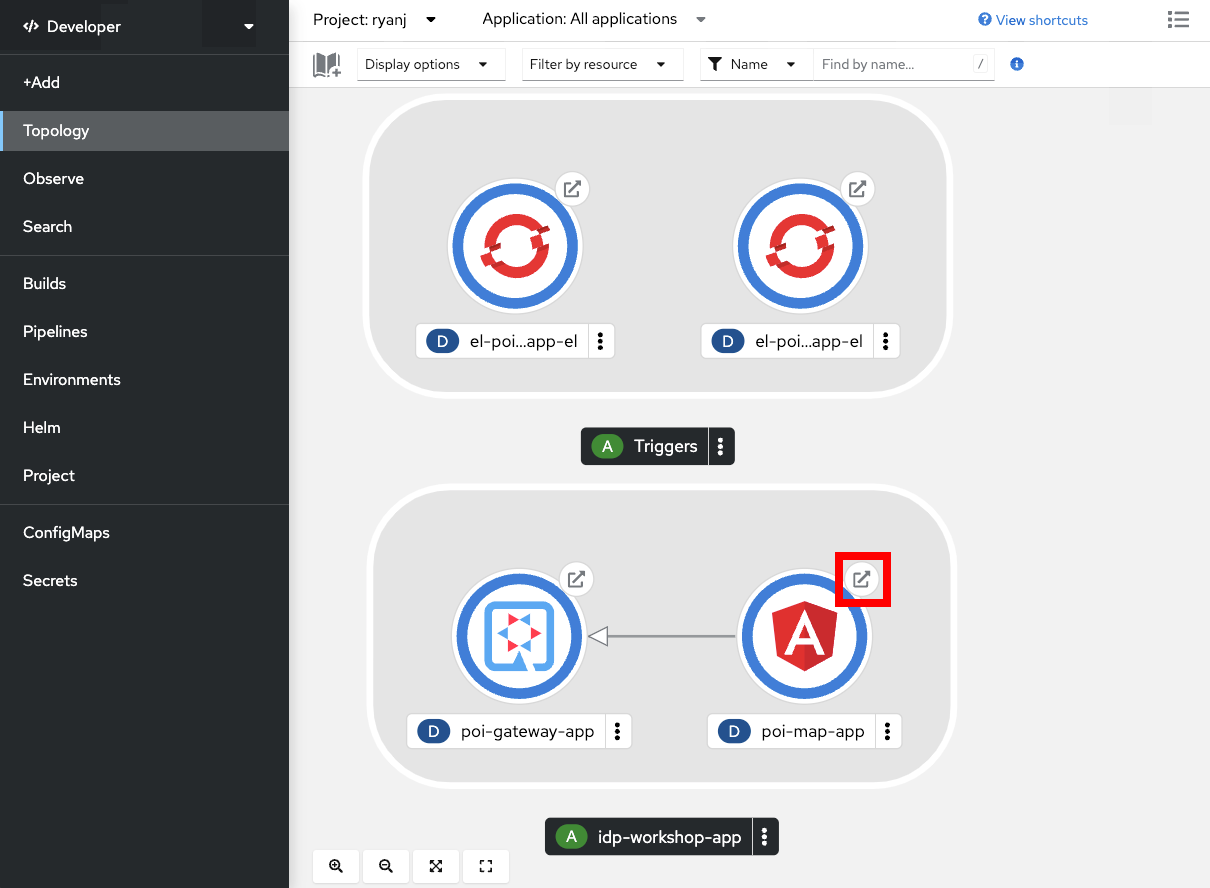
View the running workloads
Open a connection to the frontend web service by clicking on the Route decorator, located on the top right corner of the Angular Frontend component.
Having successfully deployed the Frontend and Gateway components, you will see two points on the resulting map application:
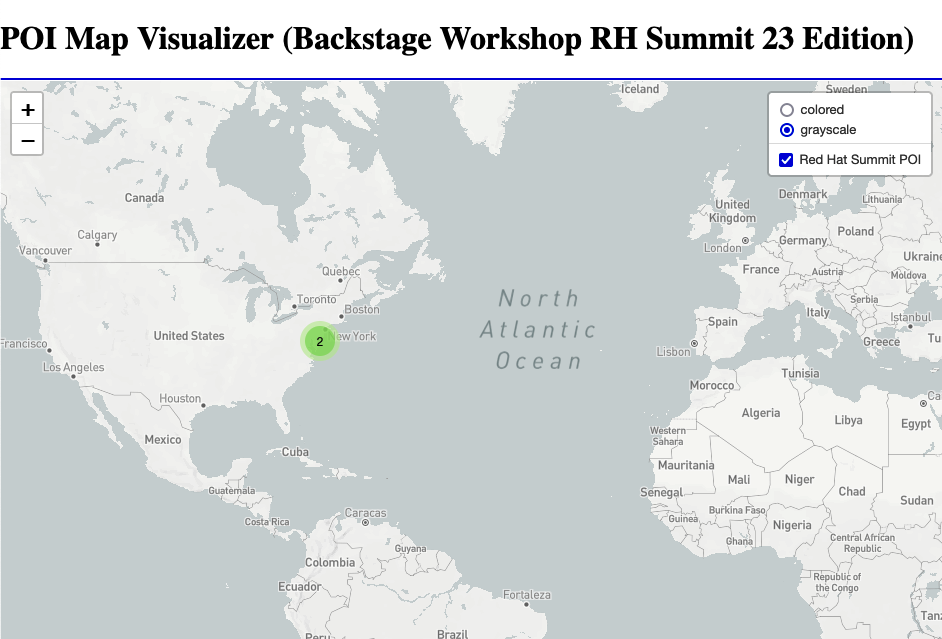
Congratulations on completing Chapter 2!
In the next chapter, you will view the these new components through the Backstage Software Catalog to learn more about what backstage has to offer.